Painting Your Body: Part 1 – Masking & Primer
by payaso
There’s no introduction needed really, it’s pretty self-explanitory ? we’re talking about painting a Bit body here. The only thing to note here is that we’re talking about painting right on top of the body. This allows you to paint fine details like side-view mirrors, headlights, grills, and have them blend in naturally with the paint on the rest of the body. With that said, let’s just dive right in shall we?
 First, make sure you body is clean with no dust specs, hairs, etc. It must be clean, if there’s any debris, it’ll ruin your paint job. Cans of compressed air come in handy for blowing away debris, while keeping the body itself free of finger prints, scratches, fuzz, etc.
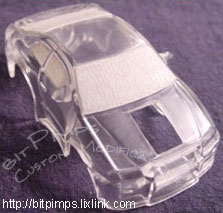
Now, it’s time to do some basic masking, unless you plan to have your windows painted, you better mask them. You can just use regular manilla colored masking tape, cheap, easy to find and easy to manipulate. Take pieces of tape off the role, relatively the size you’re going to need, you want to work with only what a piece the size neccessary to cover the area to be masked.
Next, you’ll cut the individual piece of tape in the shape of the area being masked. Most people prefer using a straight edge (or ruler) and a sharp hobby knife. Make sure you make clean cuts weather you use a knife or scissors, if there are any frayed edges, it’ll ruin your paint job.
Once you have the piece cut, stick it to the area being masked, from the top side of the body. Use the end of a pen or pencil to push the tape down firmly, you want the best seal possible, especially around the edges or the paint will bleed through and your masked area will have paint on it. Naturally, there will usually be some bleeding into the masked area, the idea is to minimize this as much as possible. After the paint has dried, this will allow you to clean up the paint that has bled through quite easily. Continue this process for all areas to be masked.
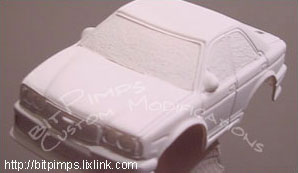
After we have all our masking done, it’s time to get some primer on our car, this will give the paint a ‘base’ so the color will show evenly and not produce any semi-transparent spots or discolorations.