
Off-Road Bits – Part 2: Hinge Plate
by betty.k

First, you need to find some stiff plastic that has a 90 degree bend. Make sure it’s not brittle.
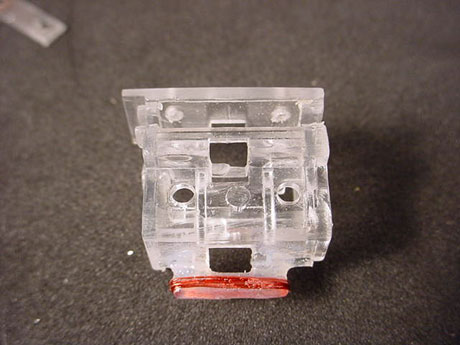
You need to make 2 holes in the motor/axle housing at roughly the level that the axle will sit. The holes I?m referring to are the ones at the top of this pic. This is the underside of the motor housing. Make sure not to drill into the axle clips, make the holes about 1mm in from each axle clip.

This view of the front of the motor housing should clarify the position of the holes. You need to make a metal plate and drill 2 holes in it the same distance as the holes in the motor housing. You could use washers; you’ll just need to trim one side of them. You’ll see why when it comes together. And a couple of screws, the length is important. Again, you’ll see how long they need to be once assembled.
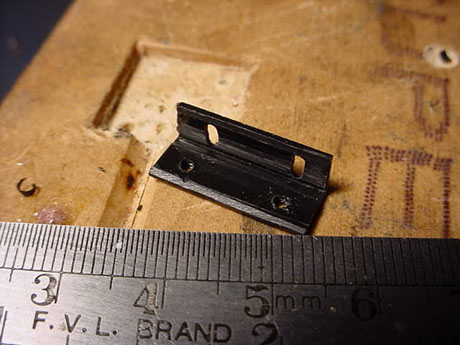
You need to trim a piece of plastic into this shape, utilizing the bend. The dimensions are:
Length 7mm
Width 17.5mm
Height 5.5mm
Near enough is good enough though, the biggest consideration is to make sure it’s no wider than the motor housing. Drill 2 holes in the bottom section, and 2 slots in the rear section, the same distance apart as the holes in the motor housing.

Attach the plastic mount by inserting the screws into the metal plate, then through the slots in the mounting into the motor housing. If you’re using washers, trim one side and make that the bottom. This is because the slots allow adjustment of the height and angle of the motor housing, and washers may touch the bottom of the mounting, preventing adjustment.

You can just see the screws poking through into the axle area. This is why screw length is important. Too long and it will touch the axle, too short and it won’t attach properly risking damage to the holes and failure of the connection. Find a couple of screws that screw into the holes in the mounting.
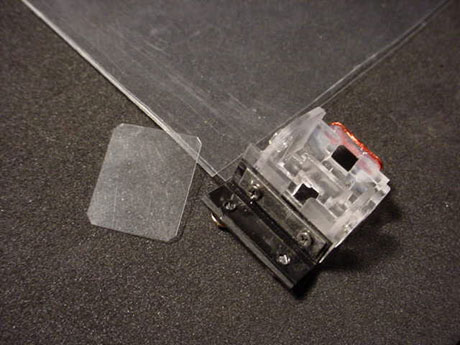
Find some thin flexible strong plastic, something like PVC from an inflatable toy. In this case I?m using plastic from a CD sleeve. Just so long as it’s flexible enough to offer little resistance when bent, (although you could experiment with other plastic of varying thickness, etc) and resistant to tearing or splitting easily, like plastic packaging on biscuits or potato chips. I?ve found that plastic that doesn’t stick to superglue is the stuff you want. Cut a piece about 14 x 17mm.

Make 2 holes in the hinge and attach one end to the mounting. Make 2 large holes on the other side.

You need to make 2 holes in the chassis about 2 mm from the edge and sides. These should match up with the large holes in the hinge. The holes in the hinge need to be large to allow adjustment of the wheelbase length and the alignment.

Find or make a couple of washers that are larger than the holes in the hinge. And some screws that will screw into the chassis.

Attach the hinge to the chassis and you’re ready to start on a shock.

Inside view. If you want you can use slightly longer screws on the chassis and have them screw into the battery terminals. That then makes the screws and washers the charging terminals.

As you can see there’s not a lot of room for error when choosing screw length for the motor housing/hinge mounting interface.
