X-Trek HUMVEE Pro
Posted: Fri Dec 04, 2009 4:20 pm
As you all know, this is my Humvee-made-crawler that I submitted for the End of the Year Contest. The people on Scale4x4RC really dig my steering set-up and asked for some pictures and an explanation. So I busted out the camera and flipped her to Macro. I figured I might as well start a thread and just post all the media that's scattered about the board here.
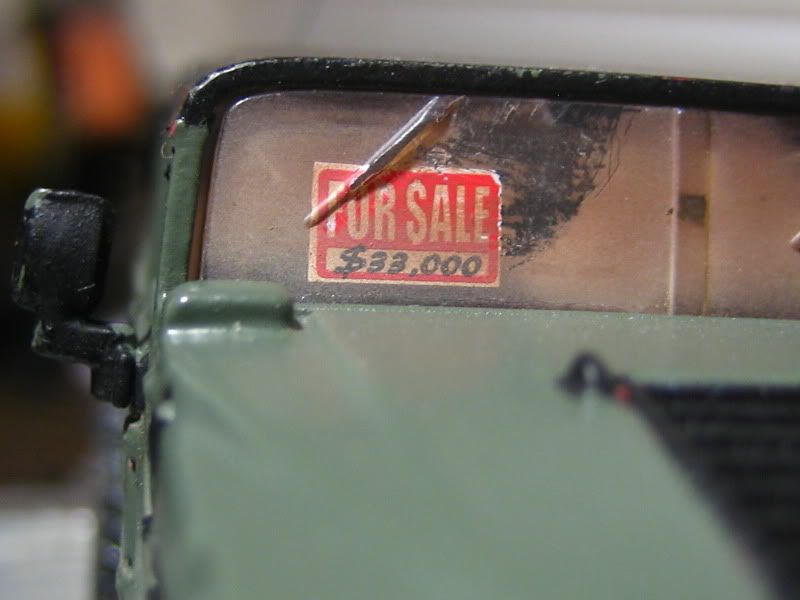
This RC started out as a Jada Toys 1/64 Humvee from their "For Sale" collection. I saw it and loved the look of it and the tires on it, so I picked it up and saved it for a rainy day.

Then I picked up a bunch of X-Trek's for about $10 each on clearance. Sporttracguy suggested using X-Trek Pro electronics for a cheap propo set-up (thanks again). The cool thing about the Humvee was that by removing one screw from the underside The die-cast body comes off and you have a nice plastic interior and the metal chassis all neatly separated.
Once more, the steering gears from the X-Trek (with a little bit of trimming) fit in between the front wheel wells of the metal tub. The board was just the right size to fit in the middle of the chassis and after cutting a hole in the chassis to seat the ZZSE servo/motor a little lower, the whole thing battery included managed to fit in with the body in place.
I had a lot of issues with getting the steering to work reliably. First I couldn't figure out how the gears went back in there properly. Then the motor kept shorting out on me, requiring a replacement motor. Then the lame pot. that comes with X-Treks was BEYOND glitchy. By far the weakest electronic component I've come by. So I found a pot from a HiTech HS-55 that I saved from a servo mod and wired that up. I set it to the neutral position, cut the little metal post coming out of it and glued that puppy above the steering gears.
I did some minor things like relocating components from the top of the PCB board to the bottom for clearance. I relocated the power switch so it could be accessed without removing the body. I wired up a deans micro plug instead of those metal tabs on the car. On the TX I pulled out those super flimsy charging wires and cut a hole to JB weld the other end of the deans plug into the TX.
I could keep going, but I think I'm boring myself right now as I type this. If you have a question about a part or assembly, ask me. On to the pics and video.
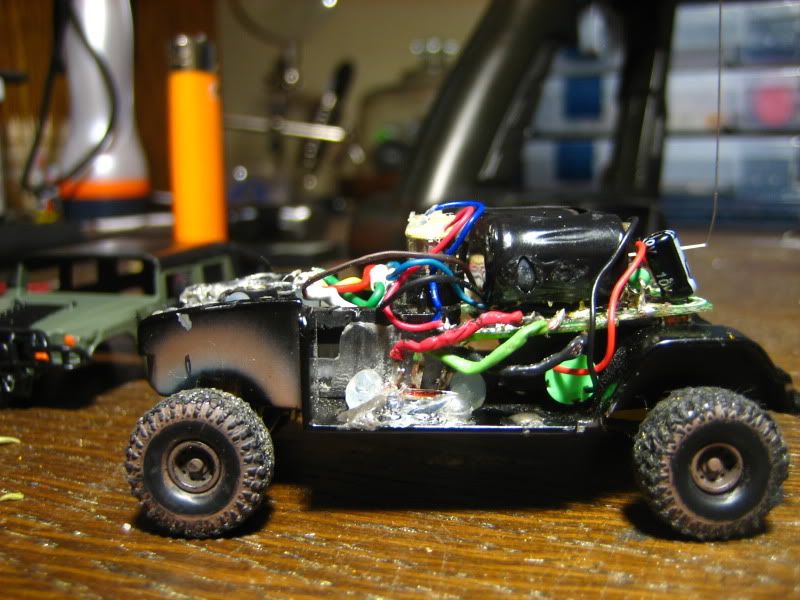
Here is the chassis with everything mounted in as it runs now.
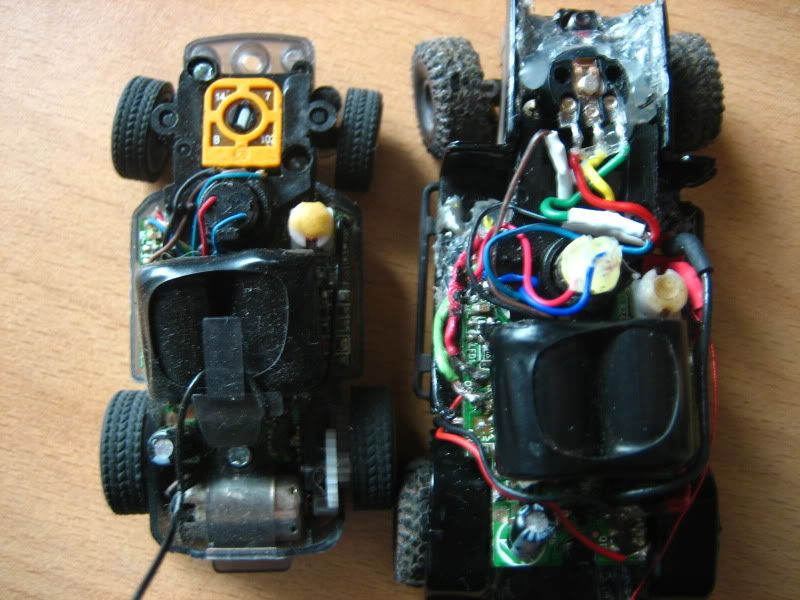
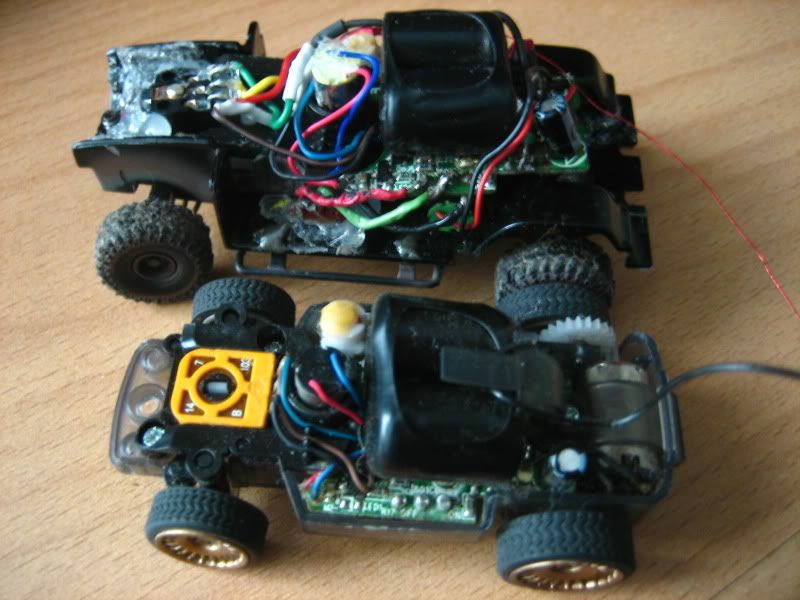
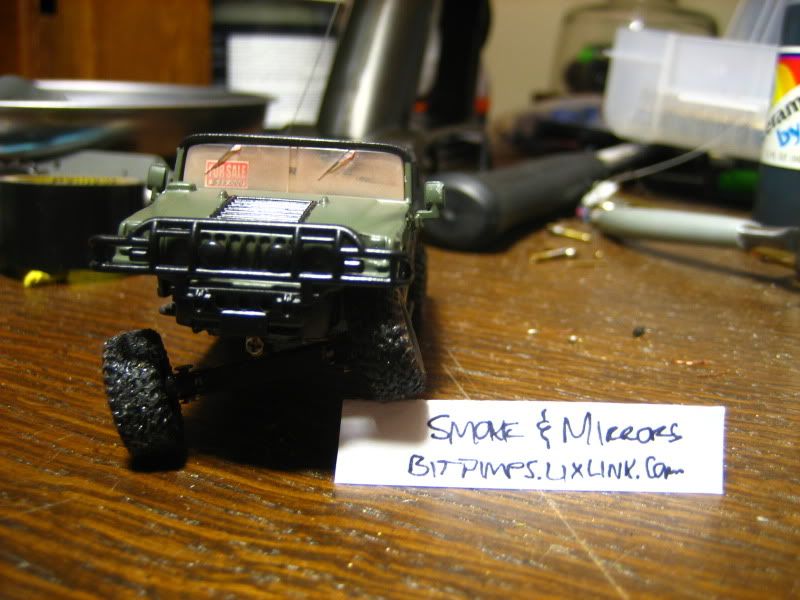
This is my Humvee next to a bone stock X-Trek.
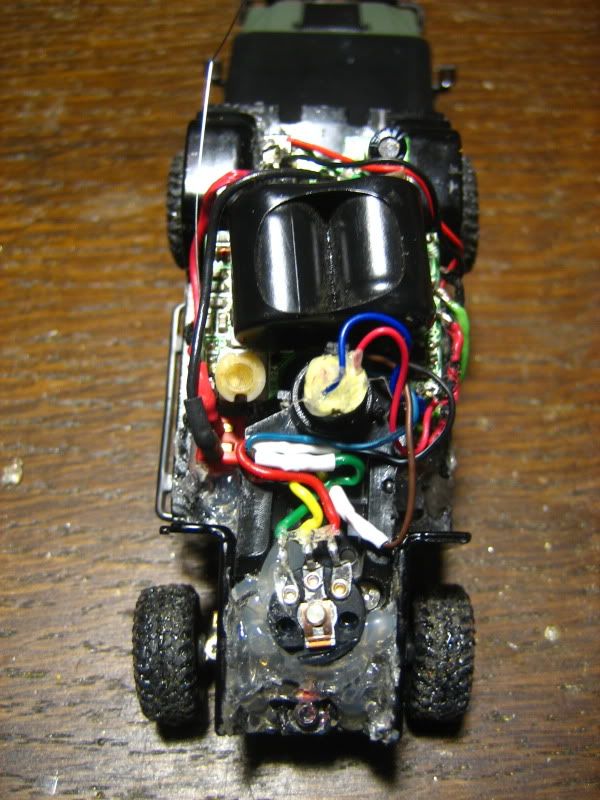
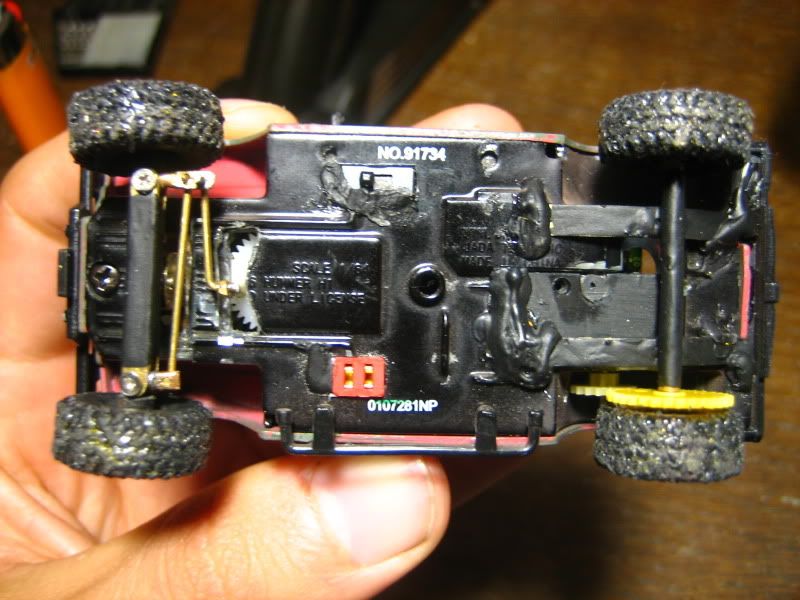
This is the underside of the Humvee.
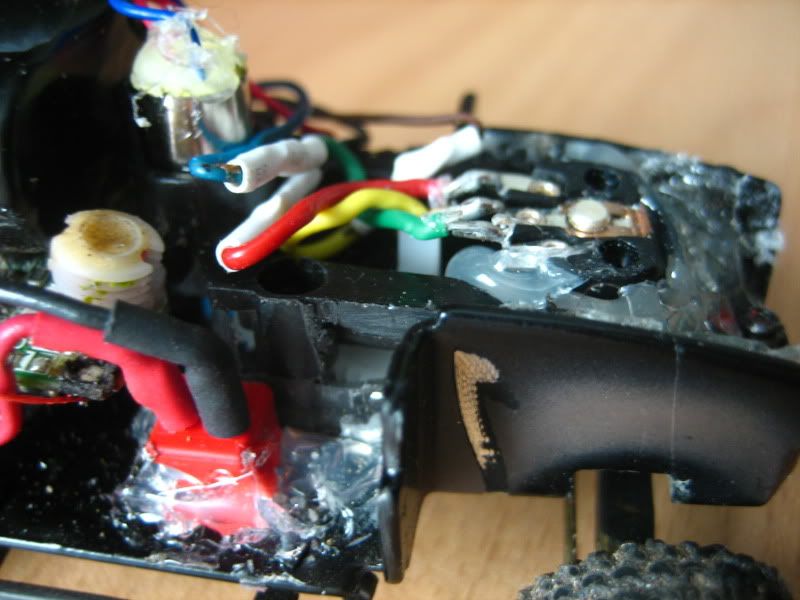
Here is a close-up of the steering set-up. (kinda catchy)
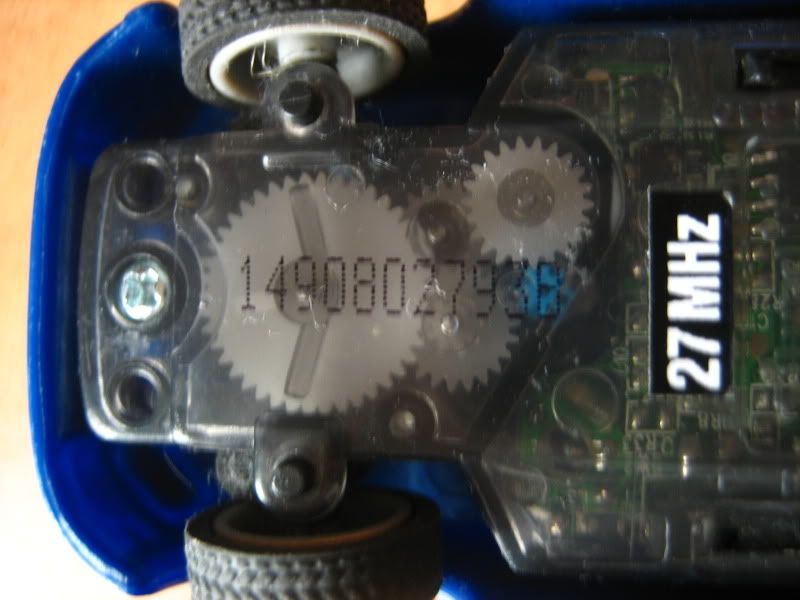
Stock X-Trek Steering gears. Same thing I'm running. I cut along that line that divides the steering and PCB.
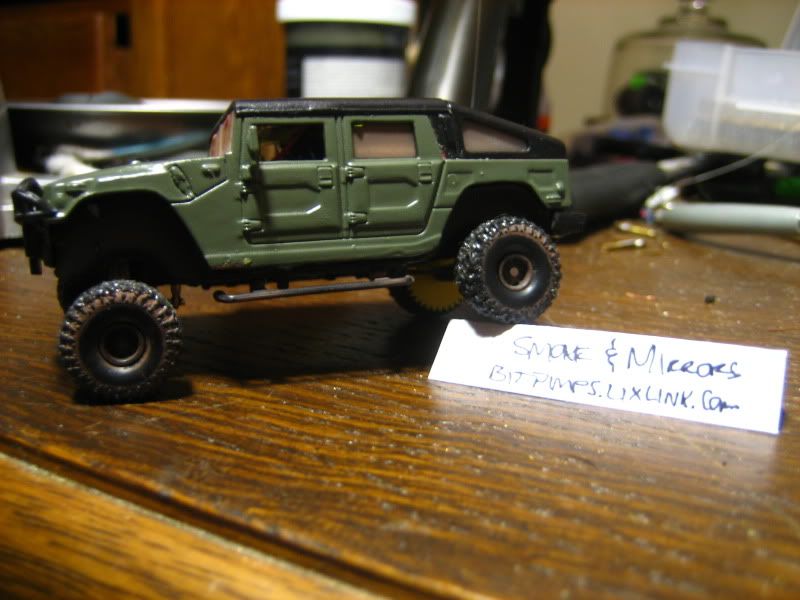
This is how she looked when I originally submitted it for the first contest deadline.
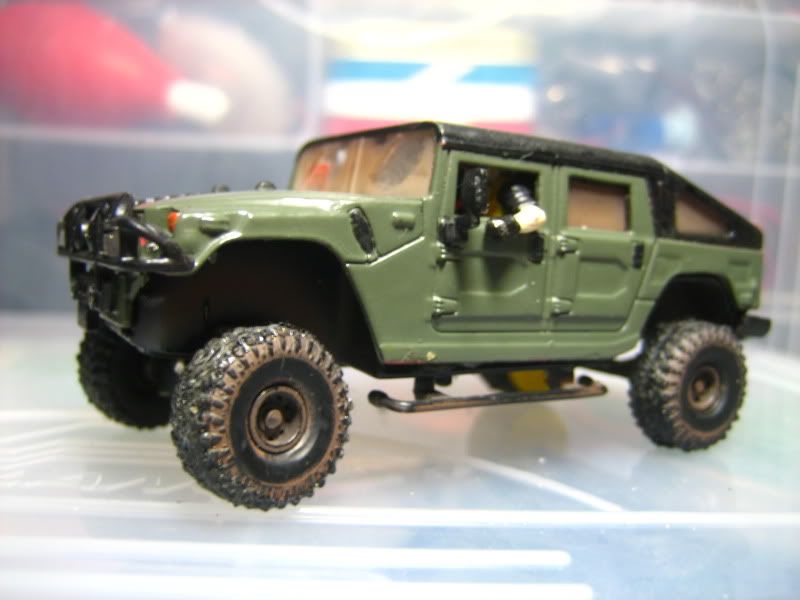
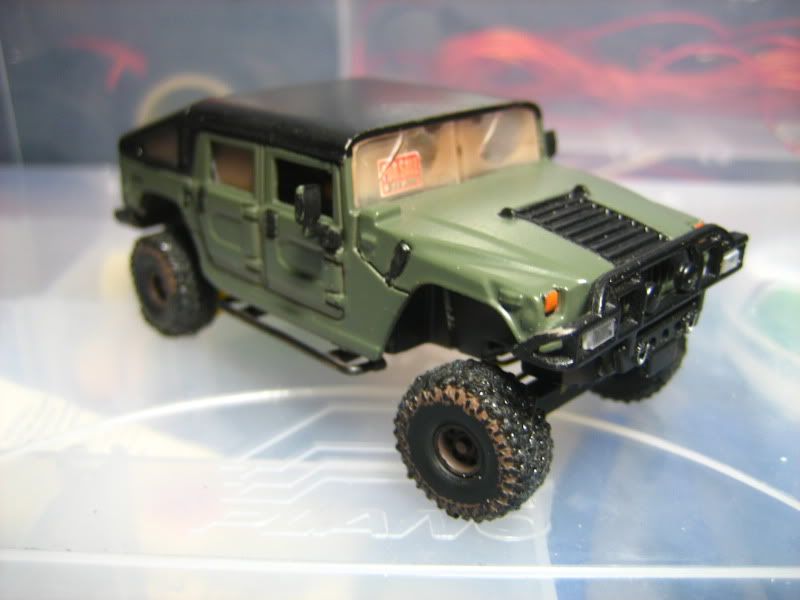
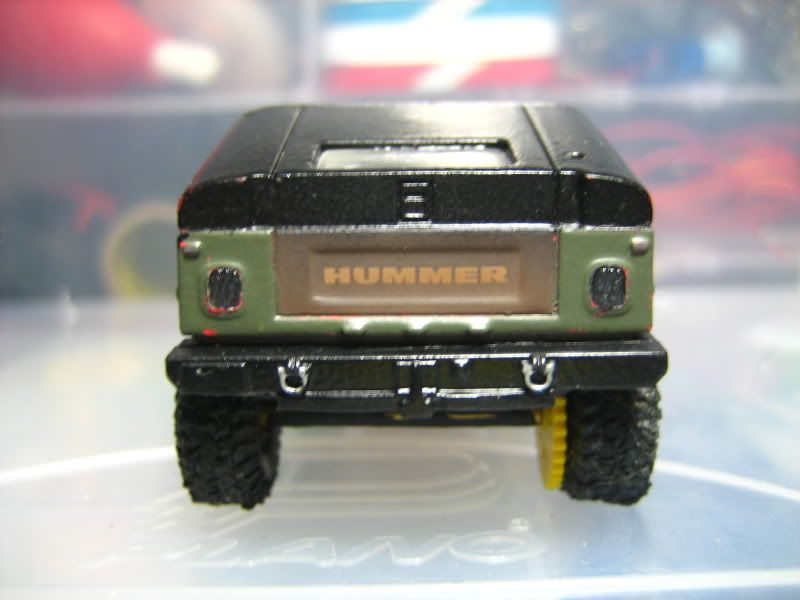
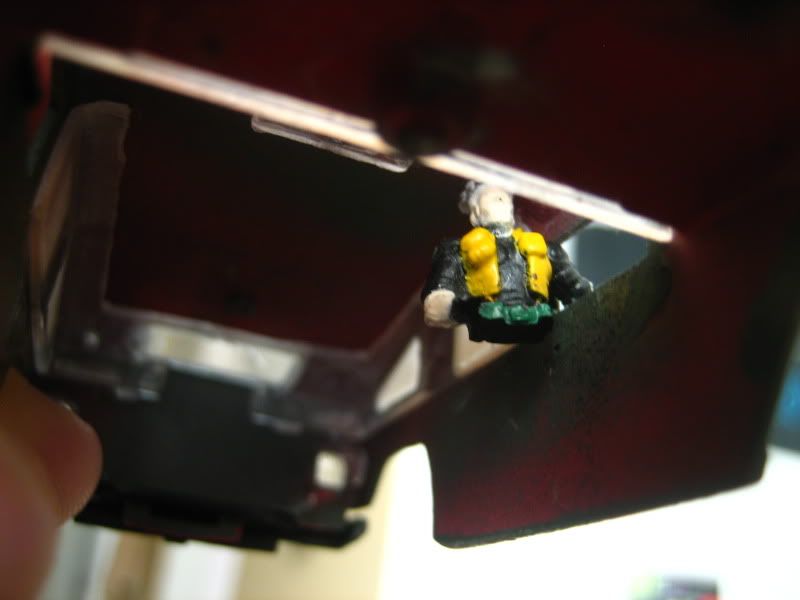
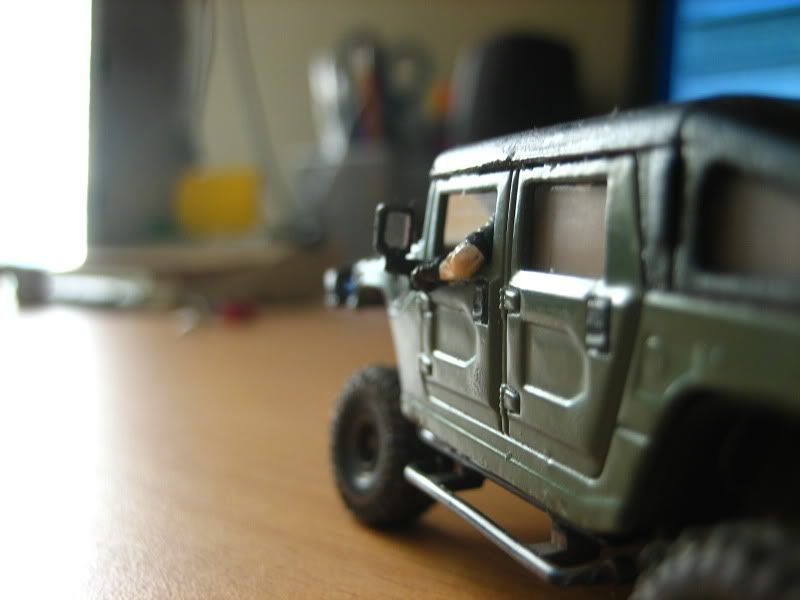
Here she is as she stands now. Painted in some more details and added 'lenses' for the headlights, aux lights in the bumper and rear taillights with texture for future addition of LED's. Major Chip Hazard hopped in for a ride and never left (probably because he is glued in).
Here she is in action.
[youtube]http://www.youtube.com/watch?v=vF0B6TieN00[/youtube]
This RC started out as a Jada Toys 1/64 Humvee from their "For Sale" collection. I saw it and loved the look of it and the tires on it, so I picked it up and saved it for a rainy day.
Then I picked up a bunch of X-Trek's for about $10 each on clearance. Sporttracguy suggested using X-Trek Pro electronics for a cheap propo set-up (thanks again). The cool thing about the Humvee was that by removing one screw from the underside The die-cast body comes off and you have a nice plastic interior and the metal chassis all neatly separated.
Once more, the steering gears from the X-Trek (with a little bit of trimming) fit in between the front wheel wells of the metal tub. The board was just the right size to fit in the middle of the chassis and after cutting a hole in the chassis to seat the ZZSE servo/motor a little lower, the whole thing battery included managed to fit in with the body in place.
I had a lot of issues with getting the steering to work reliably. First I couldn't figure out how the gears went back in there properly. Then the motor kept shorting out on me, requiring a replacement motor. Then the lame pot. that comes with X-Treks was BEYOND glitchy. By far the weakest electronic component I've come by. So I found a pot from a HiTech HS-55 that I saved from a servo mod and wired that up. I set it to the neutral position, cut the little metal post coming out of it and glued that puppy above the steering gears.
I did some minor things like relocating components from the top of the PCB board to the bottom for clearance. I relocated the power switch so it could be accessed without removing the body. I wired up a deans micro plug instead of those metal tabs on the car. On the TX I pulled out those super flimsy charging wires and cut a hole to JB weld the other end of the deans plug into the TX.
I could keep going, but I think I'm boring myself right now as I type this. If you have a question about a part or assembly, ask me. On to the pics and video.
Here is the chassis with everything mounted in as it runs now.
This is my Humvee next to a bone stock X-Trek.
This is the underside of the Humvee.
Here is a close-up of the steering set-up. (kinda catchy)
Stock X-Trek Steering gears. Same thing I'm running. I cut along that line that divides the steering and PCB.
This is how she looked when I originally submitted it for the first contest deadline.
Here she is as she stands now. Painted in some more details and added 'lenses' for the headlights, aux lights in the bumper and rear taillights with texture for future addition of LED's. Major Chip Hazard hopped in for a ride and never left (probably because he is glued in).
Here she is in action.
[youtube]http://www.youtube.com/watch?v=vF0B6TieN00[/youtube]