Fuck the Hulk
Posted: Tue May 31, 2005 8:44 pm
Ahh well, this was for the truck comp, but I had my dates all fucked up.
Without further ado...
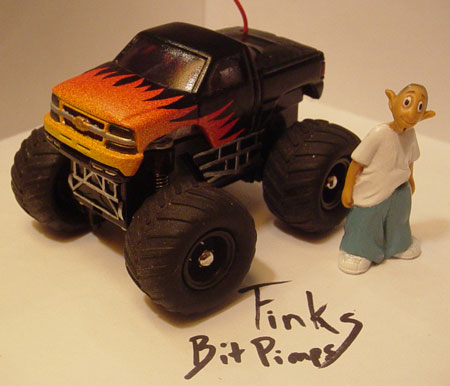
Ok, where to start. First off most notably, my first tackle at a fade job, oh yeah, and a flame job. Thanks to CD for confiming my game plan on this project. Also took off those damn ugly Hulk arms and puttied her up nice.
Oh yeah and while I was busy w/ these firsts.....

FUCKING KABLAM!
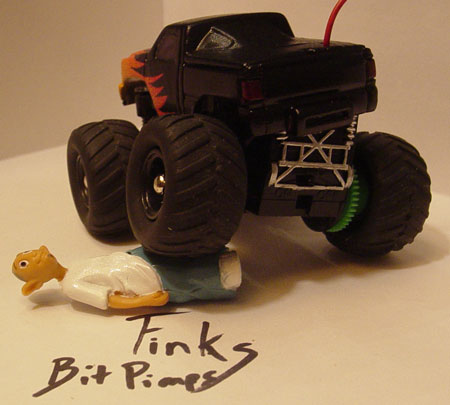
oh and Bumpity Bump
It was so straight forward. Here are some chassis pics and brief ENGLISH explanations. All I did was dremmel the fucker in half along the fairly clear natural line. After that I took out a chunk on each side to make room for the tires when swivled. Once done you use the axel as you swivle point.
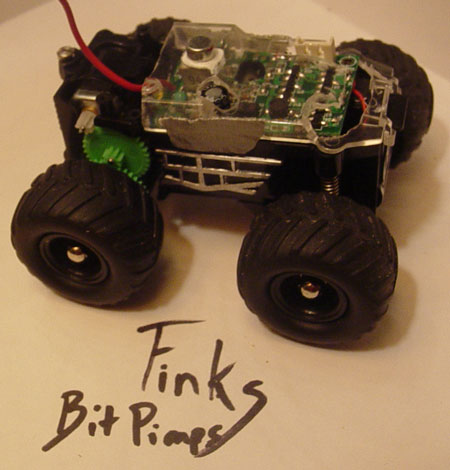

I then modded the PCB cover so that it could be pushed up and then chopped a bit off the rear.
Now for the real trick, how to attach the shell. With this shell it was fairly easy IMO. Check it out, all I did was take a stearing magnet from an old Zip and epoxied it to the PCB cover. as for what it attaches to? The screw that holds the light PCB in place!


Well anyhow, kinda bummed that this missed the comp, but that's arite, this was a great project.
Without further ado...
Ok, where to start. First off most notably, my first tackle at a fade job, oh yeah, and a flame job. Thanks to CD for confiming my game plan on this project. Also took off those damn ugly Hulk arms and puttied her up nice.
Oh yeah and while I was busy w/ these firsts.....
FUCKING KABLAM!
oh and Bumpity Bump
It was so straight forward. Here are some chassis pics and brief ENGLISH explanations. All I did was dremmel the fucker in half along the fairly clear natural line. After that I took out a chunk on each side to make room for the tires when swivled. Once done you use the axel as you swivle point.
I then modded the PCB cover so that it could be pushed up and then chopped a bit off the rear.
Now for the real trick, how to attach the shell. With this shell it was fairly easy IMO. Check it out, all I did was take a stearing magnet from an old Zip and epoxied it to the PCB cover. as for what it attaches to? The screw that holds the light PCB in place!
Well anyhow, kinda bummed that this missed the comp, but that's arite, this was a great project.