
Hey look, I'm articulate...
-
crazydave

- bitPimp
- Posts: 6874
- Joined: Thu Apr 17, 2003 9:05 am
- Location: Koolsville
Hey look, I'm articulate...
So I've been seeing every take on this Zip zap MT articulation thing. Been considering it, just wasn't sure if it was for me. I didn't really want a rock crawler, I was more or less thinking of sticking with the monster theme, and was more concerned about performance. So I wasn't sure if this was worth hacking my chassis over.
Then after seeing at least a half dozen of these, and Clint's tutorial, and then Hiroto tells us his 11yo daughter has done one, I said screw it, I gotta try. I think it was actually minutes after reading HR34's post before I started tearing down my MT.
I did mine very similar to his, since it was the last I saw. I really like his skid plate idea, so I took off on that. Just so it wouldn't be another, "hey look at my MT with articulation" post, I threw some decals on the ol' Hummer body. The silver was always meant to be a base coat, but I never decided on a color, and grew fond of the silver.
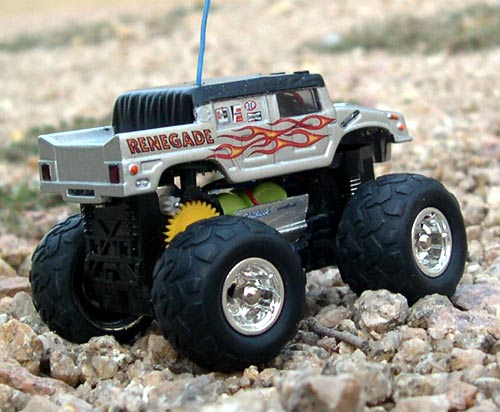
Here's your standard articulation pic.

... and the standard chassis pic w/ articulation.
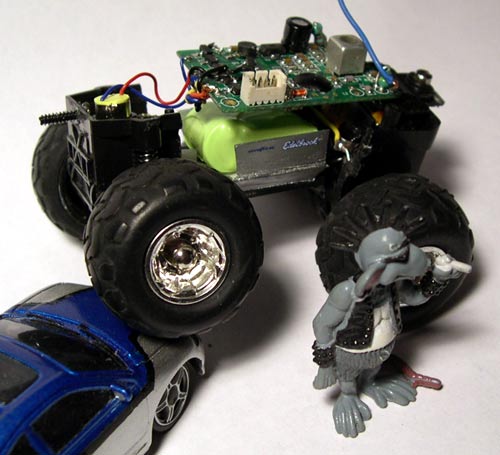
I did a couple things that I think are different. After getting it together, before I put the body on, I realized there was way too much slop for my taste. I was concerned about it steering straight. I had wished I took the time to use the antenna tube as Clint had.Then I realized I didn't have the body on, and the body would have to help stabilize it. The front of the drive shaft would still be held down, since I made my cut in back, but the back of the drive shaft would lift with the body. So I superglued a small piece of plastic to the chassis to hold the driveshaft down. Then to mount the body, and control the side to side motion, I shimmed tne back tab, so its nice and secure in the body. Then after shaving the front tab off, I drilled a hole in it's place, and super glued a Xmod screw in it. I drilled a hole through the front slot on the body, it came out more like notches, but that's enough to keep it centered, and still allows the rotationg action. I just used a Xmod screw, so I could use Xmod something, and make Cabo panic.
I still need to run it, but all seems okey dokey. I was gonna tricell it, but I decided to stick with the dual cells for now, to test it out, and because its already pretty damn fast with FET and the Orange motor. I used double stick tape to stick the batteries down to the bottom of the chassis. I stuck them down there, just because it made more sense to me to keep the weight down low, to help keep the front wheels on the ground.
That's it. Enjoy.
Then after seeing at least a half dozen of these, and Clint's tutorial, and then Hiroto tells us his 11yo daughter has done one, I said screw it, I gotta try. I think it was actually minutes after reading HR34's post before I started tearing down my MT.
I did mine very similar to his, since it was the last I saw. I really like his skid plate idea, so I took off on that. Just so it wouldn't be another, "hey look at my MT with articulation" post, I threw some decals on the ol' Hummer body. The silver was always meant to be a base coat, but I never decided on a color, and grew fond of the silver.
Here's your standard articulation pic.
... and the standard chassis pic w/ articulation.
I did a couple things that I think are different. After getting it together, before I put the body on, I realized there was way too much slop for my taste. I was concerned about it steering straight. I had wished I took the time to use the antenna tube as Clint had.Then I realized I didn't have the body on, and the body would have to help stabilize it. The front of the drive shaft would still be held down, since I made my cut in back, but the back of the drive shaft would lift with the body. So I superglued a small piece of plastic to the chassis to hold the driveshaft down. Then to mount the body, and control the side to side motion, I shimmed tne back tab, so its nice and secure in the body. Then after shaving the front tab off, I drilled a hole in it's place, and super glued a Xmod screw in it. I drilled a hole through the front slot on the body, it came out more like notches, but that's enough to keep it centered, and still allows the rotationg action. I just used a Xmod screw, so I could use Xmod something, and make Cabo panic.
I still need to run it, but all seems okey dokey. I was gonna tricell it, but I decided to stick with the dual cells for now, to test it out, and because its already pretty damn fast with FET and the Orange motor. I used double stick tape to stick the batteries down to the bottom of the chassis. I stuck them down there, just because it made more sense to me to keep the weight down low, to help keep the front wheels on the ground.
That's it. Enjoy.
-
HirotoR34

- bitPimp
- Posts: 1396
- Joined: Tue Oct 28, 2003 10:17 pm
- Location: in vdubland
- Contact:
-
LBRC

- bitGangsta'
- Posts: 361
- Joined: Sun May 02, 2004 1:25 am
- Location: North West
- Contact:
-
Clint

- bitPimp
- Posts: 519
- Joined: Sun Jul 06, 2003 7:20 am
- Location: Albany, NY
- Contact:
-
steelwoolghandi

- bitPimp
- Posts: 1696
- Joined: Fri Jun 11, 2004 11:53 am
- Location: RIGHT BEHIND YOU!!
- Contact:
-
crazydave
- bitPimp
- Posts: 6874
- Joined: Thu Apr 17, 2003 9:05 am
- Location: Koolsville
Perfect. That's what I strive for.LBRC wrote:Clean
Aww man, I'm having trouble not sticking these things on everything. I redid my CarToon Camaro with these too. A little hot rod flavor just suits my style.steelwoolghandi wrote:Great Friggen Job man love the look and great use of those Decals! (I am still trying to find something to use the Radical Decals on!)
I just keep telling myself I'm praticing, and I am really. I wish I did the side flames lower and more forwards, would look more centered on the car. The ones on the hood I wish I did farther to the outside, but they were just a tad bit too long, and I was running them so the tip would go down beside the turn signal. Seemed to make sense at the time, but in retrospect I realized, I could have trimmed the tip off, got the alignment I wanted on the hood, and it probably would have looked as if the flames were coming from the lights, which would have been pretty cool.
Nit picking aside, I'm still really happy with the way it came out, so I'm glad I was finally encouraged to try this mod. It really wasn't too hard.
EDIT: Everything worked great the first time. It really did get over obstacles it would not have before. So I really am happy with the way it came out. The only change I made after running it, was just glueing the rear tab in the body, because I got sick of the body coming off. I just used a tiny bit of glue, so I'm hoping its not gonna be too hard to get the body off when I need to now.