Pro Street Chevelle
Posted: Fri Apr 28, 2006 8:46 pm
My old camera broke, and I've been without for a few weeks. I'm just getting caught up, so don't think I just went on a modding spree. This is just my usual one quick mod a week thing. 
This is a good story of how trial and error can finally work out.
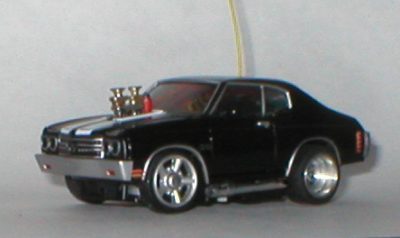
The Chevelle was another body that I thought RS had done a really nice job on. I had only added the alloys and stacks sticking out the hood becuase I had them and wanted to apply them to something, and this seemed the car for it.

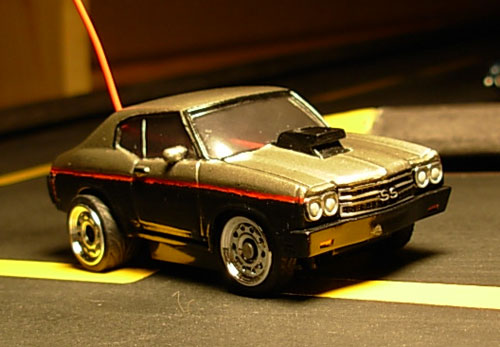
This car had 2 issues. For one, the paint was funky. It was mostly all glossy, but the passenger side was all rough, dull and kinda odd. I had to clear coat over the decals (I added them later, I thought they were in the pic), and when the clear hit the passenger side, really bad things happened. So I discontinued clear coating, and rubbed that side out. Over time the decals wore half off, and the second problem is that it was a SE, and I was breaking them at the time. So when I killed the chassis, I retired the body.
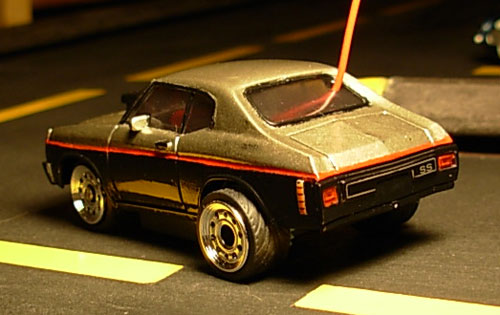
I wanted to revive it several times, but I had stold the stacks for my CarToons Camaro, and wasn't sure what to fill the hole in the hood with. So what I did was make this hood scoop by stacking ZZ packaging in the approximate shape, and sanding it smooth. I was really proud of that, so I had to make this car work, but even though I gave it a good sanding, when the grey hit it, really bad things happened again, so I sanded at it, I managed to save the top half, I figured I had nothing left to lose at this point and got experimental. I masked off the top half, and brushed on some Black water based Testors Acrylic across the bottom, and level sanded it. For separation I tried masking a thin red stripe, but the thinner red paint bled horribly. Once again decided I had nothing left to lose, I sanded the red off, then laid the stripe by hand, with no masking. I was so freakin' amazed with myself, but then I had to do it again on the passenger side. On that side I screwed up a little, and had to touch up the black. Then I felt kinda cocky, and decided to do all the window trim in black without masking. I think I pulled that off pretty well too. Me and that brush were getting along great that day.
The only bummer for me in the end is that in a couple spots, on the driver's side rear fender, and the trunk lid, I guess I had nearly sanded through, and the clear thinned the grey out. Oh well though, a paint job this old is gonna get oxidized.
Remember that Pro Street style from the 80s? That's not what I was going for, but I think it fits that theme perfect.


Its on a bone stock OG Zip Zap chassis, with the spring front end. This body just sits right on this chassis, without haveing to mod the tabs.
So despite any flaws, I love this car because of all the work I did by hand on it. I'm glad I kept my cool, because I normally would have lost my temper by this point.
This is a good story of how trial and error can finally work out.
The Chevelle was another body that I thought RS had done a really nice job on. I had only added the alloys and stacks sticking out the hood becuase I had them and wanted to apply them to something, and this seemed the car for it.

This car had 2 issues. For one, the paint was funky. It was mostly all glossy, but the passenger side was all rough, dull and kinda odd. I had to clear coat over the decals (I added them later, I thought they were in the pic), and when the clear hit the passenger side, really bad things happened. So I discontinued clear coating, and rubbed that side out. Over time the decals wore half off, and the second problem is that it was a SE, and I was breaking them at the time. So when I killed the chassis, I retired the body.
I wanted to revive it several times, but I had stold the stacks for my CarToons Camaro, and wasn't sure what to fill the hole in the hood with. So what I did was make this hood scoop by stacking ZZ packaging in the approximate shape, and sanding it smooth. I was really proud of that, so I had to make this car work, but even though I gave it a good sanding, when the grey hit it, really bad things happened again, so I sanded at it, I managed to save the top half, I figured I had nothing left to lose at this point and got experimental. I masked off the top half, and brushed on some Black water based Testors Acrylic across the bottom, and level sanded it. For separation I tried masking a thin red stripe, but the thinner red paint bled horribly. Once again decided I had nothing left to lose, I sanded the red off, then laid the stripe by hand, with no masking. I was so freakin' amazed with myself, but then I had to do it again on the passenger side. On that side I screwed up a little, and had to touch up the black. Then I felt kinda cocky, and decided to do all the window trim in black without masking. I think I pulled that off pretty well too. Me and that brush were getting along great that day.
The only bummer for me in the end is that in a couple spots, on the driver's side rear fender, and the trunk lid, I guess I had nearly sanded through, and the clear thinned the grey out. Oh well though, a paint job this old is gonna get oxidized.
Remember that Pro Street style from the 80s? That's not what I was going for, but I think it fits that theme perfect.


Its on a bone stock OG Zip Zap chassis, with the spring front end. This body just sits right on this chassis, without haveing to mod the tabs.
So despite any flaws, I love this car because of all the work I did by hand on it. I'm glad I kept my cool, because I normally would have lost my temper by this point.
