Phoenix Zip build pics
Posted: Mon May 21, 2007 10:49 pm
Here are some pics of the build up. If you haven't noticed already, I try to make these 1/64th cars as scale as I can. 
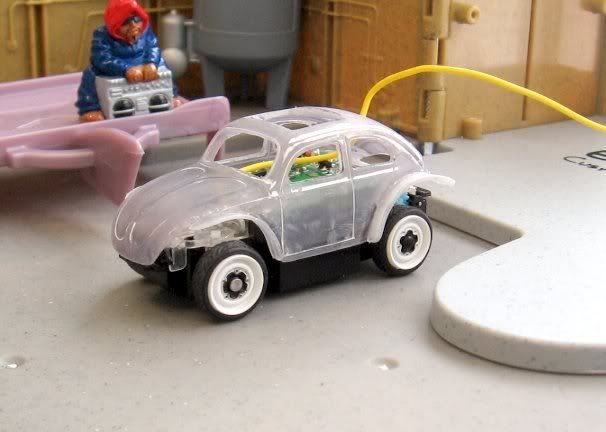
stinkin' Easy Off. The result of my first Cal-Look body for the "goin' topless"-contest

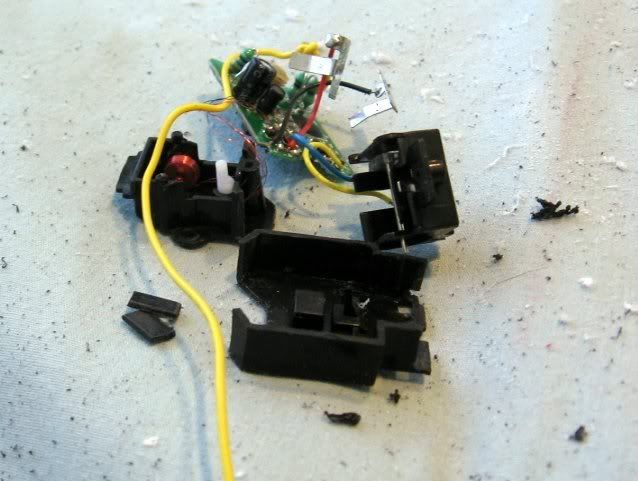
body repaired, then hacked, and trying the ride height
I was only going to extend the rear a little, then figured why stop there? so I cut the chassis up to get higher center clearance
I used scrap plastic for the wide off road fenders. I had it primered and sanded, then Dad suggested to do a oil cooler on it. So I then had to fill in the roof, I was going to leave it open, otherwise. Little did he know, at that time, that he was helping me with his own car.
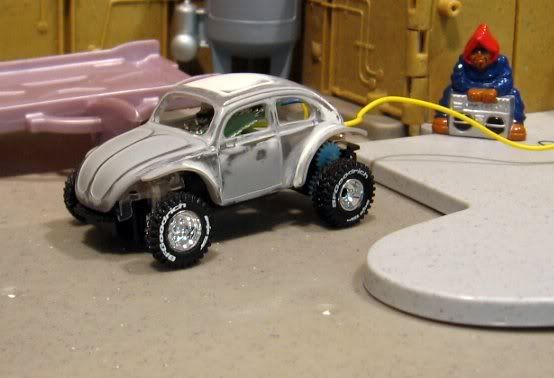
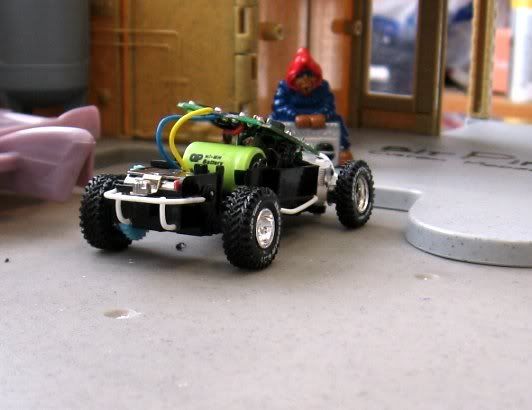
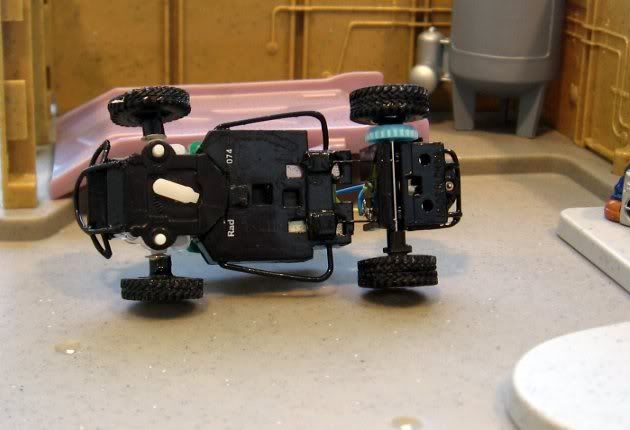
I used styrene rod for the nerf bars and such. And you can see what I did for the front suspension stiffening. It was a return to center steering spring from a ZZMT. I bent the ends downward 90* and trimmed the ends to where they were 2-3 mm long. They fit into tiny holes I made in the top of the knuckle. So the tips don't actually rest on the edges, rather they poke into the bottom of the hole. Any other way they caused the steering to hang up. I used a screw from a ZZSE to go thru the center of the spring, then a plastic spacer, and into a hole drilled into the plastic.
The tires came off of a mini machines dune buggy (it had the spare too ), and i cut them then glued them to make narrow and wide tires. The wheels came from 2 different diecasts, the front tires I had to bore out to fit, and I used a dremel to cut away the inner portions of the wheels.
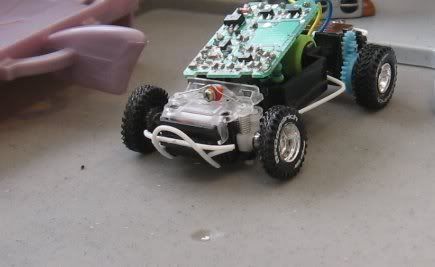
The music spring suspension can be seen. Stupid me, I didn't take pics while doing it- I was in the zone so to speak I am doing another offroad Zip similar to this- just better, so I'll post on that later.
I was able to still use the original battery tabs.
Pics of it before it left Slam'n'Jam's shop. The clear coat hadn't even cured yet. But I had to get some outside pics.
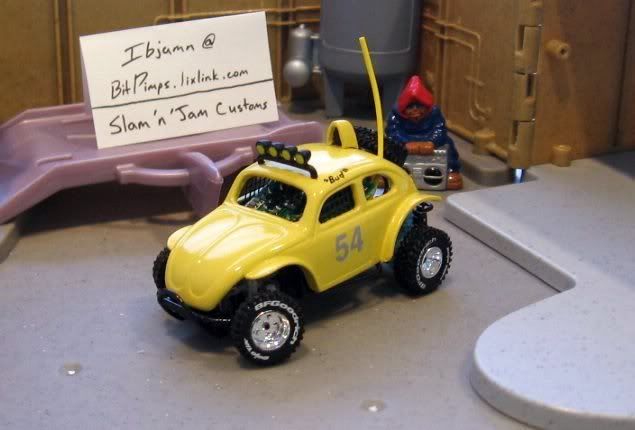
House window screen was pefect for the window netting, and I robbed the light bar from my poor Offroad-bit build. Stick-on foam on the inner sides of the body old the body on tight.
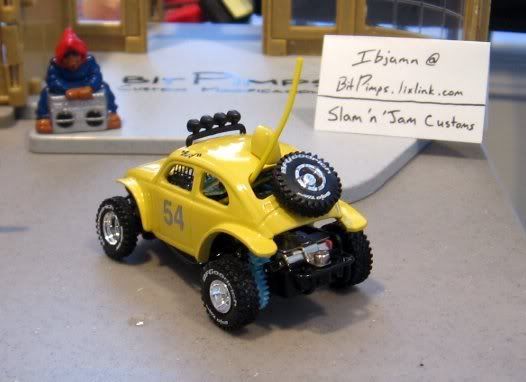
I always hated that the front wheels on these things seemed to be bottomed out all the time, but not this one.
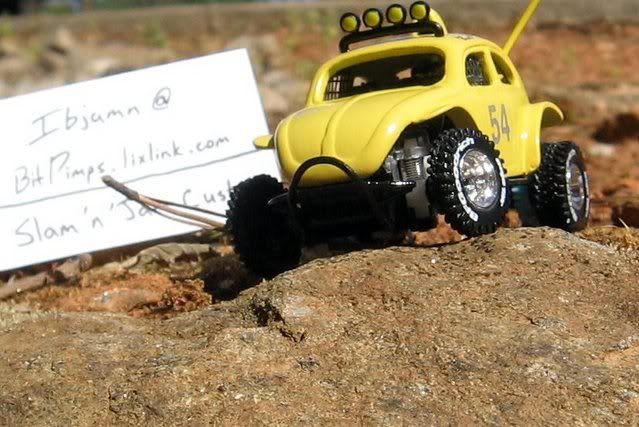
When dad saw it, he had made some suggestions. So we added music string for the antenna, and put a flag on it. Then electrical taped the circuit board down. You can see the gained center clearance here.
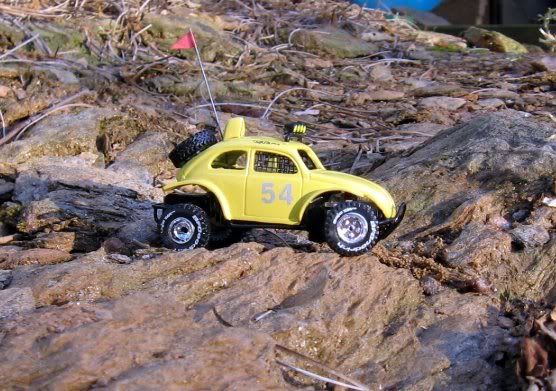
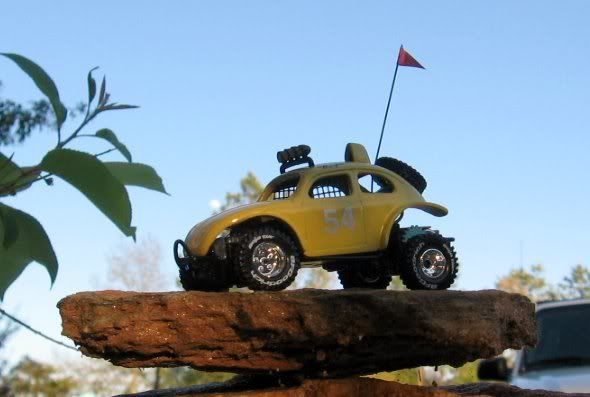
I handed it over to good ole' pops. I swore that I owed him a Herbie ZZ. But he says I didn't.
I want to change a few things on it, like remove the side bars and put some on the body. Then the body will sit lower. I really wasn't happy with the height in the rear. I still need to finish the matching controller. Plus I want to make a vid of it, but now I don't think he'll let it out of his sight for that long
stinkin' Easy Off. The result of my first Cal-Look body for the "goin' topless"-contest

body repaired, then hacked, and trying the ride height

I was only going to extend the rear a little, then figured why stop there? so I cut the chassis up to get higher center clearance

I used scrap plastic for the wide off road fenders. I had it primered and sanded, then Dad suggested to do a oil cooler on it. So I then had to fill in the roof, I was going to leave it open, otherwise. Little did he know, at that time, that he was helping me with his own car.

I used styrene rod for the nerf bars and such. And you can see what I did for the front suspension stiffening. It was a return to center steering spring from a ZZMT. I bent the ends downward 90* and trimmed the ends to where they were 2-3 mm long. They fit into tiny holes I made in the top of the knuckle. So the tips don't actually rest on the edges, rather they poke into the bottom of the hole. Any other way they caused the steering to hang up. I used a screw from a ZZSE to go thru the center of the spring, then a plastic spacer, and into a hole drilled into the plastic.

The tires came off of a mini machines dune buggy (it had the spare too
The music spring suspension can be seen. Stupid me, I didn't take pics while doing it- I was in the zone so to speak
I was able to still use the original battery tabs.


Pics of it before it left Slam'n'Jam's shop. The clear coat hadn't even cured yet. But I had to get some outside pics.

House window screen was pefect for the window netting, and I robbed the light bar from my poor Offroad-bit build. Stick-on foam on the inner sides of the body old the body on tight.

I always hated that the front wheels on these things seemed to be bottomed out all the time, but not this one.

When dad saw it, he had made some suggestions. So we added music string for the antenna, and put a flag on it. Then electrical taped the circuit board down. You can see the gained center clearance here.


I handed it over to good ole' pops. I swore that I owed him a Herbie ZZ. But he says I didn't.
I want to change a few things on it, like remove the side bars and put some on the body. Then the body will sit lower. I really wasn't happy with the height in the rear. I still need to finish the matching controller. Plus I want to make a vid of it, but now I don't think he'll let it out of his sight for that long
