
The CNC challenge, a different sort of mod
-
color0

- bitPlaya'
- Posts: 161
- Joined: Mon Nov 28, 2005 7:30 pm
- Location: Silicon Valley, CA
- Contact:
Ok guys, I now have a new problem. Feed rates! My spindle goes up to 10k rpm so it's no slouch for a micro mill; however, the feed rates I've been recommended to use cause programs to take well over a day to complete... is it really that difficult to machine fiberglass? Right now we're at:
0.5mm cut depth
6.0-14.0 in/min feed rate (endmill is still fine at 14)
14 hours to complete program.
I have 10 of those 1mm endmills to spare, I'm considering experimenting with feed rates (bumping it up to 25 in/min?) and figuring out how to optimize endmill performance/lifetime vs. time-efficiency.
Greyscale Racing
-
LBRC

- bitGangsta'
- Posts: 361
- Joined: Sun May 02, 2004 1:25 am
- Location: North West
- Contact:
-
color0
- bitPlaya'
- Posts: 161
- Joined: Mon Nov 28, 2005 7:30 pm
- Location: Silicon Valley, CA
- Contact:
2 flutes.
Just for kicks I took the feed rate all the way up 30 in/min; that didn't work, it created burrs on the G10 and jammed up the mill to the point that half of the cuts ended up shifted an inch away.
Will go back to 14 in/min tomorrow, while it's slower the cut quality was near perfect.
Just for kicks I took the feed rate all the way up 30 in/min; that didn't work, it created burrs on the G10 and jammed up the mill to the point that half of the cuts ended up shifted an inch away.
Will go back to 14 in/min tomorrow, while it's slower the cut quality was near perfect.
Greyscale Racing
-
LBRC
- bitGangsta'
- Posts: 361
- Joined: Sun May 02, 2004 1:25 am
- Location: North West
- Contact:
Not much help I’m afraid, more speed or larger bits. Aside from a few pieces of CF here and there I haven’t played around with much but aluminum, yet.
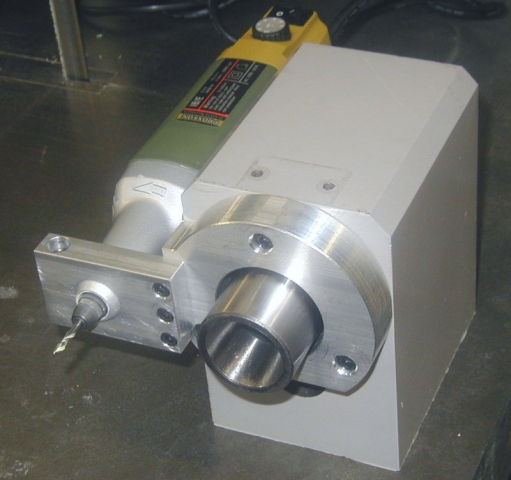
In my long list of must have attachments is this Proxxon rotary tool and mount, for engraving and high speed 5K to 20k cutting and engraving. Have seen photos of one attached to a Taig too, for me though the other important use for the Proxxon Professional Rotary Tool is a mount that attaches it to my lathe for precision ultra small axle grinding.
http://www.littlemachineshop.com/produc ... &category=
I did pick up a role of Mitee-Grip that should be great for holding thin CF or in your case G-10 chassis parts. It’s a heat-activated wax-based adhesive compound embedded in precision paper, and supposedly excelent for holding smooth flat delicate parts while machining. With the quick change Tormach Tooling System (great but won’t work with the Taig) the computer always knows where the tool tip is within a couple of thousandths of an inch so I can actually set my cut depth to cut a piece of CF and part of the mounting paper while leaving my mounting plate untouched.
http://www.miteebite.com/products/mitee_grip_m.html
After seeing your chassis parts and post at R7R I decided to go ahead and give it a try with a 1/32” piece of CF for a Micro-T chassis so I could tell you how well it worked or not, but ran into a little motor problem (see below) that put the test on hold.
 My latest setback:
Everything was going great until yesterday when my Z-axis servo motor decided to fry itself for no apparent reason, yea nothing like a $150 motor filling your shop full of foul smelling acrid black smoke, oh the stink! Showered three times and the wife still wanted me to sleep elsewhere and not even on the couch least I contaminate it, more like outside. So now I’m waiting on a new motor, oh well that’s what makes it a “chalange.”
In my long list of must have attachments is this Proxxon rotary tool and mount, for engraving and high speed 5K to 20k cutting and engraving. Have seen photos of one attached to a Taig too, for me though the other important use for the Proxxon Professional Rotary Tool is a mount that attaches it to my lathe for precision ultra small axle grinding.
http://www.littlemachineshop.com/produc ... &category=
I did pick up a role of Mitee-Grip that should be great for holding thin CF or in your case G-10 chassis parts. It’s a heat-activated wax-based adhesive compound embedded in precision paper, and supposedly excelent for holding smooth flat delicate parts while machining. With the quick change Tormach Tooling System (great but won’t work with the Taig) the computer always knows where the tool tip is within a couple of thousandths of an inch so I can actually set my cut depth to cut a piece of CF and part of the mounting paper while leaving my mounting plate untouched.
http://www.miteebite.com/products/mitee_grip_m.html
After seeing your chassis parts and post at R7R I decided to go ahead and give it a try with a 1/32” piece of CF for a Micro-T chassis so I could tell you how well it worked or not, but ran into a little motor problem (see below) that put the test on hold.
Everything was going great until yesterday when my Z-axis servo motor decided to fry itself for no apparent reason, yea nothing like a $150 motor filling your shop full of foul smelling acrid black smoke, oh the stink! Showered three times and the wife still wanted me to sleep elsewhere and not even on the couch least I contaminate it, more like outside. So now I’m waiting on a new motor, oh well that’s what makes it a “chalange.”
Favorite quote; “dude. it's a peice of wire.....” by ph2t.
-
color0
- bitPlaya'
- Posts: 161
- Joined: Mon Nov 28, 2005 7:30 pm
- Location: Silicon Valley, CA
- Contact:
That's a neat attachment, LBRC. I know who to call on when I need some round, centered stock to make rims off of. 
I wonder if heating and cooling that tape will add significantly to the time it takes to machine? I had an issue the first time with the final part catching on the endmill and getting nicked after it was done machining (I didn't leave tabs). So my plan at the moment is to drill the necessary holes to hold the finished parts, then screw through those holes, through some foam tape onto a wooden board. Now that I have a dial indicator I can also add clamps to the sides of the G10, adjusting the clamping tension on the four corners to make everything pretty close to perfectly flat. It takes some time, but just like RC cars adjustability seems to be the ticket to performance.
I wonder if heating and cooling that tape will add significantly to the time it takes to machine? I had an issue the first time with the final part catching on the endmill and getting nicked after it was done machining (I didn't leave tabs). So my plan at the moment is to drill the necessary holes to hold the finished parts, then screw through those holes, through some foam tape onto a wooden board. Now that I have a dial indicator I can also add clamps to the sides of the G10, adjusting the clamping tension on the four corners to make everything pretty close to perfectly flat. It takes some time, but just like RC cars adjustability seems to be the ticket to performance.
Greyscale Racing