Nelly 1.2 invades USA!!!
-
sg219
- bitPimp
- Posts: 4244
- Joined: Thu Jan 22, 2004 1:00 pm
- Location: Kennywood, PA
- Contact:
Nelly 1.2 invades USA!!!
Yes, kiddies Nelly 1.2 hit American Shores about a week ago and is now installed completely into a Brand Spankin' New Radio Shack Nissan 350z Chassis with a Honda Civic Body. I'll give all the specs at the end of the post.
Tools used...
Wire strippers
Wire cutters
Xacto knife
Nelly 1.2
Dual "AAA" holder
Xmod chassis
Small screw driver
Tweezers or something similar
Solder gun
Solder
Favorite refreshments
Sandwiches
And any other vices you may have or need to keep your patience and your hands steady.

The items to be installed. From left to right...1-Dual "AAA" holder, 1-Ph2t Nelly 1.2 Imported from Brucestralia, and 1-Test Motor (Later not used)

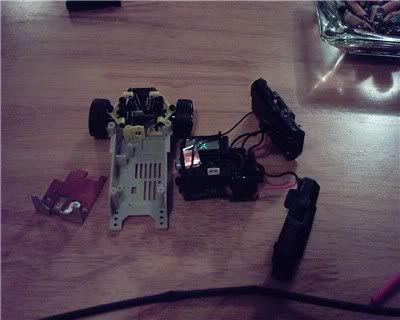
The guts of the Xmod chassis thats being used.
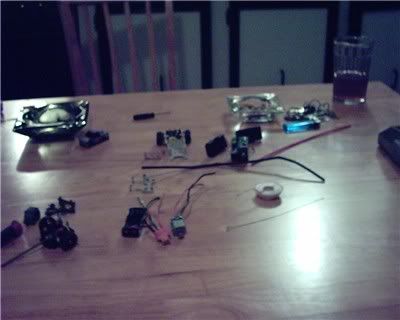
Tools, materials, work space, and stuff.
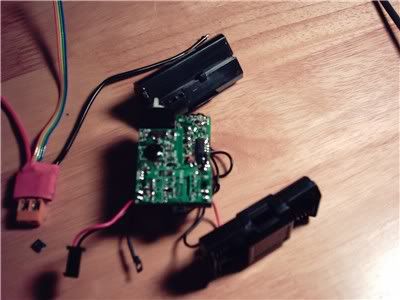
The PCB Board area.
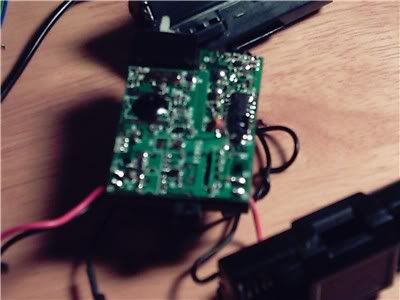
The stock removed. How cute and tiny they look.
At this point the steps are...
Break car down to the parts that you are going to be working with.
Think about how your going to go about the whole process, from beginning to the end. Play close attention to where you intend on mounting, placing, soldering, routing, any parts and/or wires.
Start work on the install.
I had great help in doing this. Bird from BitPimps and R7R did all the soldering and I asisisted the entire install. He loves to practice soldering and I just really don't have all the pantience in the world right now. So Bird got the practice on this install. Next one's all me.
THANKS BIRD FOR YOUR TIME!!! (The pay wasn't that bad either.
  )
)
OK, back to the install. Ph2t has a PDF that he made up to assist in doing the install, so I'm not going to go into specific here. Go read his Nelly Development Thread over at AusMicro. It'll have all the details you need for a successful install and info on the furthering development of Nelly into the BEST 1:28 scale MOD Board available!!
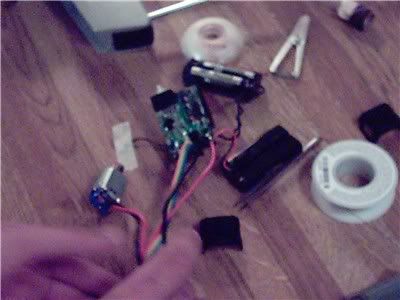
The Nelly 1.2 connected and tested.
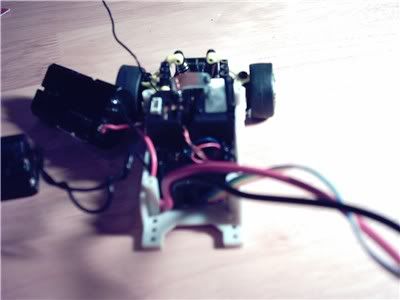
Put in its place very carefully. Rear of chassis veiw.
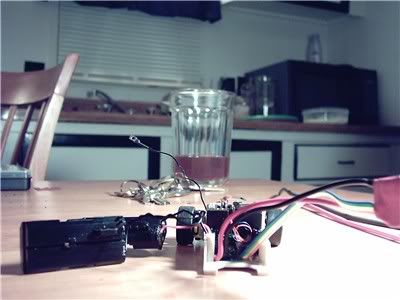
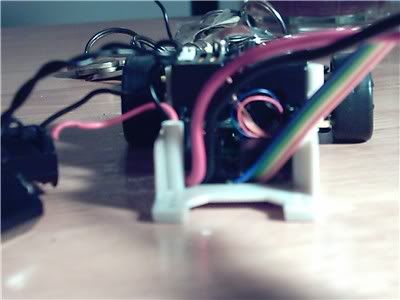
Here you can see where the wires were routed.
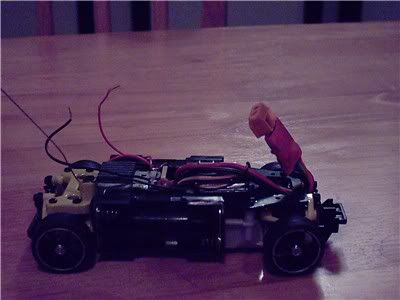
Nelly 1.2 installed.
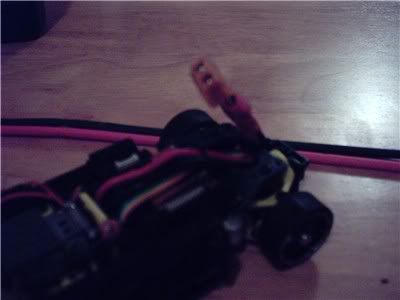
The Nelly 1.2 wires come up between the motor mount and the elctronics. The wires are ran on the bottom of the mount (rear/thin motor mount) and to the sides or corners of it, then up. I suggest replacing the motor mount once you have Nelly 1.2 installed and ready. This way you can have the wires routed proprely before putting the rear drive back on.
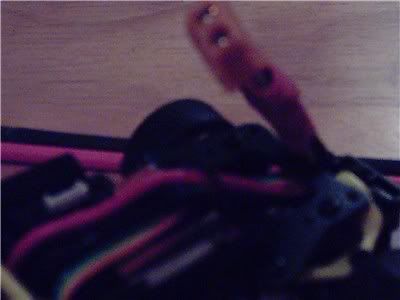
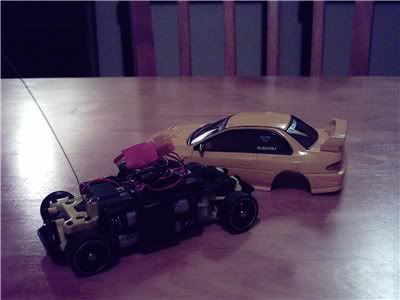
Yes, I know i said a Honda body at the beginning of this, but I like the one thats in the pic better!! It's whats eventually going to be on it anyway!!
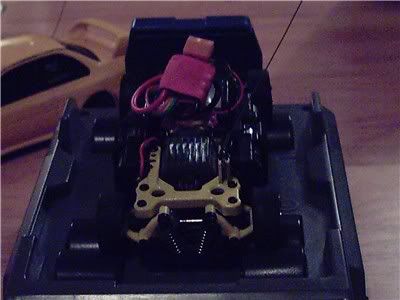
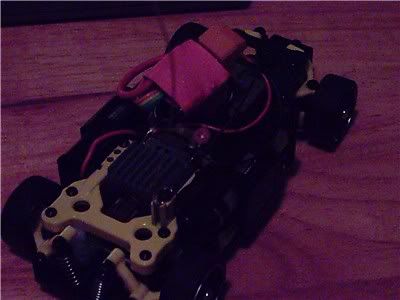
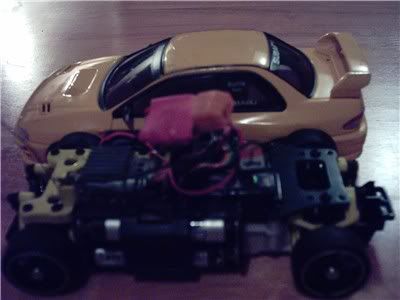

Now there's is only one more thing to do!! TEST IT!! Thats the End of night one!! The next night we preformed the 6 cell modification on it.
This mod here is well documents, so there is NO need for me to explain this procedure!!
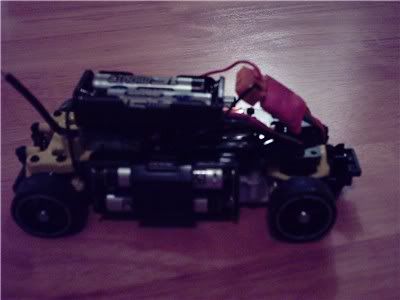
You can see here that the extra cell holder has been installed. It is directly wired to the loop and has a peice of velcro on the backside which attachs it to the top of the heat sink securely!!
Cut all the wires off the cell holder for this app. There is already enough wires around, so get rid of them. Solder the cell holder to the actual loop wires by useing the metal grommets on the end of it. By doing this the mod comes out looking much cleaner and precise.
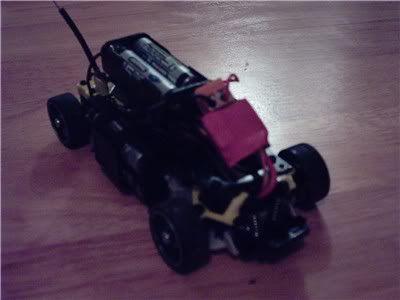

The routing of the wires is a bit tricky, because you need enough room for Nelly 1.2, a Dual cell holder, velcro, and extra wires.
I routed Nelly to the front and down through the center of the CF front deck and up and out the front of it between the shocks and then toward the back. This leaves enough room to install the AWD later and positions the Nelly board in the right position to connect the motor wires. Plus its up under the hood/windsheild area of the car, leaving plenty of room for the extra cells.
Things to do while installing...
Learn from what your doing!!!! Is the most important thing.
This is what was learned through-out this install, both by, Bird and myself. He picked up different things and so did I, so if I leave anything ut Bird, Please post your experiance soon!!
Some of these will be gone back and performed on the car.
The Nelly 1.2 wires can be shortened by about 1 3/4 inches to 2 1/4 inches, depending on routeing and confidence in soldering and wire handling. We weren't sure how this procedure was going to go, so we stayed on the safe side. It when great, so shorten those Nelly wires for your install.
When soldering the rainbow wires to the PCB, do so, with the wires facing away from the switch area. This was a revalation after they were already soldered. We said let's try it this way and just never went back to change them. Also when soldering the power wires to the PCB, put them on at a slight angle so that they lead away from the chassis post when you put the PCB back in the chassis. Try it and see where they come out and the angle that works best.
Use a pinion pusher or a vise to put a pinion back on a motor!! i ruined 2 motors during this, all by trying to pound the damn pinion back on. I bent 2 armatures. The car now has an Escalation Motor from TOyEast installed in it with upgraded, thicker wires.
Use 18 gauge for all your wiring if possible. Rewire your motor leads, your battery wires, and anything else you feel comfortable doing. By doing this you get a sturdy system. I'm sure there might be a technical reason, but I'll leave that info up to the pros. (Ask Ph2t about it, i'm sure he has a reason and the knoweledge to elaborate on the topic of different gauges of wiring and they're functions.)
Take your time and have some extra time set aside for errors and adjustments.
Take pics and notes if your that type of record keeper.
Enjoy installing it!!
Here are the specs of the current car.
Stock Nissan 350z Chassis with front nose clip
Honda Civic Body (The 350z front clip raises the front end slightly and helps with the room needed to install everything. Slight, but enough.)
Nelly 1.2
5&6 Cells added
14 Bearings
6 Ray-O-Vac IC-3's
AWD diff
Escalation motor
Blue cone gear
11 tooth pinion
Black rims
Super Glued tires
Alloy Nylok wheel nuts
Soft Slicks
RC Butler Green CF front Deck (slightly modded to fit Nelly 1.2 thru the center hole.)
Used the wire from the cell holder and installed and replaced the wires on the Escalation motor.
1"x1" square of Velcro
Metal heat sink
Heat shink on the lower part of antenna. 1" or so, to protect from shorting receiver out.
Speed before 6 cell, just Nelly 1.2, using a regualr speed checker topped out at 31 km.
After 6 cell with Nelly 1.2 it topped out at 35 km.
It has an insane amount of torque, but now I need a motor that can fully take advantage of Nelly 1.2. A low wind motor. The Escalation motor just won't go any faster, its maxed out and so is the Stage 2 motor. A motor can only spin so fast, until you have to get a better built one. So to take full effect of the efficency of Nelly 1.2, I must find a BETTER motor now!!!
Thanks.....
Ph2t for developing, designing, constucting, and providing Nelly 1.2, the test motor, and online support. I purchased Nelly 1.2 from him. Please contact him for further ordering info.
Bird for his time, kitchen, and desire to get better at soldering. He helped and did alot of the work all the way to the final install. Great and clean job done, all the way around.
As for me, I supplied all the stuff and the testing grounds to install everything on. Research and Development supplies.
I will have some vid eventually. Soon I hope. The whole time, my 1:1 has been in the shop. So I haven't been able to hit the usually creepin' and filmin' spot. Soon.
I think I covered everything. If not I'll update the thread as it moves along.
Thanks for readin'!!!
Tools used...
Wire strippers
Wire cutters
Xacto knife
Nelly 1.2
Dual "AAA" holder
Xmod chassis
Small screw driver
Tweezers or something similar
Solder gun
Solder
Favorite refreshments
Sandwiches
And any other vices you may have or need to keep your patience and your hands steady.

The items to be installed. From left to right...1-Dual "AAA" holder, 1-Ph2t Nelly 1.2 Imported from Brucestralia, and 1-Test Motor (Later not used)


The guts of the Xmod chassis thats being used.

Tools, materials, work space, and stuff.

The PCB Board area.


The stock removed. How cute and tiny they look.
At this point the steps are...
Break car down to the parts that you are going to be working with.
Think about how your going to go about the whole process, from beginning to the end. Play close attention to where you intend on mounting, placing, soldering, routing, any parts and/or wires.
Start work on the install.
I had great help in doing this. Bird from BitPimps and R7R did all the soldering and I asisisted the entire install. He loves to practice soldering and I just really don't have all the pantience in the world right now. So Bird got the practice on this install. Next one's all me.
THANKS BIRD FOR YOUR TIME!!!
OK, back to the install. Ph2t has a PDF that he made up to assist in doing the install, so I'm not going to go into specific here. Go read his Nelly Development Thread over at AusMicro. It'll have all the details you need for a successful install and info on the furthering development of Nelly into the BEST 1:28 scale MOD Board available!!

The Nelly 1.2 connected and tested.

Put in its place very carefully. Rear of chassis veiw.


Here you can see where the wires were routed.

Nelly 1.2 installed.

The Nelly 1.2 wires come up between the motor mount and the elctronics. The wires are ran on the bottom of the mount (rear/thin motor mount) and to the sides or corners of it, then up. I suggest replacing the motor mount once you have Nelly 1.2 installed and ready. This way you can have the wires routed proprely before putting the rear drive back on.


Yes, I know i said a Honda body at the beginning of this, but I like the one thats in the pic better!! It's whats eventually going to be on it anyway!!


Now there's is only one more thing to do!! TEST IT!! Thats the End of night one!! The next night we preformed the 6 cell modification on it.
This mod here is well documents, so there is NO need for me to explain this procedure!!

You can see here that the extra cell holder has been installed. It is directly wired to the loop and has a peice of velcro on the backside which attachs it to the top of the heat sink securely!!
Cut all the wires off the cell holder for this app. There is already enough wires around, so get rid of them. Solder the cell holder to the actual loop wires by useing the metal grommets on the end of it. By doing this the mod comes out looking much cleaner and precise.


The routing of the wires is a bit tricky, because you need enough room for Nelly 1.2, a Dual cell holder, velcro, and extra wires.
I routed Nelly to the front and down through the center of the CF front deck and up and out the front of it between the shocks and then toward the back. This leaves enough room to install the AWD later and positions the Nelly board in the right position to connect the motor wires. Plus its up under the hood/windsheild area of the car, leaving plenty of room for the extra cells.
Things to do while installing...
Learn from what your doing!!!! Is the most important thing.
This is what was learned through-out this install, both by, Bird and myself. He picked up different things and so did I, so if I leave anything ut Bird, Please post your experiance soon!!
Some of these will be gone back and performed on the car.
The Nelly 1.2 wires can be shortened by about 1 3/4 inches to 2 1/4 inches, depending on routeing and confidence in soldering and wire handling. We weren't sure how this procedure was going to go, so we stayed on the safe side. It when great, so shorten those Nelly wires for your install.
When soldering the rainbow wires to the PCB, do so, with the wires facing away from the switch area. This was a revalation after they were already soldered. We said let's try it this way and just never went back to change them. Also when soldering the power wires to the PCB, put them on at a slight angle so that they lead away from the chassis post when you put the PCB back in the chassis. Try it and see where they come out and the angle that works best.
Use a pinion pusher or a vise to put a pinion back on a motor!! i ruined 2 motors during this, all by trying to pound the damn pinion back on. I bent 2 armatures. The car now has an Escalation Motor from TOyEast installed in it with upgraded, thicker wires.
Use 18 gauge for all your wiring if possible. Rewire your motor leads, your battery wires, and anything else you feel comfortable doing. By doing this you get a sturdy system. I'm sure there might be a technical reason, but I'll leave that info up to the pros. (Ask Ph2t about it, i'm sure he has a reason and the knoweledge to elaborate on the topic of different gauges of wiring and they're functions.)
Take your time and have some extra time set aside for errors and adjustments.
Take pics and notes if your that type of record keeper.
Enjoy installing it!!
Here are the specs of the current car.
Stock Nissan 350z Chassis with front nose clip
Honda Civic Body (The 350z front clip raises the front end slightly and helps with the room needed to install everything. Slight, but enough.)
Nelly 1.2
5&6 Cells added
14 Bearings
6 Ray-O-Vac IC-3's
AWD diff
Escalation motor
Blue cone gear
11 tooth pinion
Black rims
Super Glued tires
Alloy Nylok wheel nuts
Soft Slicks
RC Butler Green CF front Deck (slightly modded to fit Nelly 1.2 thru the center hole.)
Used the wire from the cell holder and installed and replaced the wires on the Escalation motor.
1"x1" square of Velcro
Metal heat sink
Heat shink on the lower part of antenna. 1" or so, to protect from shorting receiver out.
Speed before 6 cell, just Nelly 1.2, using a regualr speed checker topped out at 31 km.
After 6 cell with Nelly 1.2 it topped out at 35 km.
It has an insane amount of torque, but now I need a motor that can fully take advantage of Nelly 1.2. A low wind motor. The Escalation motor just won't go any faster, its maxed out and so is the Stage 2 motor. A motor can only spin so fast, until you have to get a better built one. So to take full effect of the efficency of Nelly 1.2, I must find a BETTER motor now!!!
Thanks.....
Ph2t for developing, designing, constucting, and providing Nelly 1.2, the test motor, and online support. I purchased Nelly 1.2 from him. Please contact him for further ordering info.
Bird for his time, kitchen, and desire to get better at soldering. He helped and did alot of the work all the way to the final install. Great and clean job done, all the way around.
As for me, I supplied all the stuff and the testing grounds to install everything on. Research and Development supplies.
I will have some vid eventually. Soon I hope. The whole time, my 1:1 has been in the shop. So I haven't been able to hit the usually creepin' and filmin' spot. Soon.
I think I covered everything. If not I'll update the thread as it moves along.
Thanks for readin'!!!
- Bird
- bitPimp
- Posts: 1303
- Joined: Sat Jan 17, 2004 2:22 am
- Location: waste mifflin, pa
I just want to add this... ph2t is a class act. The quality of construction and clean, well thought out layout of the Nelly wiring, coupled with the excellent instructions and support made this install go much easier than I could have ever anticipated... I can't wait to get my own to put into the xmod chassis/iwaver electronics hybrid that I am currently gathering parts for...
I also can't wait for 219 to get a proper hot motor to see what this puppy can really do!
I also can't wait for 219 to get a proper hot motor to see what this puppy can really do!
- Sdog
- bitPimp
- Posts: 862
- Joined: Thu Apr 15, 2004 7:54 am
- Location: Burbs of Philly
- Contact:
- betty.k
- bitPimp
- Posts: 4090
- Joined: Fri Dec 26, 2003 4:52 pm
- Location: la la land
- Contact:
- SuperFly
- bitPimp
- Posts: 2760
- Joined: Mon May 05, 2003 6:37 pm
- Location: nationwide
wow sg, you get a cramp writing that? Pretty dang thorough. I'm looking forward to getting a whoa nelly, but I have some other issues to take care of first. Mainly getting an RCP track to drive on. I don't have the balls to take my fast mini-Zs outside like da bruces do, and the floor hue35 and I race on is pretty slick. We're already running 08 extra soft tires in the back, and we spend more time sliding sideways that not.
I bought a used MR01 on eBay that has some sort of turbo in it and a PN03 motor. The car is fast as hell, but it's right at the limits of traction and control. It's got a 6 tooth pinion that I can't change unless I get a different motor mount. I kinda like tall gears in my bits, and I like them in the bigger cars as well. So I'm thinking a whoa nelly pushing my NML motor with a 10 or 11 tooth pinion is going to blow the doors off everything else. Just got to figure out how to keep it on the ground.
I bought a used MR01 on eBay that has some sort of turbo in it and a PN03 motor. The car is fast as hell, but it's right at the limits of traction and control. It's got a 6 tooth pinion that I can't change unless I get a different motor mount. I kinda like tall gears in my bits, and I like them in the bigger cars as well. So I'm thinking a whoa nelly pushing my NML motor with a 10 or 11 tooth pinion is going to blow the doors off everything else. Just got to figure out how to keep it on the ground.
- betty.k
- bitPimp
- Posts: 4090
- Joined: Fri Dec 26, 2003 4:52 pm
- Location: la la land
- Contact:
-
sg219
- bitPimp
- Posts: 4244
- Joined: Thu Jan 22, 2004 1:00 pm
- Location: Kennywood, PA
- Contact:
SuperFly wrote:wow sg, you get a cramp writing that? Pretty dang thorough.
No, no cramp. I was pretty relaxed at 4 something in the morning.
When I finished writing it, I logged onto AIM and Ph2t was on, and I think I scared him a little being up so late.
How are those motors?Superfly wrote:I bought a used MR01 on eBay that has some sort of turbo in it and a PN03 motor. The car is fast as hell, but it's right at the limits of traction and control. It's got a 6 tooth pinion that I can't change unless I get a different motor mount. I kinda like tall gears in my bits, and I like them in the bigger cars as well. So I'm thinking a whoa nelly pushing my NML motor with a 10 or 11 tooth pinion is going to blow the doors off everything else. Just got to figure out how to keep it on the ground.
So to try and answer that problem, I started a motor building contest at R7R to see what motor will work best with Nelly. I don't expect a real big turn-out, but a few will be better than none. I think someone might surprise me with a motor thats off the hook.[/quote]
-
sg219
- bitPimp
- Posts: 4244
- Joined: Thu Jan 22, 2004 1:00 pm
- Location: Kennywood, PA
- Contact:
Ya, I'm a little tired of all these people talking game about the motors that are out there.ph2t wrote:A motor building contest? hmmm, interesting....
So I'm going to give them a chance to put there motor where their mouth is and have a contest on building them.
Come on I know you got something up your sleeve.
- betty.k
- bitPimp
- Posts: 4090
- Joined: Fri Dec 26, 2003 4:52 pm
- Location: la la land
- Contact:
i have a pn racing s03 in my z waver and i'm really happy with it. i'm running a nelly 1.0, 10t pinion and i get 35kph on the speed checker. there's plenty more torque to be had so i could go up to a 12t pinion and still have enough torque.
it's a 37 turn, bb can, neo mags, carbon brushes and balanced. i paid $25 for mine on rcmart. there's an s04 out which is a 35 turn balanced armiture with all that other stuff, maybe better brushes. i think it's only a couple of $ more so i'd look at that one too. i've seen one in action and it's plenty torquey and fast.
it's a 37 turn, bb can, neo mags, carbon brushes and balanced. i paid $25 for mine on rcmart. there's an s04 out which is a 35 turn balanced armiture with all that other stuff, maybe better brushes. i think it's only a couple of $ more so i'd look at that one too. i've seen one in action and it's plenty torquey and fast.


