
A MAXXA Designs WIP
-
Maxximum Attack
- bitDisciple
- Posts: 1798
- Joined: Thu Jul 31, 2003 7:15 pm
- Location: Barbados
-
Bird

- bitPimp
- Posts: 1303
- Joined: Sat Jan 17, 2004 2:22 am
- Location: waste mifflin, pa

-
Maxximum Attack
- bitDisciple
- Posts: 1798
- Joined: Thu Jul 31, 2003 7:15 pm
- Location: Barbados
Well, to explain, my paint spazzed on me. And with 2 coats of primer one coat of white and a spazzed layer of translucent yellow, I don't think I have to tell you that the paint was too thick  . So after I tried to take off the yellow (bubbles and all). So repainting, the paint was DEFINATELY too thick. So I've basically given up on this project. I'll use the chassis for another project, so I'll kee that underwraps for a while longer.
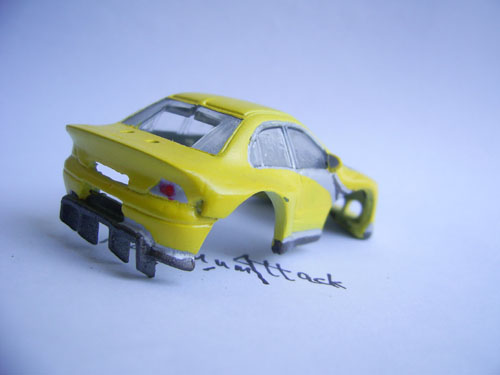
But since I'm not going any further, here is the body in all of it's glory, before the paint booth and before the 2nd primer (had some sanding to do)


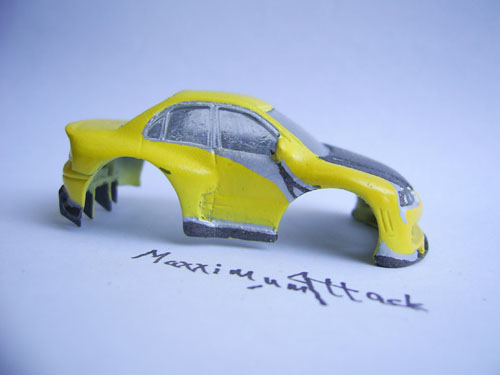
As you can see I've built a rear diffuser out of some scrap plastic and also added a trunk lip. Here's a pic of it before the primer, I basically cut out a space in the bumper and added two 'soccer goal post' shaped to fill the space. One smaller than the next. The larger on goes right to the ends and the smaller one forms the two inner splitters. Then I got two more small pieces and filled in the gaps between the inner and the outer splitters. Keep it strong with LOTS of superglue. These things break easy so any body work that needs to be done after this, make sure the body is securely suspended.

I was keeping the rear end of this project a secret, I was kinda proud of my little accomplishment
But hey, live and learn huh?
I'd like to say that I'm done with acrylics, but that's all that's availible to me
Hope you liked the project that almost was. I'll post finished pics when i actually take photos.
But since I'm not going any further, here is the body in all of it's glory, before the paint booth
As you can see I've built a rear diffuser out of some scrap plastic and also added a trunk lip. Here's a pic of it before the primer, I basically cut out a space in the bumper and added two 'soccer goal post' shaped to fill the space. One smaller than the next. The larger on goes right to the ends and the smaller one forms the two inner splitters. Then I got two more small pieces and filled in the gaps between the inner and the outer splitters. Keep it strong with LOTS of superglue. These things break easy so any body work that needs to be done after this, make sure the body is securely suspended.
I was keeping the rear end of this project a secret, I was kinda proud of my little accomplishment
But hey, live and learn huh?
I'd like to say that I'm done with acrylics, but that's all that's availible to me
Hope you liked the project that almost was. I'll post finished pics when i actually take photos.

-
Maxximum Attack
- bitDisciple
- Posts: 1798
- Joined: Thu Jul 31, 2003 7:15 pm
- Location: Barbados
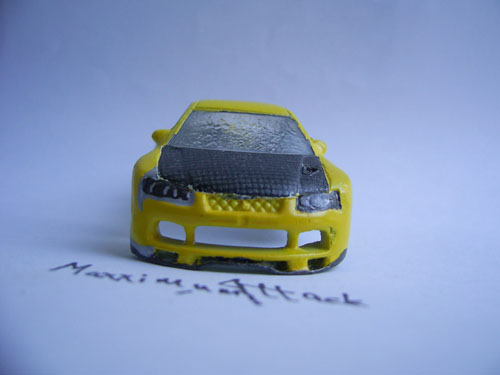
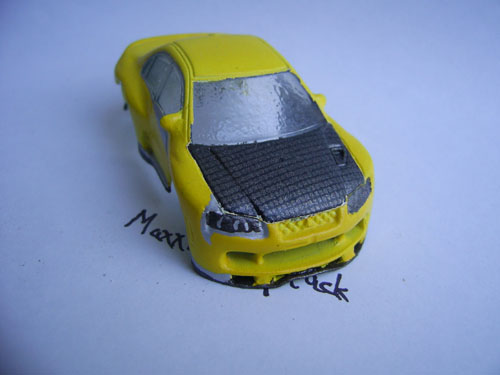
As promised here are the pics of the body that went wrong. Any colour asside from yellow was a failed attempt to mask inconsistencies and/or try to save the paintjob
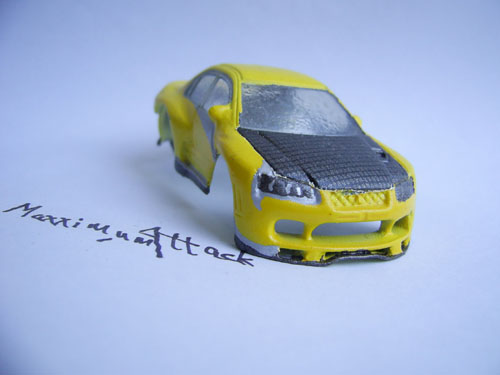
Here is a pic of the front kit. I made a few small changes, and prior to painting, was very pleased with the progress. It even had a sweet intercooler
This result will not halt my efforts to produce a wide body bit, now I know that this definately works I plan to produce another japanese fatty
Thanks for tuning in
Maxx