
A MAXXA Designs WIP
-
Maxximum Attack
- bitDisciple
- Posts: 1798
- Joined: Thu Jul 31, 2003 7:15 pm
- Location: Barbados
A MAXXA Designs WIP
For a long time I've shyd away from making WIP threads. I thought they were a jinx. Well on some inward reflection, I realised that I don't believe in jinxes etc. So in order to prove my defiance over my childish superstition, I present to you my WIP.
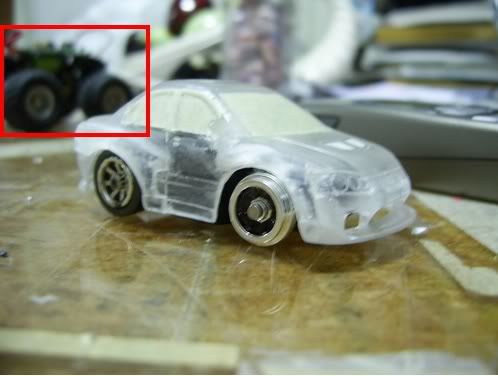
I started out with a Speed set that I got from Darktari, and decided to do some modding on it. I was looking at some of my old rides and I decided to "remake" a ride that I did earlier. However, instead of a direct remake, I'll be doing mods that I've learnt since then and also trying to add a few to my repetoir.
Well so far it's been going rather well. I used this ride to do my first "slot lowering". It's lowered front and rear. I also did some work on the front bumper and replaced the lip with a "racey-er" one. To the chassis so far, I've put small wheels on all four corners. For the lancer, i've found that this is the best way to get a propper looking drop.
Sorry for the fuzzy pic but a mobile cam was all I had at the time.


I'm not going to tell my plans for this car, I'll let them unfold here. I'll let it be known that the car has advanced beyond what is pictured above. I'll reveal that when I update.
Let me know what you guys think
Maxx
I started out with a Speed set that I got from Darktari, and decided to do some modding on it. I was looking at some of my old rides and I decided to "remake" a ride that I did earlier. However, instead of a direct remake, I'll be doing mods that I've learnt since then and also trying to add a few to my repetoir.
Well so far it's been going rather well. I used this ride to do my first "slot lowering". It's lowered front and rear. I also did some work on the front bumper and replaced the lip with a "racey-er" one. To the chassis so far, I've put small wheels on all four corners. For the lancer, i've found that this is the best way to get a propper looking drop.
Sorry for the fuzzy pic but a mobile cam was all I had at the time.
I'm not going to tell my plans for this car, I'll let them unfold here. I'll let it be known that the car has advanced beyond what is pictured above. I'll reveal that when I update.
Let me know what you guys think
Maxx
Last edited by Maxximum Attack on Tue Sep 26, 2006 5:27 pm, edited 1 time in total.

-
SkysTheLimit

- bitHood
- Posts: 36
- Joined: Tue Aug 08, 2006 11:22 am
- Location: NJ
- Contact:
-
honda_s2000
- bitNinja
- Posts: 883
- Joined: Sat Oct 30, 2004 5:42 pm
- Location: New Zealand
-
Maxximum Attack
- bitDisciple
- Posts: 1798
- Joined: Thu Jul 31, 2003 7:15 pm
- Location: Barbados
Another fuzzy pic?????
Back in '04 I probly would have been burnt pretty bad
You guys'll let it slide right? right!!
This should be the last one anyway. I'll just have to unload my GFs cam to get better quality pics.
Anyway I've made some steps to my first Wide Body on a bit
Here is a pic of the front. Only the right front fender has been done (left side of the pic) the other one is stock.

I think it's going rather well. I'm trying a method that requires NO putty, and so far I'm VERY pleased with the results. I'm not gunna spill the beans on it yet, but future pics will tell all
That was an update
Maxx
Back in '04 I probly would have been burnt pretty bad
You guys'll let it slide right? right!!
This should be the last one anyway. I'll just have to unload my GFs cam to get better quality pics.
Anyway I've made some steps to my first Wide Body on a bit
Here is a pic of the front. Only the right front fender has been done (left side of the pic) the other one is stock.
I think it's going rather well. I'm trying a method that requires NO putty, and so far I'm VERY pleased with the results. I'm not gunna spill the beans on it yet, but future pics will tell all
That was an update
Maxx
-
frizzen
- bitDisciple
- Posts: 1730
- Joined: Wed Aug 03, 2005 7:48 am
- Location: Big Left Turn, Indiana
- Contact:
Those are some nice fuzzy pics. Maybe you should try using some of that Nair or that Bodygroom thing that was mentioned a while back in Dumpster/Useless...
Looks like you're starting to really make some progress. What I think I see looks like it'll be really good!
Looks like you're starting to really make some progress. What I think I see looks like it'll be really good!
Jack of all trades, master of none; yet often better than master of one.
-
End genital mutilation, don't circumcise. Restore your fore'
-
End genital mutilation, don't circumcise. Restore your fore'
-
Maxximum Attack
- bitDisciple
- Posts: 1798
- Joined: Thu Jul 31, 2003 7:15 pm
- Location: Barbados
Now we're "claritin clear" 
Multiple updates in this post, I'm pleased with how this is coming along.
Here we have a picture showing the front fender, the front headlight looks a little messed up but I'll do a full damage assesment after primer. So far that fender is done for now. I already have a plan for the headlights anyway. See how low you get with the smalls all round? If I had the stock lip it would be scraping the ground  .
.


Now here's the rear fender under construction, the actual how-to pics for this come after (strangely enough). Alot of cutting and a little shaving produce our rear fender...

Actually some more cutting and shaping was done after this, see?

Because the body is clear, the camera has a little dificulty picking up the details I want to be seen, so I had to ask my white friend to place his hand behind the car to offer a background.

Actually it's my hand......CaboWabo

Now the body's mounted and it's looking pretty good. But the skirt's too wide for the rear wheels . I posted in the "Lookin' to score" section that I wanted some pullback wheels for the rear to fill out the wells, but it seems I don't need them anymore....

ouuuuuu sexxehhhh
-------------------------------------------here comes the How-to-------------------------------------
Well first you need to have a donor body, that's how you get the shape being so good. It's like the stock kit only fatter. You get to retain some of the bodylines.
Here's the donor, another clear lancer from Darktari (big up!)

After cutting out the fender with a dremel, xacto etc, you'll need to tack the fender onto the main body. This takes patience and a steady hand. What I do is; tyr to position the body how I want it and tape half of the fender down so it doesn't move. I normally leave the half that is snug to the body exposed. This way you can use a couple drops of superglue to slip into the small space between the two plastics.***Make sure to mask your windows so they don't fog***. Now let the glue set. Then you can remove the tape that's holding it in place, gently.

Now that it's gone, it's time to fill the huge spaces that are definately going to appear, more around the top than the wheelwells. Just take some baking soda and fill the space and smoth it with your finger to make a nice surface. I normally use a Q-tip to "sweep" away excess powder.

Good. Now that you have that space filled it's time to make it permanant. Take your tube of superglue and gently, drop-by-drop add it to the baking soda. It is very important that you DO NOT POUR. Rather, what you want to do is let each individual drop be absorbed by the powder. This keeps the shape of the powder so you'll have less sanding to do when the time comes.

From the picture above you can see the glisening of the freshly applied superglue on the rear fender, just underneith the window.
Hmm, that's about it. Now all you have to do is sand smooth to your desire. Primer is always a good option when doing bodymods such as kits and ground effects as they show up the minute flaws that the eyes or touch-tests didn't pick up.
Just so you guys know, I've done both rear fenders now, the left rear needs sanding.
More updates later
Maxx
Multiple updates in this post, I'm pleased with how this is coming along.
Here we have a picture showing the front fender, the front headlight looks a little messed up but I'll do a full damage assesment after primer. So far that fender is done for now. I already have a plan for the headlights anyway
Now here's the rear fender under construction, the actual how-to pics for this come after (strangely enough). Alot of cutting and a little shaving produce our rear fender...
Actually some more cutting and shaping was done after this, see?
Because the body is clear, the camera has a little dificulty picking up the details I want to be seen, so I had to ask my white friend to place his hand behind the car to offer a background.
Actually it's my hand......CaboWabo
Now the body's mounted and it's looking pretty good. But the skirt's too wide for the rear wheels
ouuuuuu sexxehhhh
-------------------------------------------here comes the How-to-------------------------------------
Well first you need to have a donor body, that's how you get the shape being so good. It's like the stock kit only fatter. You get to retain some of the bodylines.
Here's the donor, another clear lancer from Darktari (big up!
After cutting out the fender with a dremel, xacto etc, you'll need to tack the fender onto the main body. This takes patience and a steady hand. What I do is; tyr to position the body how I want it and tape half of the fender down so it doesn't move. I normally leave the half that is snug to the body exposed. This way you can use a couple drops of superglue to slip into the small space between the two plastics.***Make sure to mask your windows so they don't fog***. Now let the glue set. Then you can remove the tape that's holding it in place, gently.
Now that it's gone, it's time to fill the huge spaces that are definately going to appear, more around the top than the wheelwells. Just take some baking soda and fill the space and smoth it with your finger to make a nice surface. I normally use a Q-tip to "sweep" away excess powder.
Good. Now that you have that space filled it's time to make it permanant. Take your tube of superglue and gently, drop-by-drop add it to the baking soda. It is very important that you DO NOT POUR. Rather, what you want to do is let each individual drop be absorbed by the powder. This keeps the shape of the powder so you'll have less sanding to do when the time comes.
From the picture above you can see the glisening of the freshly applied superglue on the rear fender, just underneith the window.
Hmm, that's about it. Now all you have to do is sand smooth to your desire. Primer is always a good option when doing bodymods such as kits and ground effects as they show up the minute flaws that the eyes or touch-tests didn't pick up.
Just so you guys know, I've done both rear fenders now, the left rear needs sanding.
More updates later
Maxx
-
honda_s2000
- bitNinja
- Posts: 883
- Joined: Sat Oct 30, 2004 5:42 pm
- Location: New Zealand
The tutorial is awsome, but i'm not sure i'd have the guts to hack a lancer up like that.
Ahh fuck, who am I kidding, Of course I do
Really nice man, the front bumper blew me away too! Nice idea with the fenders
Keep it up
Nice pics too !
EDIT :
Maxx, dont be keeping shit from me, especially MT shit !
I spy with my little eye, something beggining with - an artic modded MT!
We don't need no god damn roads!
-
Maxximum Attack
- bitDisciple
- Posts: 1798
- Joined: Thu Jul 31, 2003 7:15 pm
- Location: Barbados
-
sat4life27

- bitPimp
- Posts: 404
- Joined: Wed Apr 27, 2005 10:48 am
- Location: Warner Vegas, GA

-
frizzen
- bitDisciple
- Posts: 1730
- Joined: Wed Aug 03, 2005 7:48 am
- Location: Big Left Turn, Indiana
- Contact:
Ya know, I've been thinking I need to do a wide body kit for a while, now you're really making me want to start!
That is looking amazing so far! Can't wait to see what you do with the back end.
That is looking amazing so far!
Jack of all trades, master of none; yet often better than master of one.
-
End genital mutilation, don't circumcise. Restore your fore'
-
End genital mutilation, don't circumcise. Restore your fore'


-
honda_s2000
- bitNinja
- Posts: 883
- Joined: Sat Oct 30, 2004 5:42 pm
- Location: New Zealand
Meh, I wasn't even around then, that was when I dropped out.Maxximum Attack wrote:I got ya back
Cool rig though
We don't need no god damn roads!
-
Bird

- bitPimp
- Posts: 1303
- Joined: Sat Jan 17, 2004 2:22 am
- Location: waste mifflin, pa
-
45tr0

- bitNinja
- Posts: 703
- Joined: Mon Jun 13, 2005 10:21 pm
- Location: Brisvegas, Australia
great balls of balls! that thing is looking killer max.
You guys have been producing some really innovative stuff lately.
I gotta track down some more bodies/chassis to work on, i've sorta reached my critical minimum of bits for now, the core dozen or so that i refuse to butcher.
You guys have been producing some really innovative stuff lately.
I gotta track down some more bodies/chassis to work on, i've sorta reached my critical minimum of bits for now, the core dozen or so that i refuse to butcher.
"You guys are Wack"
"Wiggity Wack?"
"Nope, just regular kind"
"Wiggity Wack?"
"Nope, just regular kind"
-
Maxximum Attack
- bitDisciple
- Posts: 1798
- Joined: Thu Jul 31, 2003 7:15 pm
- Location: Barbados
Update:
No pics this time. Nothing much has been done since the last update, relatively speaking. It's amazing how a little more experience helps the outcome of a build phase. I basically did 3 fenders the same time (days apart) but now that I have done the Left front fender, it looks better than the right. I even preserved more bodylines etc. Because of that I had to shave them away so that it would match the other one. It's not fully finished yet, just some minor touching up to do.
I've also conceptualised what I'm going to do with the rear of the car. So during the week I'll see if I can fabricate the wing/trunk area. I've also made giant strides in making a crucial cut (didn't have the balls before).
All in all, just as before it's coming along well. I'm pleased.
I wasn't sure whether to update this until I have entered it in the year end comp, as most of you have probably forgotten this little project. I'll only show the build up to a point before I enter it, then I'll fill in the time gap afterward.
The shell hasn't gone to the paint booth yet, no primer or anything. I'm hoping to have it primered sometime this week. School is picking up with mid-terms etc so I'm not making any promises...
Maxx
Last edited by Maxximum Attack on Mon Oct 09, 2006 1:20 pm, edited 1 time in total.