
How To: Absurdly Small Scale Hi-Lift Jack
-
Smoke&Mirrors

- bitGangsta'
- Posts: 258
- Joined: Sun Feb 10, 2008 1:52 am
- Location: Nor Cal
How To: Absurdly Small Scale Hi-Lift Jack
So upon the challenge (kinda) of frizzen that a Hi-Lift Jack would be too hard to make look good on this scale, I spent the day experimenting with different processes and this is what I got.
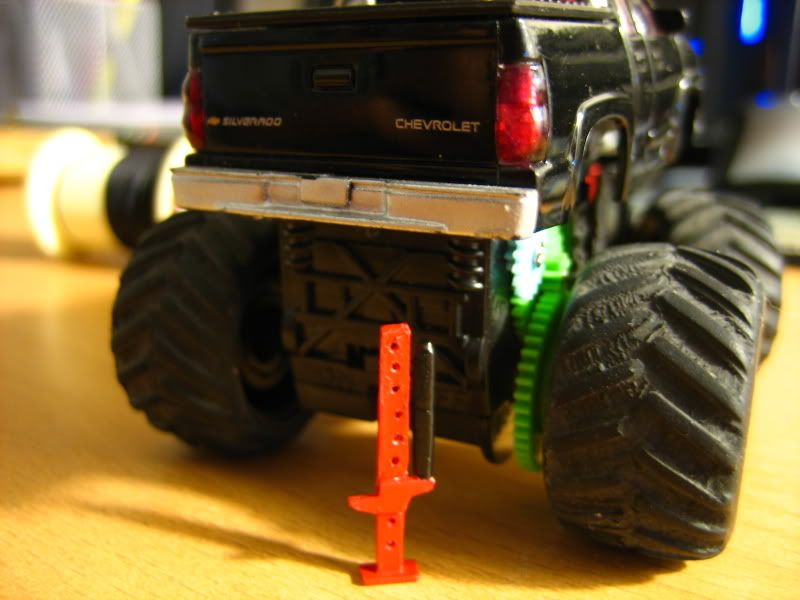
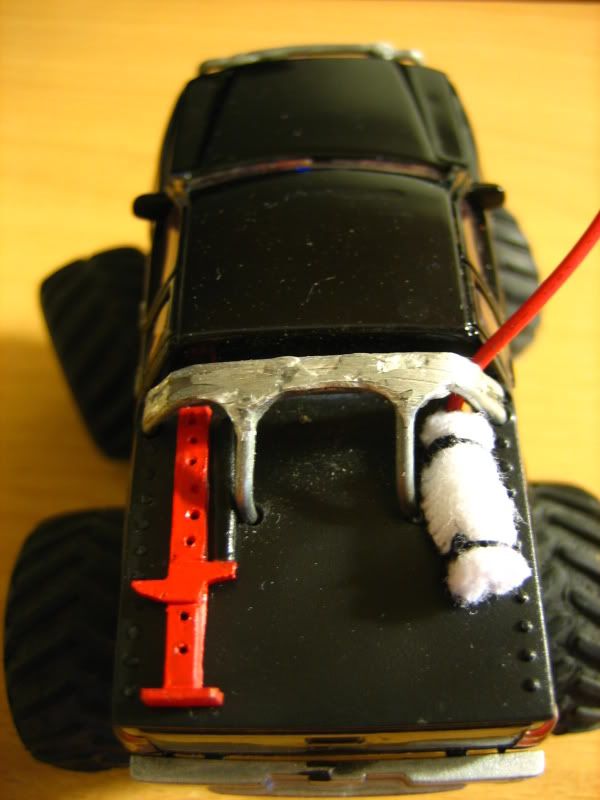
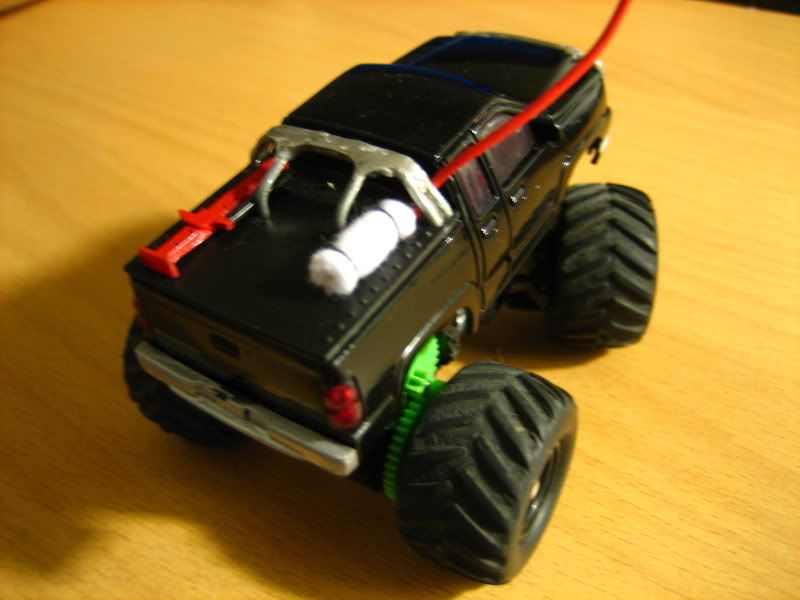
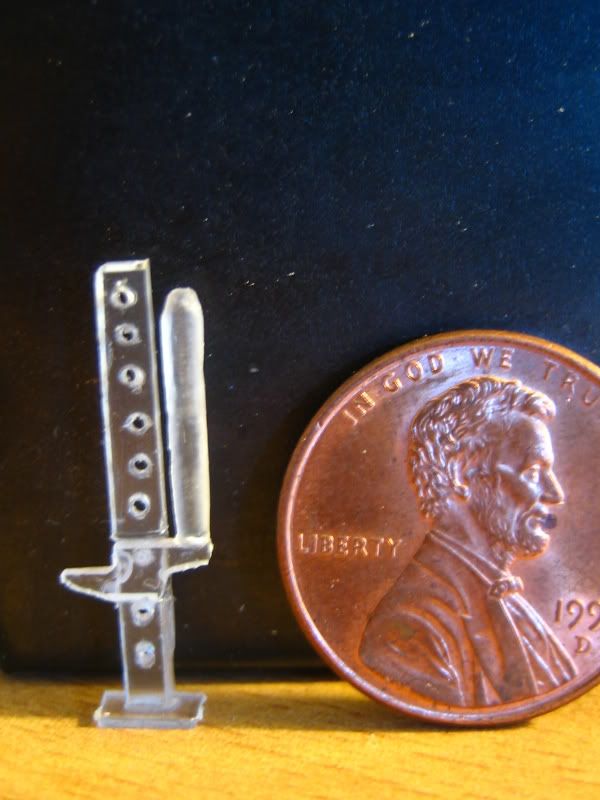
First and foremost, the intended result: a scale looking Hi-Lift Jack for your ZZMT
So now that you know what we are shooting for, let's get started.
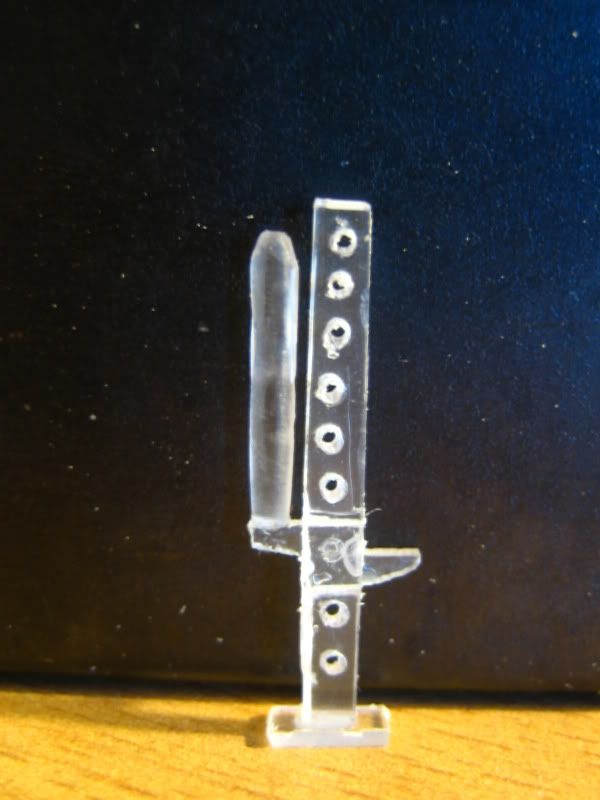
The Parts list and half ass picture.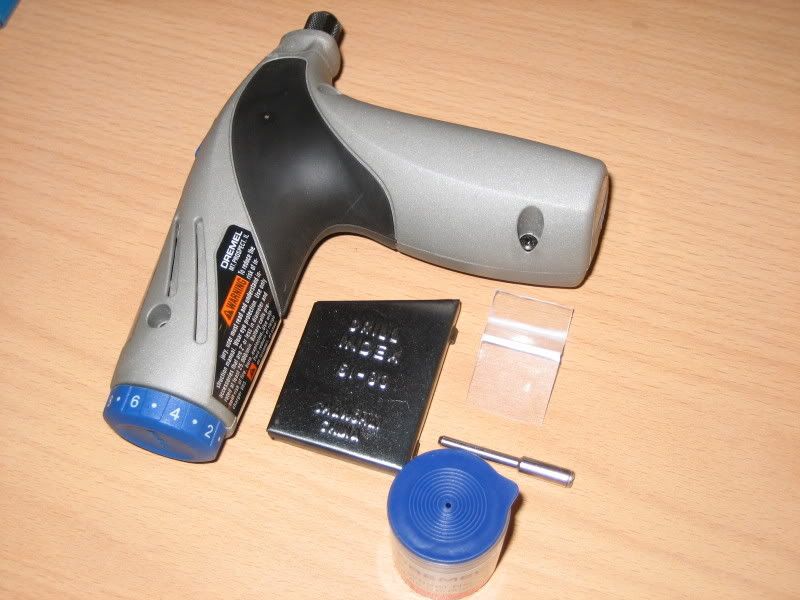
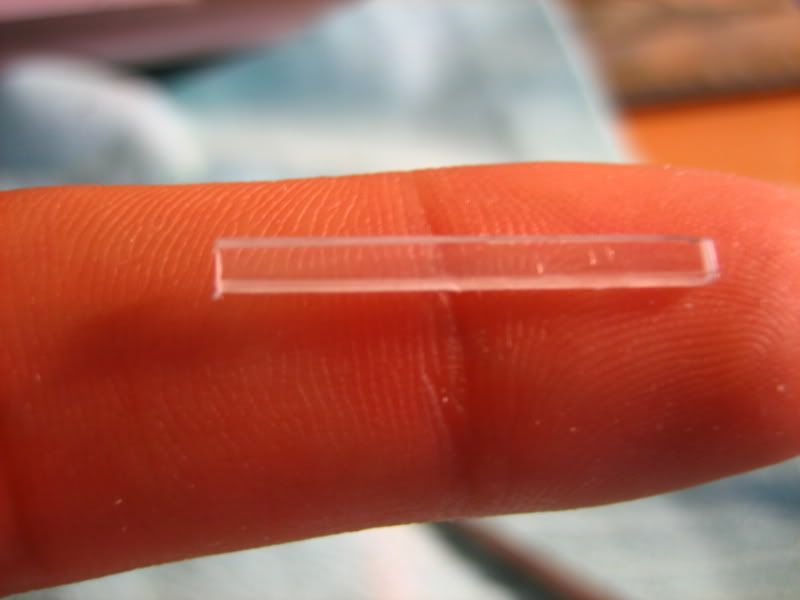
Start off by using the dremel and cut-off wheel to cut out a long rectangle of fairly thick plastic (keep in mind that you will drill into this, so the thicker the better).
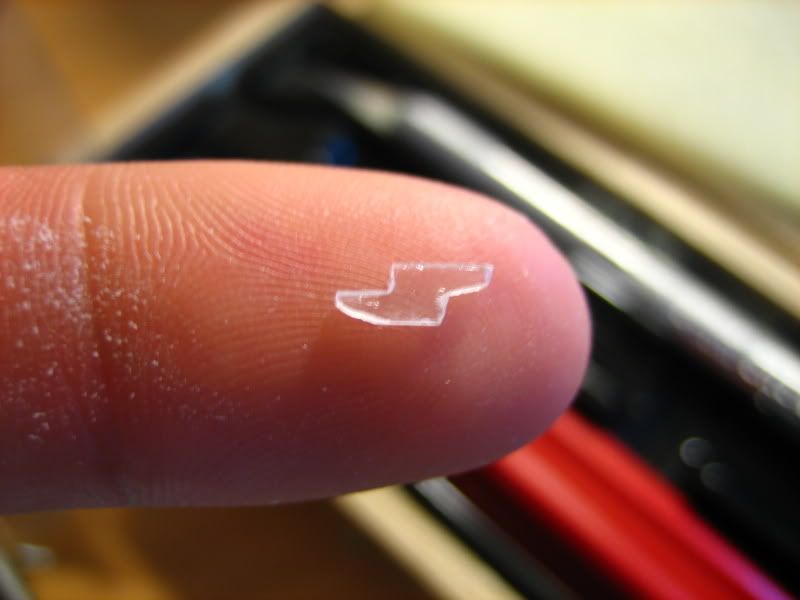
Now cut out a smaller block-like rectangle and shape it as seen below. An important note is that the middle part should be the same length as the first long rectangle. Use a thin to medium thickness piece of plastic here.
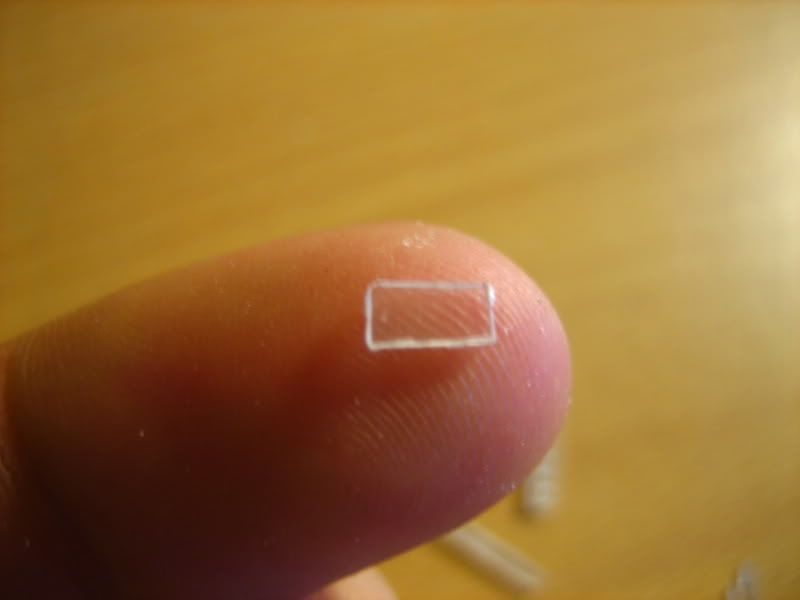
For the base of the jack and easiest step, just cut out a rectangle about the same size as the one you just cut out, and make sure it's pretty thick as well.
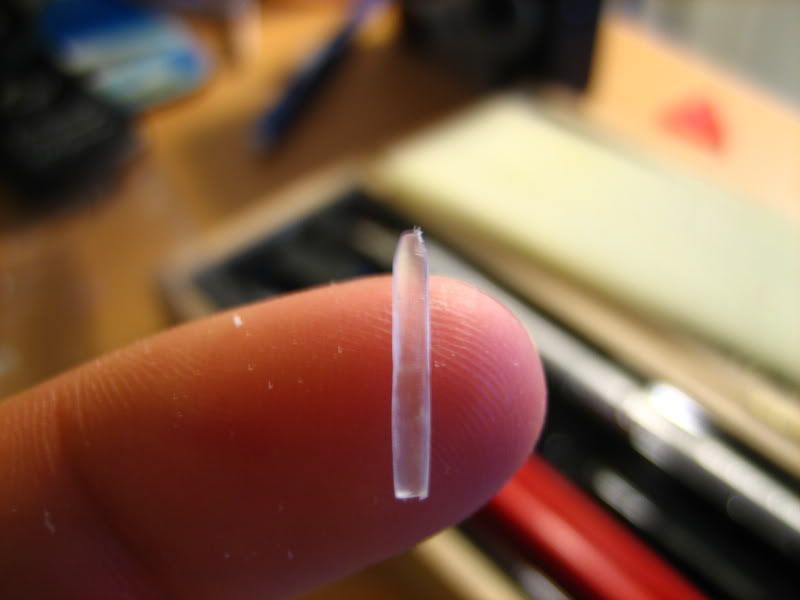
Now this is the HARDEST step. I'm not really sure how to describe it. Cut out a very thick piece of plastic that is about 2/3 to 1/2 the size of the first rectangle. Using the needle nose pliers to hold the piece and your dremel with cut-off wheel, cut off the edges of the rectangle and keep grinding it and shaping it until it resembles a handle or cylinder. Don't forget to round the top and keep the bottom flat.
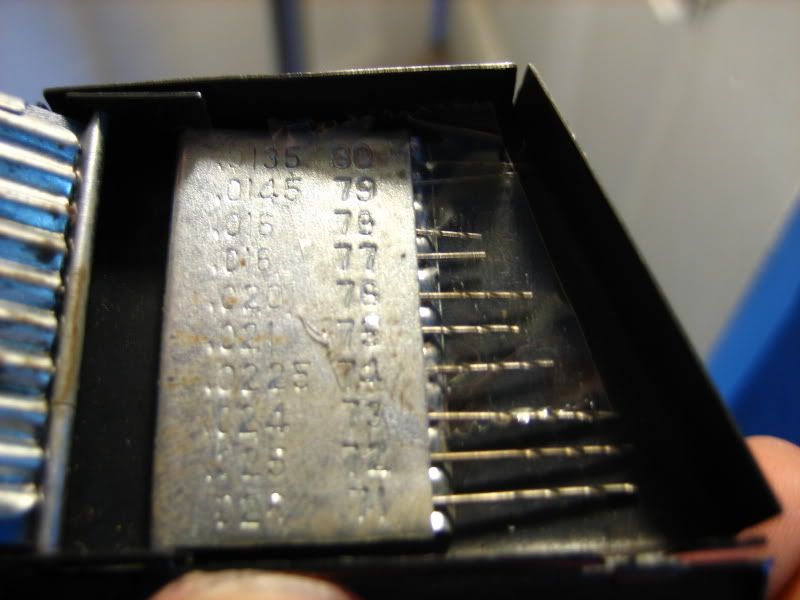
Go to your drill index set and grab number 73 or whatever size you think is best and put it in your drill or dremel.
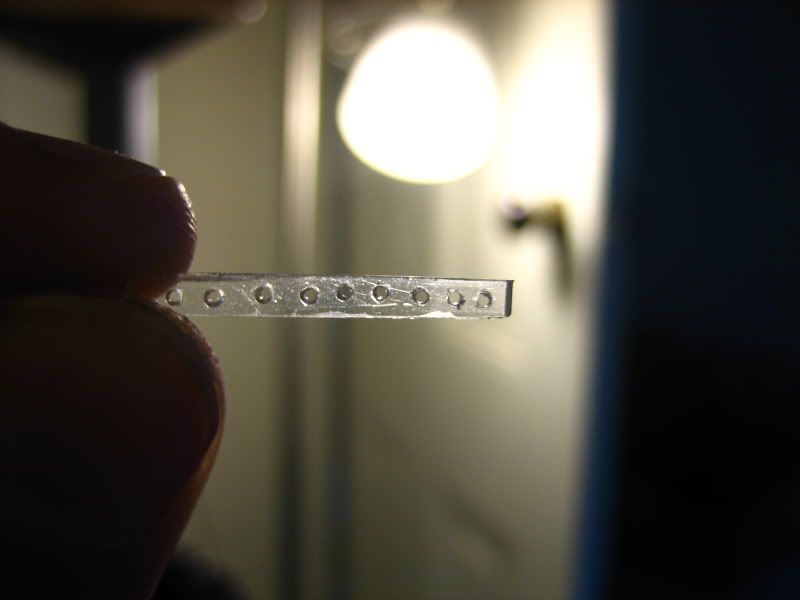
Take the razor blade mentioned earlier and use the tip of it to 'drill' (by spinning the blade) little starter holes in the first long rectangle. Once that is done you can drill pretty quickly (although haste makes waste, take your time) through the plastic to make your holes.
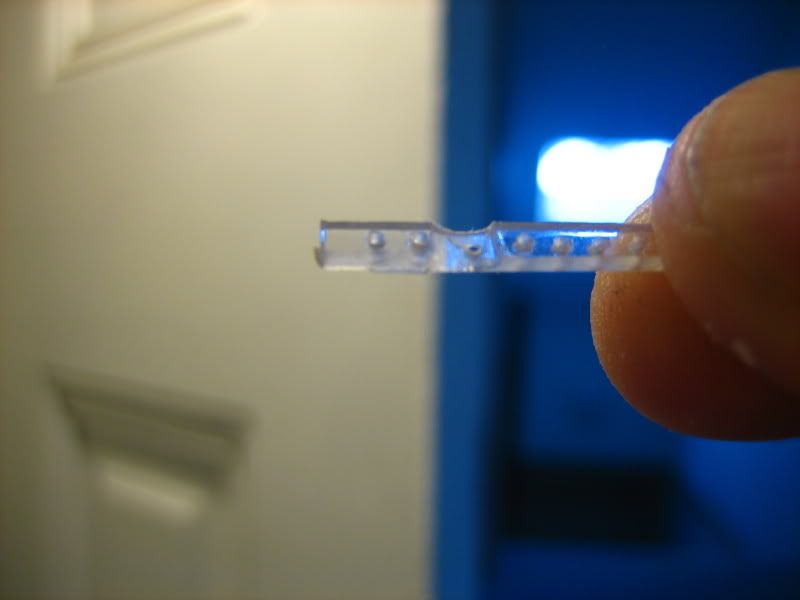
Using the cut-off wheel again, make a tiny notch in the long rectangle that is the same height of the lifty party we made in step 2. This is for the lifty thing to rest in on the jack. Be careful not to cut the long rectangle so thin that it breaks as I almost did.
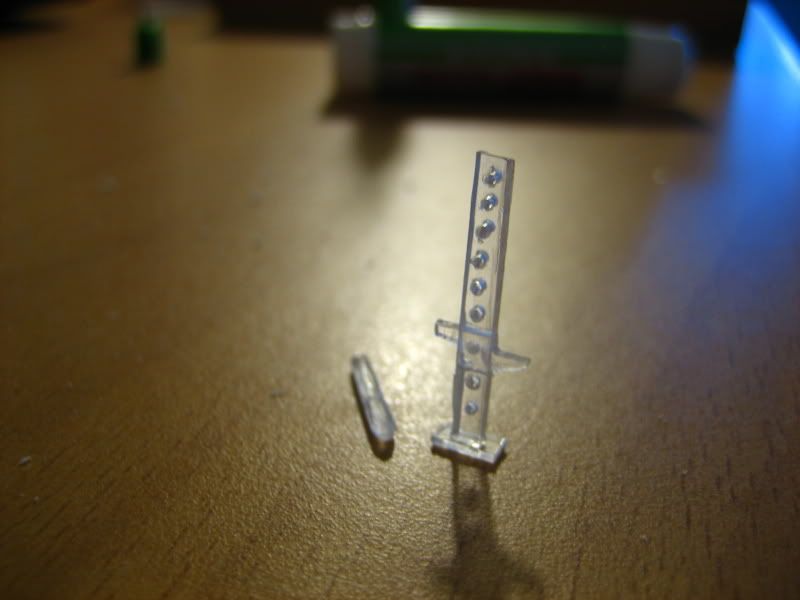
We're almost done! Grab your crazy glue and start gluing the lifty thing-a-ma-jig to the long rectangle. Then glue the handle to the end of the lifty thing. Lastly glue the base to the rest of it. You get the idea.
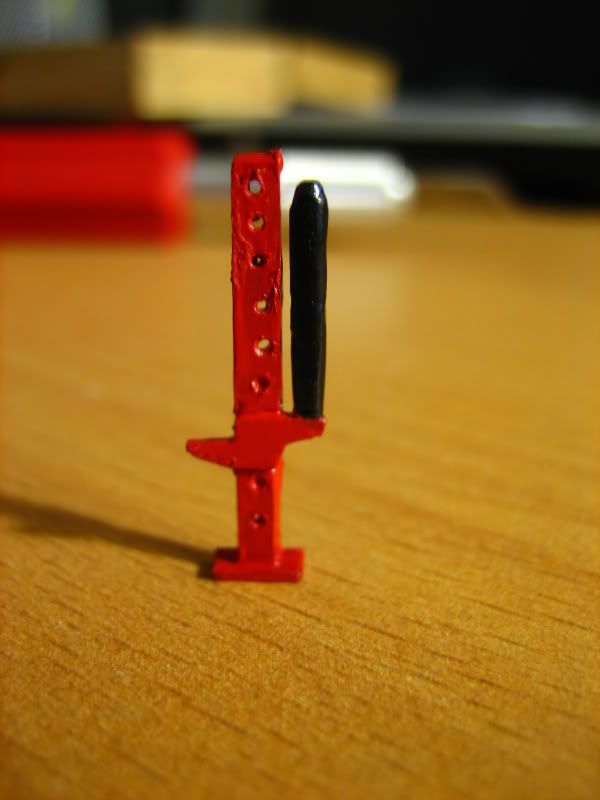
All that is left is to paint it. Just a word for the wise, leave the space between the handle and the jack clear. No one will notice and it's way too hard to get back in there. If you use steady hands and some good technique, most of the paint will naturally flow into the tricky areas. You can use a need when you are done to clear the holes of paint again.
Note: using the razor blade after each step to clean up the plastic you cut off will make your jack look that much better. Also, after you have drilled all the holes in the long rectangle, take bit that is a little bit larger and BY HAND, twist the bit on the holes and it should clear out any excess plastic.
So if you ask me, this is a pretty recognizable Hi-Lift Jack. Frizzen, I have nothing against you and I only did this to help you any one else who wants to build one. Please don't think I'm trying to make you look stupid in any way. Thanks for getting me off my butt to make one of these. I'm glad I did.
First and foremost, the intended result: a scale looking Hi-Lift Jack for your ZZMT
So now that you know what we are shooting for, let's get started.
The Parts list and half ass picture.
- Dremel
Cut-Off Wheel bit (I used the diamond plated one for cleaner cuts)
Drill bit number #73 from a drill index set
A Drill (if your dremel can't grip the drill bit)
Some red and black paint
A razor blade
Some scrap plastic of varying sizes from any ZZ, ZZSE, or ZZMT packaging
Needle Nose Pliers will make things tremendously easier
Crazy Glue
Lastly, a ton of patience and good hand work
Start off by using the dremel and cut-off wheel to cut out a long rectangle of fairly thick plastic (keep in mind that you will drill into this, so the thicker the better).
Now cut out a smaller block-like rectangle and shape it as seen below. An important note is that the middle part should be the same length as the first long rectangle. Use a thin to medium thickness piece of plastic here.
For the base of the jack and easiest step, just cut out a rectangle about the same size as the one you just cut out, and make sure it's pretty thick as well.
Now this is the HARDEST step. I'm not really sure how to describe it. Cut out a very thick piece of plastic that is about 2/3 to 1/2 the size of the first rectangle. Using the needle nose pliers to hold the piece and your dremel with cut-off wheel, cut off the edges of the rectangle and keep grinding it and shaping it until it resembles a handle or cylinder. Don't forget to round the top and keep the bottom flat.
Go to your drill index set and grab number 73 or whatever size you think is best and put it in your drill or dremel.
Take the razor blade mentioned earlier and use the tip of it to 'drill' (by spinning the blade) little starter holes in the first long rectangle. Once that is done you can drill pretty quickly (although haste makes waste, take your time) through the plastic to make your holes.
Using the cut-off wheel again, make a tiny notch in the long rectangle that is the same height of the lifty party we made in step 2. This is for the lifty thing to rest in on the jack. Be careful not to cut the long rectangle so thin that it breaks as I almost did.
We're almost done! Grab your crazy glue and start gluing the lifty thing-a-ma-jig to the long rectangle. Then glue the handle to the end of the lifty thing. Lastly glue the base to the rest of it. You get the idea.
All that is left is to paint it. Just a word for the wise, leave the space between the handle and the jack clear. No one will notice and it's way too hard to get back in there. If you use steady hands and some good technique, most of the paint will naturally flow into the tricky areas. You can use a need when you are done to clear the holes of paint again.
Note: using the razor blade after each step to clean up the plastic you cut off will make your jack look that much better. Also, after you have drilled all the holes in the long rectangle, take bit that is a little bit larger and BY HAND, twist the bit on the holes and it should clear out any excess plastic.
So if you ask me, this is a pretty recognizable Hi-Lift Jack. Frizzen, I have nothing against you and I only did this to help you any one else who wants to build one. Please don't think I'm trying to make you look stupid in any way. Thanks for getting me off my butt to make one of these. I'm glad I did.
Project Willy
ZZMT
-Articulation Mod
-288:1 Gear Ratio
-BB Steering Servo
-Extended Wheelbase
-Widened Axles
-Polaris ATV Tires
-Dean Plugs
-1:35 Scale Willy's Flatfender body
ZZMT
-Articulation Mod
-288:1 Gear Ratio
-BB Steering Servo
-Extended Wheelbase
-Widened Axles
-Polaris ATV Tires
-Dean Plugs
-1:35 Scale Willy's Flatfender body
-
frizzen
- bitDisciple
- Posts: 1730
- Joined: Wed Aug 03, 2005 7:48 am
- Location: Big Left Turn, Indiana
- Contact:
You sir, are one hell of a builder!
Wow.
Ok, you got me, scared and lazy. You have well and truely proven me wrong. Thanks for the tutorial and giving me a push to build it!
Jack of all trades, master of none; yet often better than master of one.
-
End genital mutilation, don't circumcise. Restore your fore'
-
End genital mutilation, don't circumcise. Restore your fore'
-
SHAUN
- bitDisciple
- Posts: 1462
- Joined: Wed Oct 05, 2005 10:35 am
- Location: On the trail
- Contact:
-
sidewinder
- bitProphet
- Posts: 3165
- Joined: Wed Apr 25, 2007 6:31 pm
- Location: Walmart
-
Smoke&Mirrors
- bitGangsta'
- Posts: 258
- Joined: Sun Feb 10, 2008 1:52 am
- Location: Nor Cal
That's pushing it. Although I've decided to swap the ZZSE servo in my project rubi for a 5th gear mod and use it instead as a winch on that crawler. That way, while it may have less torque and get stuck more easily, it will be pretty easy to get it out.sidewinder wrote:Yeah like they said, very coolNow how about a working version
Project Willy
ZZMT
-Articulation Mod
-288:1 Gear Ratio
-BB Steering Servo
-Extended Wheelbase
-Widened Axles
-Polaris ATV Tires
-Dean Plugs
-1:35 Scale Willy's Flatfender body
ZZMT
-Articulation Mod
-288:1 Gear Ratio
-BB Steering Servo
-Extended Wheelbase
-Widened Axles
-Polaris ATV Tires
-Dean Plugs
-1:35 Scale Willy's Flatfender body
-
frizzen
- bitDisciple
- Posts: 1730
- Joined: Wed Aug 03, 2005 7:48 am
- Location: Big Left Turn, Indiana
- Contact:
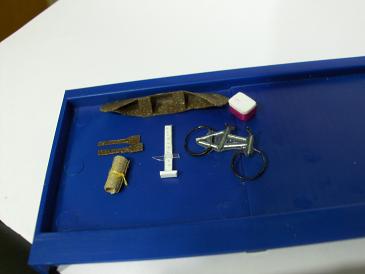
Ok I got around to building a jack, I still need to add color and mount the handle, but I've got a Hilift now.
I also realized your hilift is more detailed than a couple I've seen for sale in 1/10 scale.
I also realized your hilift is more detailed than a couple I've seen for sale in 1/10 scale.
Jack of all trades, master of none; yet often better than master of one.
-
End genital mutilation, don't circumcise. Restore your fore'
-
End genital mutilation, don't circumcise. Restore your fore'
-
Smoke&Mirrors
- bitGangsta'
- Posts: 258
- Joined: Sun Feb 10, 2008 1:52 am
- Location: Nor Cal
Thanks. I've always been one for details. My friends often associate the word 'meticulous' with me when that little game goes around. Sure I'm slow, but I put out the best result. I'm sure you all know how that is. If you're going to do it all, you might as well do it right. Right? Right!. Wanna post up some pictures? I'd love to see your work, or it mounted on your rig. I'll try making an extinguisher this weekend maybe.frizzen wrote:Ok I got around to building a jack, I still need to add color and mount the handle, but I've got a Hilift now.
I also realized your hilift is more detailed than a couple I've seen for sale in 1/10 scale.
Project Willy
ZZMT
-Articulation Mod
-288:1 Gear Ratio
-BB Steering Servo
-Extended Wheelbase
-Widened Axles
-Polaris ATV Tires
-Dean Plugs
-1:35 Scale Willy's Flatfender body
ZZMT
-Articulation Mod
-288:1 Gear Ratio
-BB Steering Servo
-Extended Wheelbase
-Widened Axles
-Polaris ATV Tires
-Dean Plugs
-1:35 Scale Willy's Flatfender body
-
frizzen
- bitDisciple
- Posts: 1730
- Joined: Wed Aug 03, 2005 7:48 am
- Location: Big Left Turn, Indiana
- Contact:
-
Smoke&Mirrors
- bitGangsta'
- Posts: 258
- Joined: Sun Feb 10, 2008 1:52 am
- Location: Nor Cal
Well they do that too, but that usually goes with a different set of insults. Moving on, I really like that cooler. What did you make it out of?frizzen wrote:Your friends call you meticulous? Mine just call me anal...
Didn't really photograph that well, needs paint and handle attached.
Project Willy
ZZMT
-Articulation Mod
-288:1 Gear Ratio
-BB Steering Servo
-Extended Wheelbase
-Widened Axles
-Polaris ATV Tires
-Dean Plugs
-1:35 Scale Willy's Flatfender body
ZZMT
-Articulation Mod
-288:1 Gear Ratio
-BB Steering Servo
-Extended Wheelbase
-Widened Axles
-Polaris ATV Tires
-Dean Plugs
-1:35 Scale Willy's Flatfender body
-
frizzen
- bitDisciple
- Posts: 1730
- Joined: Wed Aug 03, 2005 7:48 am
- Location: Big Left Turn, Indiana
- Contact:
Cooler was laminated out of 4 layers of 0.040" styrene, CA layers together, file to size, round corners, good luck getting it all symmetrical. When I added color (sharpie) it was easy to folow the top lamination line which kept the lid evenly thick.
Jack of all trades, master of none; yet often better than master of one.
-
End genital mutilation, don't circumcise. Restore your fore'
-
End genital mutilation, don't circumcise. Restore your fore'
-
Smoke&Mirrors
- bitGangsta'
- Posts: 258
- Joined: Sun Feb 10, 2008 1:52 am
- Location: Nor Cal
Oh thanks. One More questions: I've been asking around and haven't yet found an answer. Where can I get styrene. Is there a brand name that would help me find it?frizzen wrote:Cooler was laminated out of 4 layers of 0.040" styrene, CA layers together, file to size, round corners, good luck getting it all symmetrical. When I added color (sharpie) it was easy to folow the top lamination line which kept the lid evenly thick.
Project Willy
ZZMT
-Articulation Mod
-288:1 Gear Ratio
-BB Steering Servo
-Extended Wheelbase
-Widened Axles
-Polaris ATV Tires
-Dean Plugs
-1:35 Scale Willy's Flatfender body
ZZMT
-Articulation Mod
-288:1 Gear Ratio
-BB Steering Servo
-Extended Wheelbase
-Widened Axles
-Polaris ATV Tires
-Dean Plugs
-1:35 Scale Willy's Flatfender body
-
frizzen
- bitDisciple
- Posts: 1730
- Joined: Wed Aug 03, 2005 7:48 am
- Location: Big Left Turn, Indiana
- Contact:
My styrene was from a local hobby shop. Evergreen brand. Sheets are something like 12x24 in, also have all kinds of tubes and extrusions. If you have a hobby shop that's big into Models or Trains, you're set.
It's also one of the most widely used plastics for product packaging and gift cards.
It's also one of the most widely used plastics for product packaging and gift cards.
Jack of all trades, master of none; yet often better than master of one.
-
End genital mutilation, don't circumcise. Restore your fore'
-
End genital mutilation, don't circumcise. Restore your fore'
-
ynad

- bitNinja
- Posts: 776
- Joined: Fri Apr 30, 2004 12:22 am
- Location: NYC/NJ
-
sidewinder
- bitProphet
- Posts: 3165
- Joined: Wed Apr 25, 2007 6:31 pm
- Location: Walmart
You mean like anal retentive right? Or is there something you need to get off your chest? We're here for ya buddyfrizzen wrote:Your friends call you meticulous? Mine just call me anal...
The smallest minority on earth is the individual. Those who deny individual rights cannot claim to be defenders of minorities. - Ayn Rand
-
frizzen
- bitDisciple
- Posts: 1730
- Joined: Wed Aug 03, 2005 7:48 am
- Location: Big Left Turn, Indiana
- Contact: