Swaybar Spring Suspension (Tutorial)
Posted: Sun Oct 01, 2006 4:33 pm
I was talking with Shaun last night about Off-Road performance mods for the Walgreens Charg-N-Go bullet clone Trucks. One of the mods I suggested as being incredibly good, is one that I've mentioned a few times but I think it's been generally overlooked because it's not as trick as coilover springs on the knuckles, but it does work. And it works well.
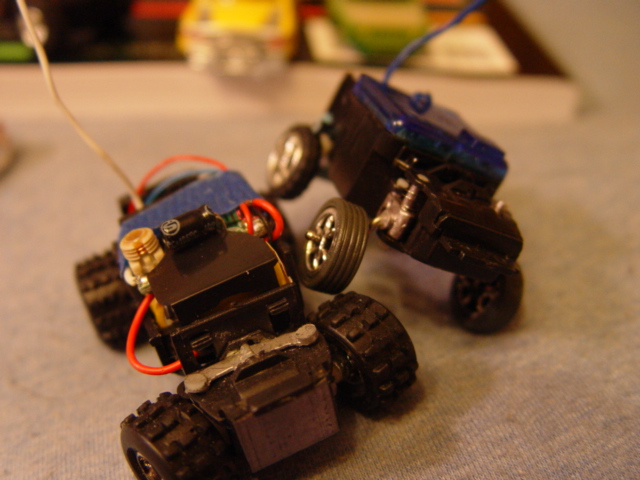
Which one of these vehicles has a "sprung" front end?

They both do.
---------
Ok, before you call BS on me, grab one of your old swaybars. If you're using one off a really cheap clone, preferably one with a deeper "V" but any of them should work as long as they aren't completely flat. We're going to be removing the little structural rib that goes across the top, and thinning our the arms between fulcrum and the end pads. Then, the swaybar is inverted and snapped back into the chassis *upsidedown* so what used to be the top that would limit how high the knuckle would go is now pushing the knuckle down.
Instead of a fixed tension coil spring like we all traditionally use on these, you're making a torsion spring that you can fine tune to be as firm or complient as you wish.
Grab an old swaybar, a file, a knife, maybe a gnawing rodent, and even something to drink (optional). We'll get started as soon as I finish taking some pics.
------

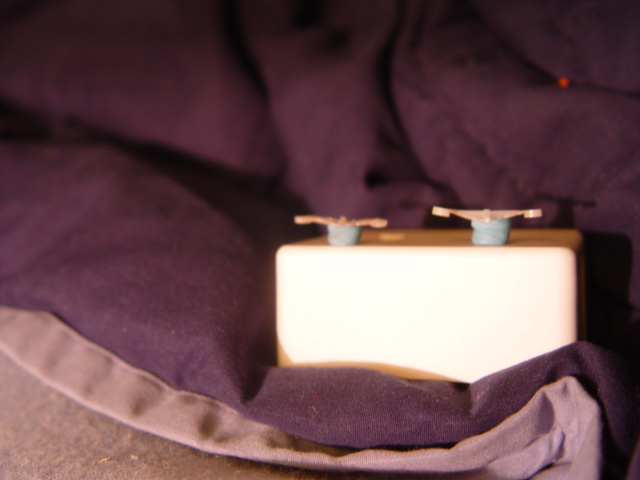
Ok, in this absolutely HORRIBLE pic, the stock one I'm starting with is on Right. If you use your imagination, you can almost see the stiffening bar across the top I was talking about. God that pic sucks.
Use the file, knife, or gnawing rodent to fairly carefully hack that stupid stiffening spine off. It's dead to you!
Once that stiffener is removed it should look something vaguely like the thing on the left. Only yours should be in focus, and hopefully look like the gnawing rodent didn't go too far.
Then just grab your file (or absurdly sharp knife if you really think you're that good) and smooth up any mistakes you might have made, then start thinning out the thickness of the swaybar. I can't tell you how far to go, just that you want it to be nice and springy under the weight of the bit, yet you don't want it to be too hard or too soft.
Be sure that you get your right and left sides as closely balanced in force as possible. (Though I guess if you were doing an oval-track racer, you'd want one side softer, but you'd be weird.) Anyway, just keep fiddling with it until they're perfect. If you're building a Jumper, then leave the bar stiffer; if you want something to soak up all the bumps, go thinner.
Make absolutely positive that you don't have any abrupt transitions in material thickness between the fulcrum and the pads, otherwise it'll be a stress riser and be MUCH more likely to break there. Haven't had it happen, but don't want you to risk it. The swaybars were NEVER intended to be used this way, I'm sure their material isn't too well suited for it.
After you finish modding it down, I'd reccomend some kind of color coding for it, so you can tell it's not a standard swaybar anymore.
-
Ok maybe it's a hack job, but it allows ANYBODY to run a sprung front-end without having to open the steering box and risk screwing it up, and the need to find those tiny coil springs is gone too. Probably will take well under half an hour if you know how to use a file, the gnawing rodent doesn't run off with the part, and you're not drinking something really high proof.
Which one of these vehicles has a "sprung" front end?
They both do.
---------
Ok, before you call BS on me, grab one of your old swaybars. If you're using one off a really cheap clone, preferably one with a deeper "V" but any of them should work as long as they aren't completely flat. We're going to be removing the little structural rib that goes across the top, and thinning our the arms between fulcrum and the end pads. Then, the swaybar is inverted and snapped back into the chassis *upsidedown* so what used to be the top that would limit how high the knuckle would go is now pushing the knuckle down.
Instead of a fixed tension coil spring like we all traditionally use on these, you're making a torsion spring that you can fine tune to be as firm or complient as you wish.
Grab an old swaybar, a file, a knife, maybe a gnawing rodent, and even something to drink (optional). We'll get started as soon as I finish taking some pics.
------
Ok, in this absolutely HORRIBLE pic, the stock one I'm starting with is on Right. If you use your imagination, you can almost see the stiffening bar across the top I was talking about.
Use the file, knife, or gnawing rodent to fairly carefully hack that stupid stiffening spine off. It's dead to you!
Once that stiffener is removed it should look something vaguely like the thing on the left. Only yours should be in focus, and hopefully look like the gnawing rodent didn't go too far.
Then just grab your file (or absurdly sharp knife if you really think you're that good) and smooth up any mistakes you might have made, then start thinning out the thickness of the swaybar. I can't tell you how far to go, just that you want it to be nice and springy under the weight of the bit, yet you don't want it to be too hard or too soft.
Be sure that you get your right and left sides as closely balanced in force as possible. (Though I guess if you were doing an oval-track racer, you'd want one side softer, but you'd be weird.) Anyway, just keep fiddling with it until they're perfect. If you're building a Jumper, then leave the bar stiffer; if you want something to soak up all the bumps, go thinner.
Make absolutely positive that you don't have any abrupt transitions in material thickness between the fulcrum and the pads, otherwise it'll be a stress riser and be MUCH more likely to break there. Haven't had it happen, but don't want you to risk it. The swaybars were NEVER intended to be used this way, I'm sure their material isn't too well suited for it.
After you finish modding it down, I'd reccomend some kind of color coding for it, so you can tell it's not a standard swaybar anymore.
-
Ok maybe it's a hack job, but it allows ANYBODY to run a sprung front-end without having to open the steering box and risk screwing it up, and the need to find those tiny coil springs is gone too. Probably will take well under half an hour if you know how to use a file, the gnawing rodent doesn't run off with the part, and you're not drinking something really high proof.

