Page 1 of 2

Kamikaze Kustoms Zero D Build

Posted: Tue Oct 14, 2008 9:55 pm
by SHAUN
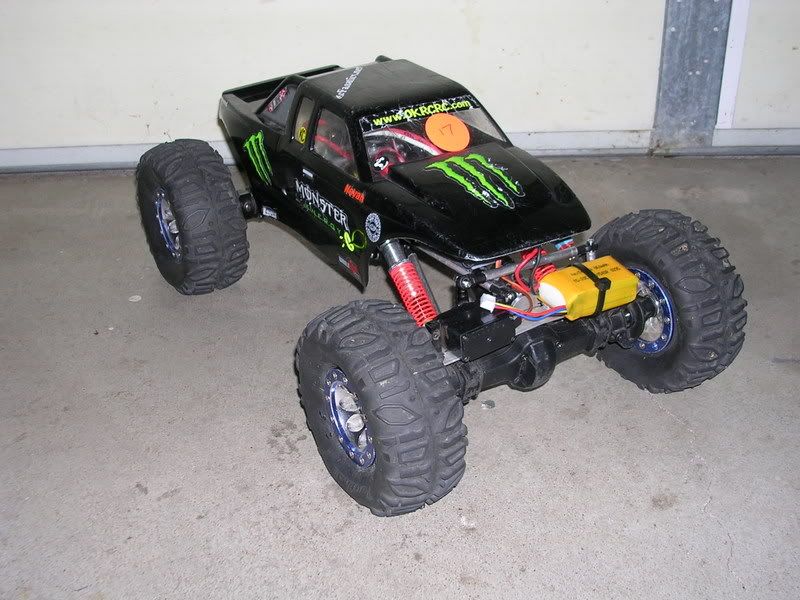
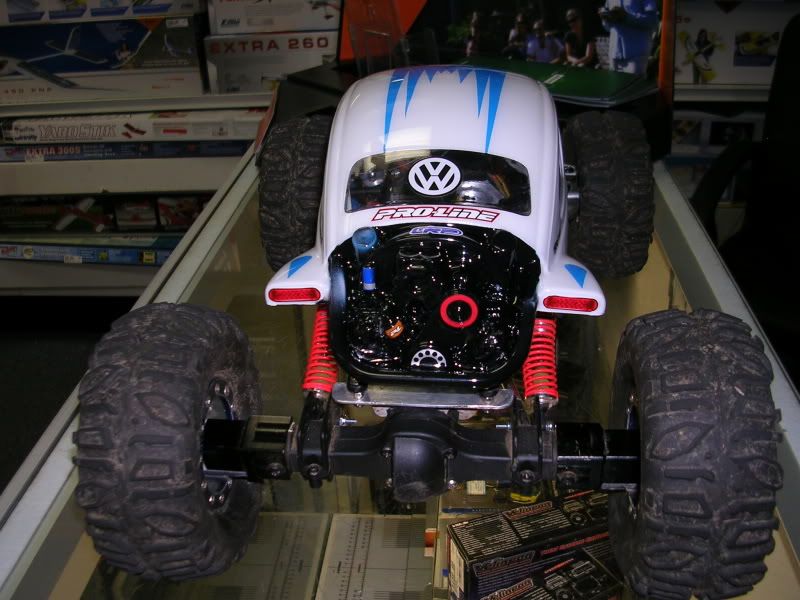
Well, I have had this chassis in hand for a few weeks, but wanted to wait till after Crawlapalooza to start the build.

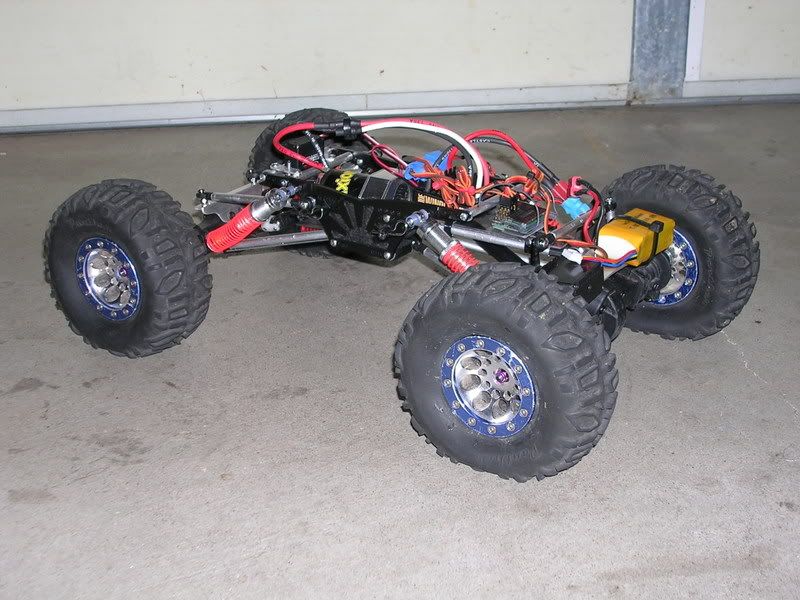
I will be using the Kamikaze Kustoms Zero D chassis.

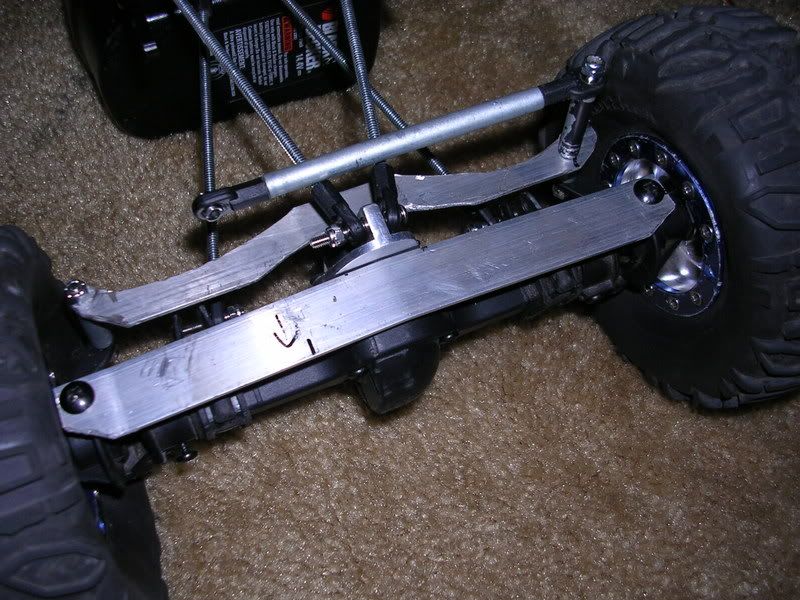
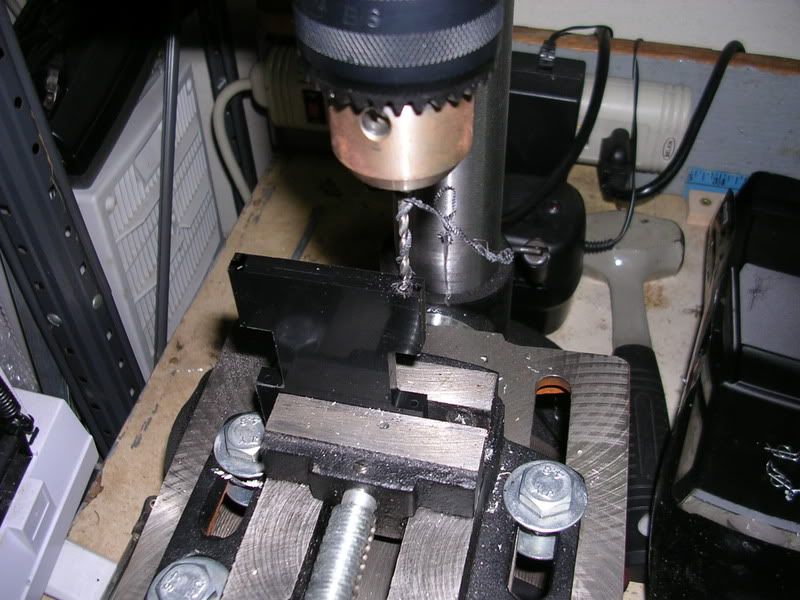
First of all I needed to punch some holes in the skid so I could mount the side plates.
Image

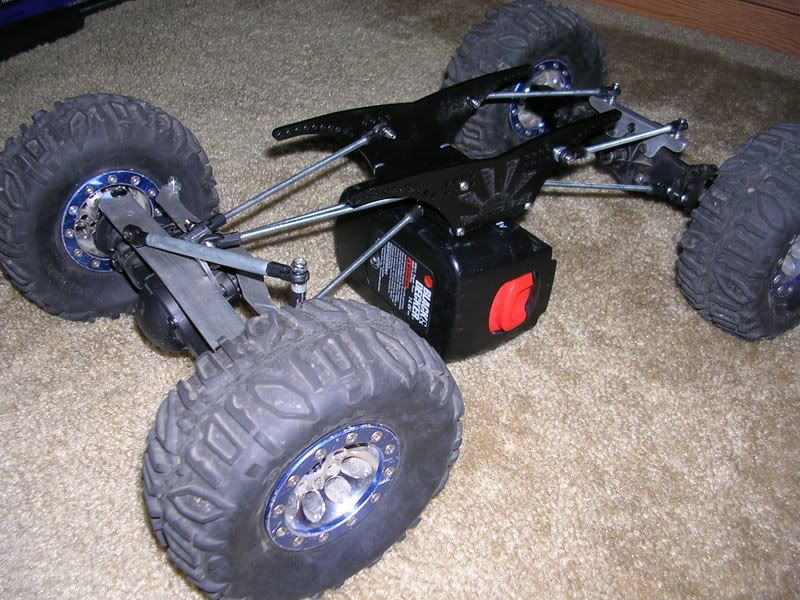
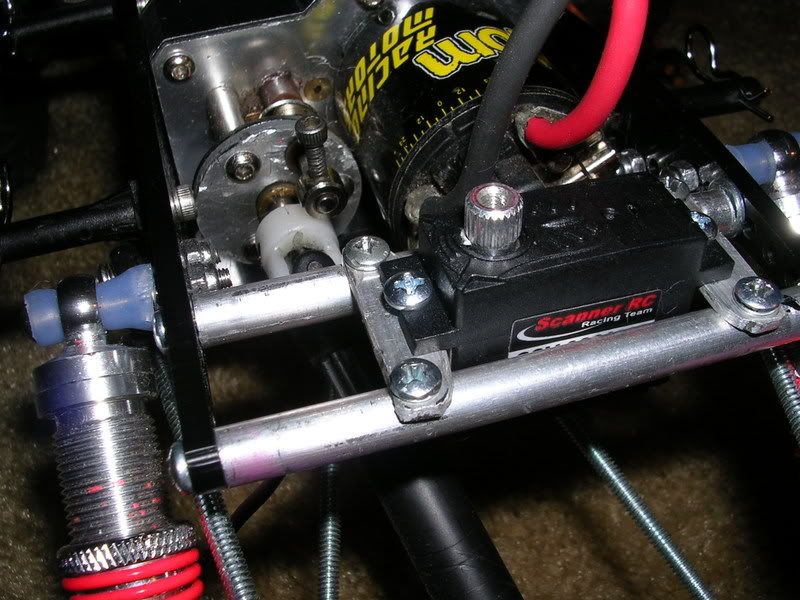
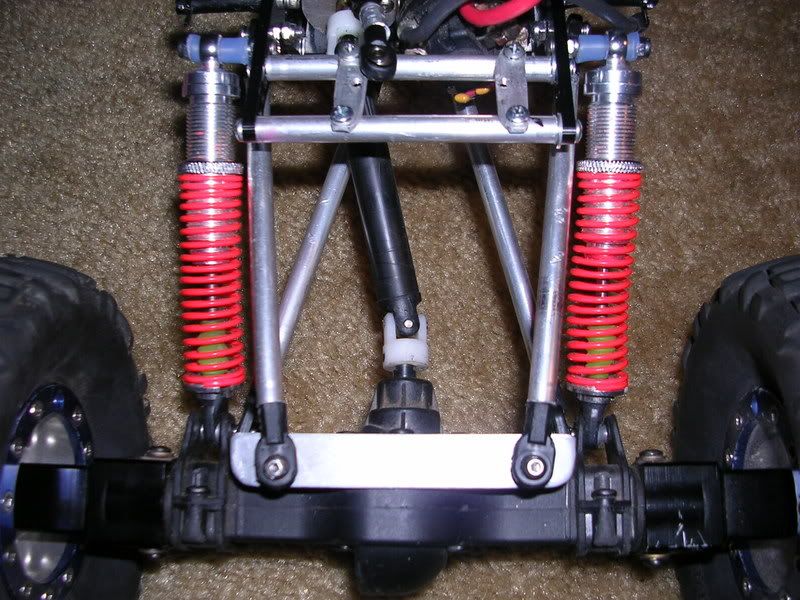
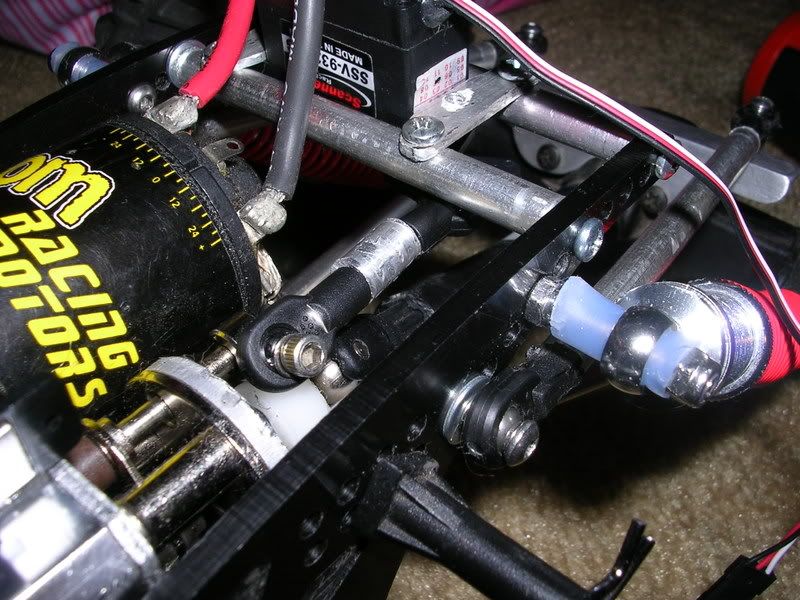
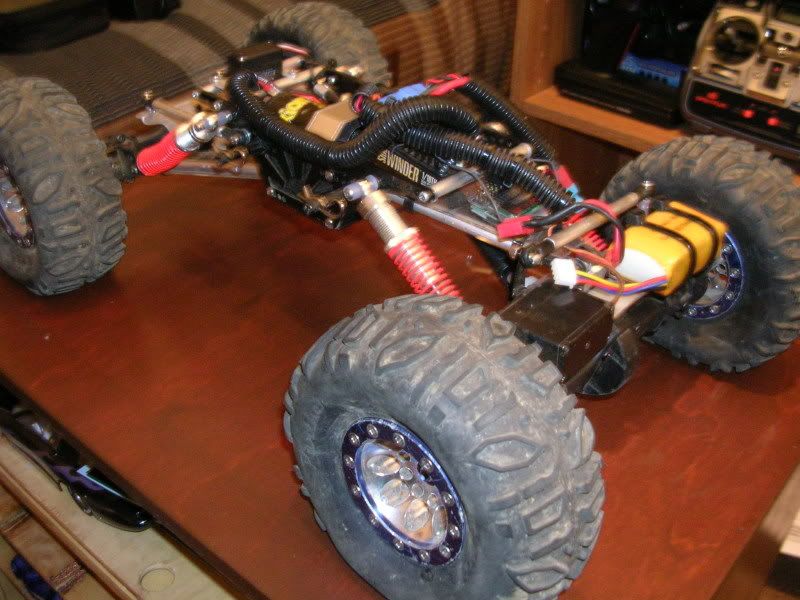
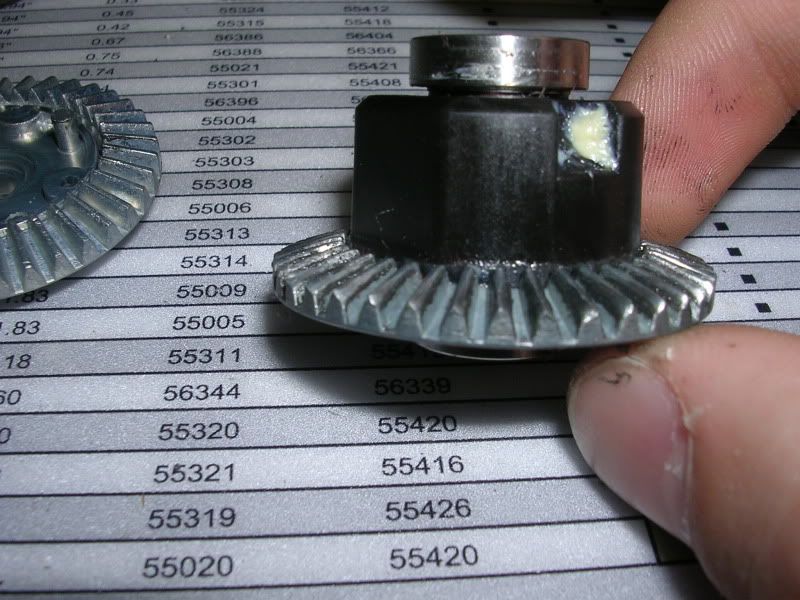
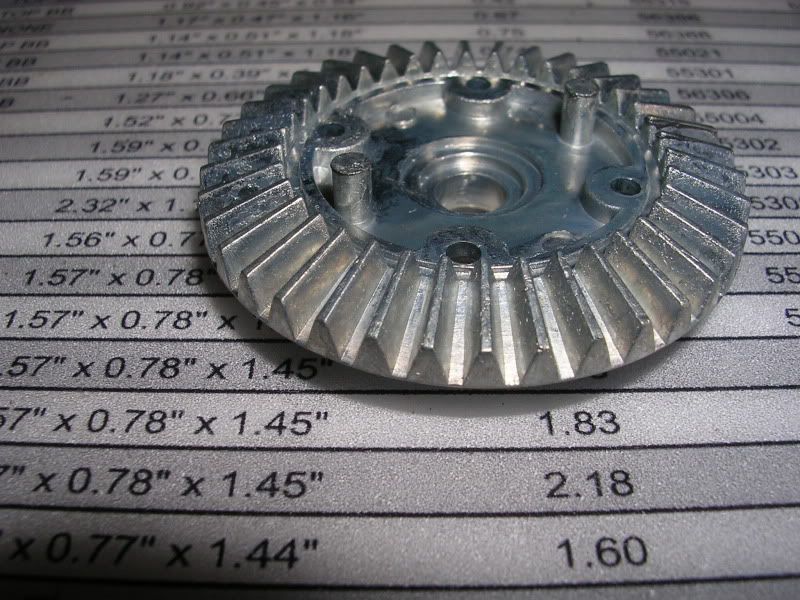
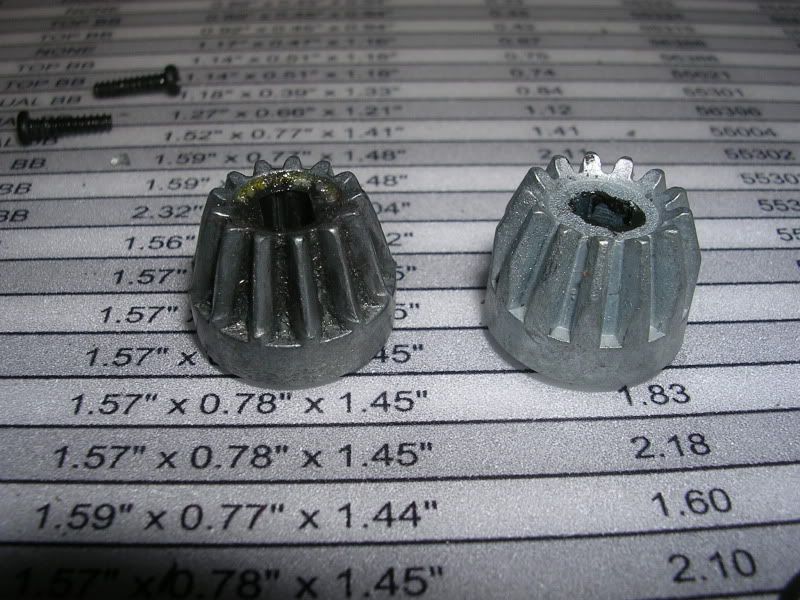
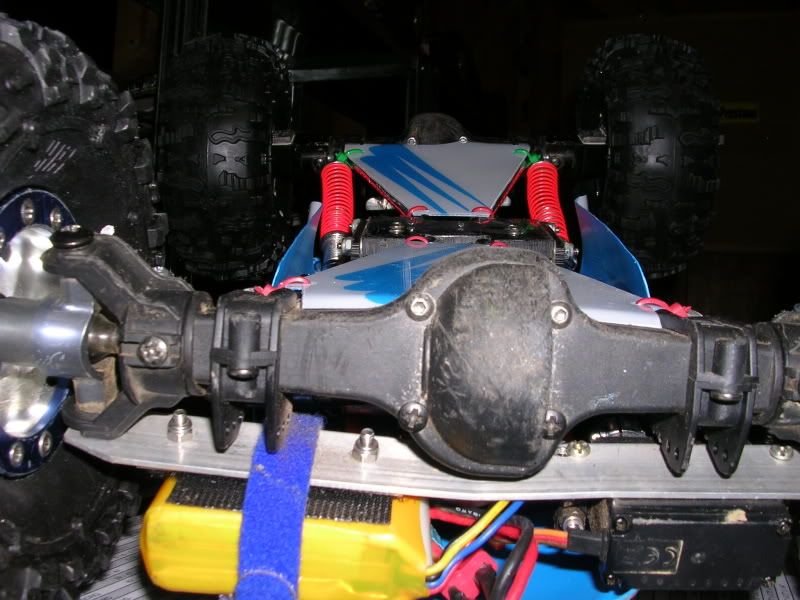
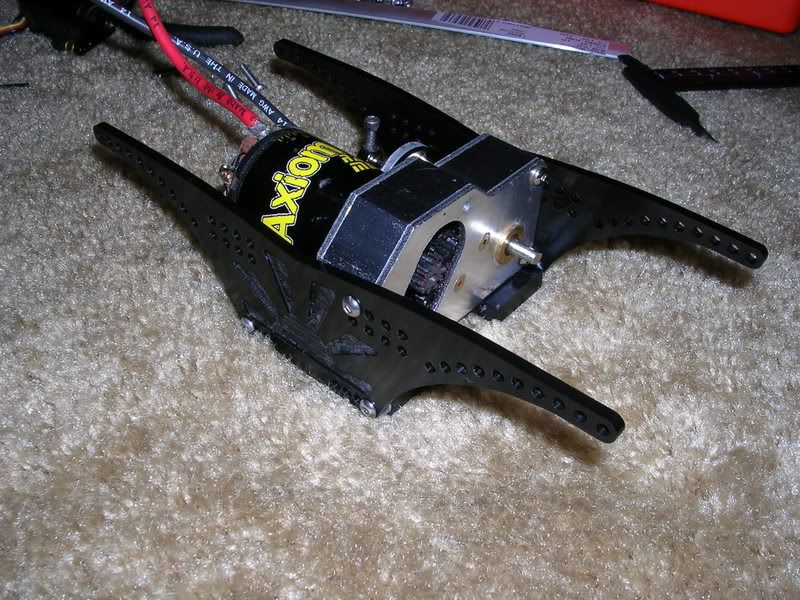
The R2D Trans, paired with a Axiom 55 turn lathe motor fits nicely.
Image

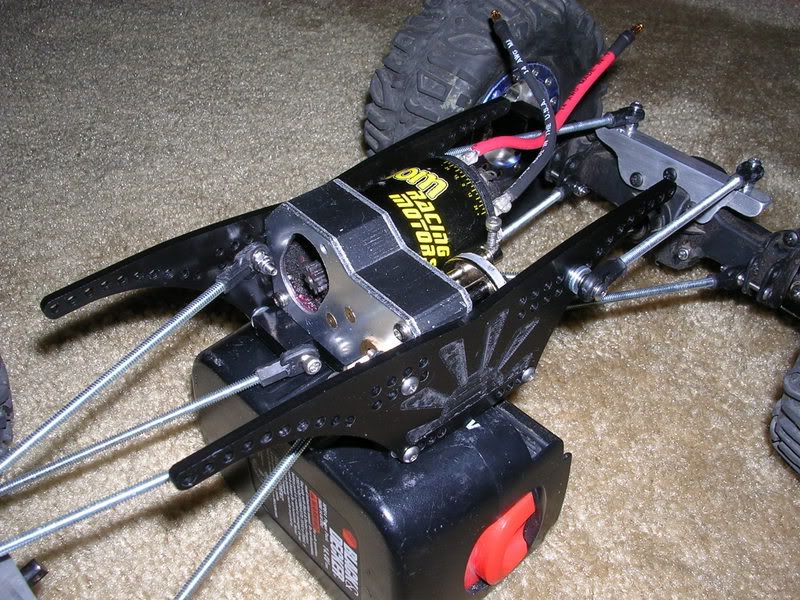
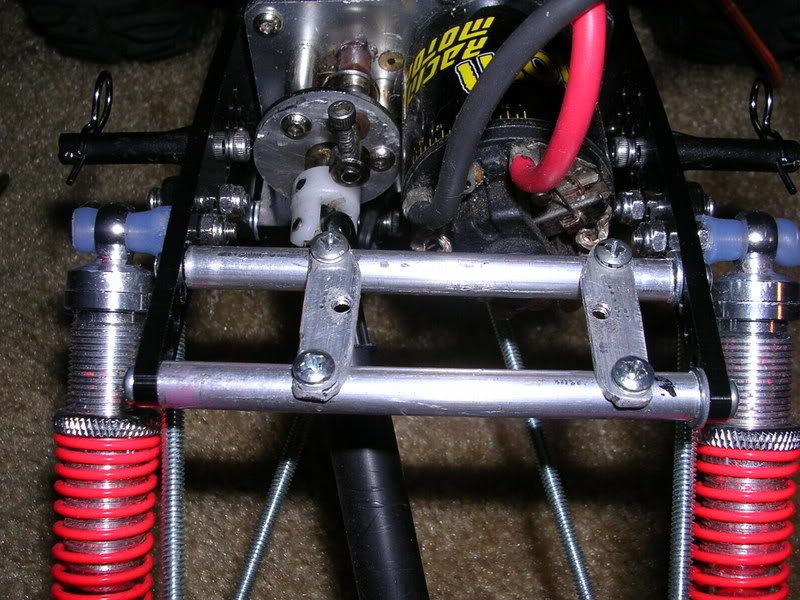
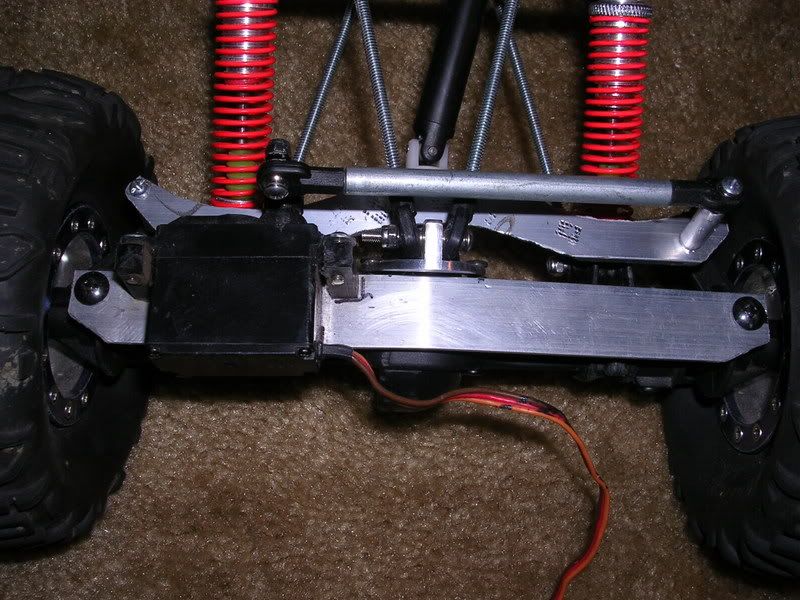
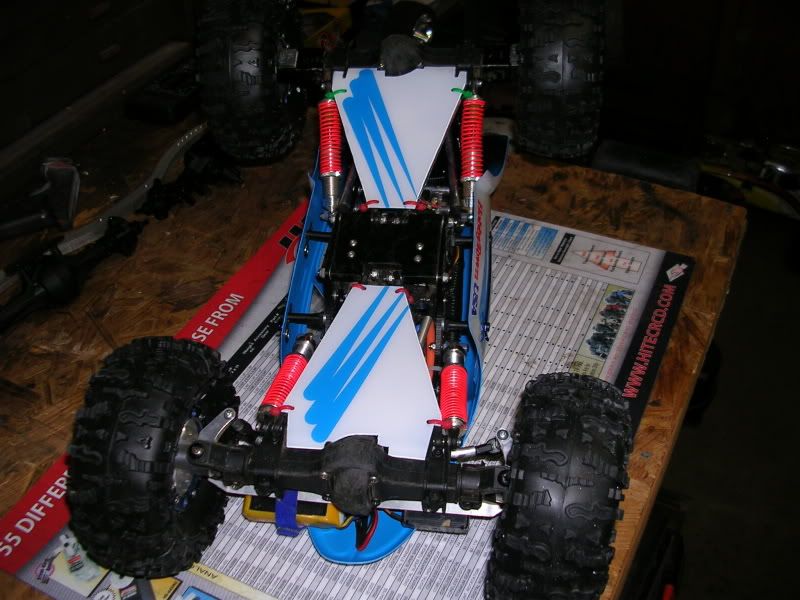
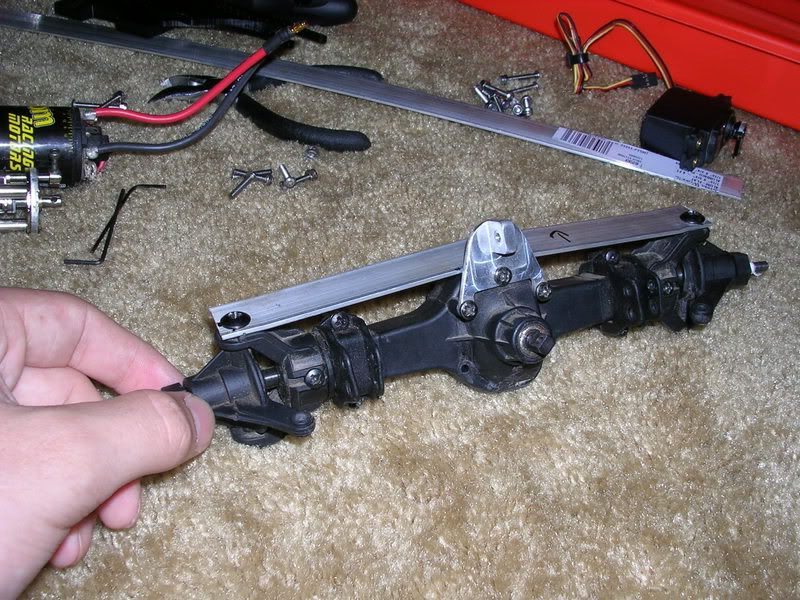
I will be attempting to do BTA steering with this build. Here is the mount I made for my Battery and Servo, keep in mind it needs alot of work still.
Image

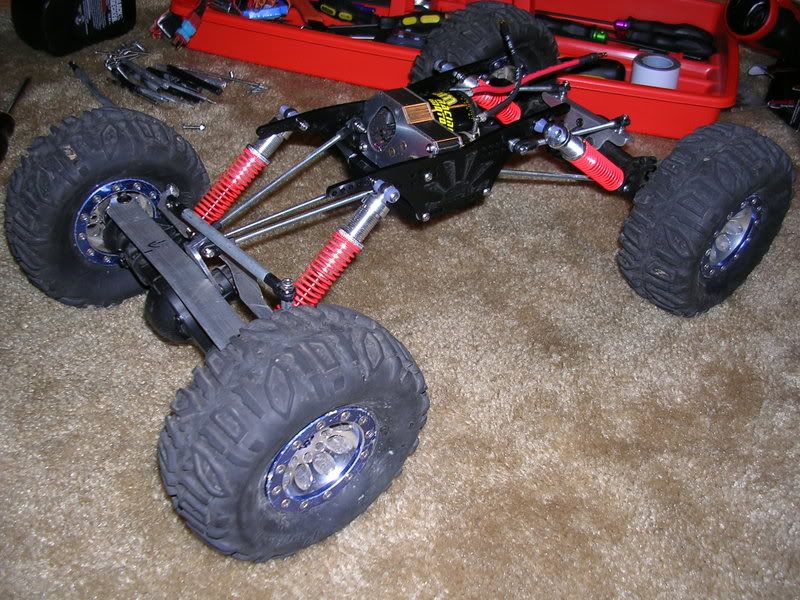
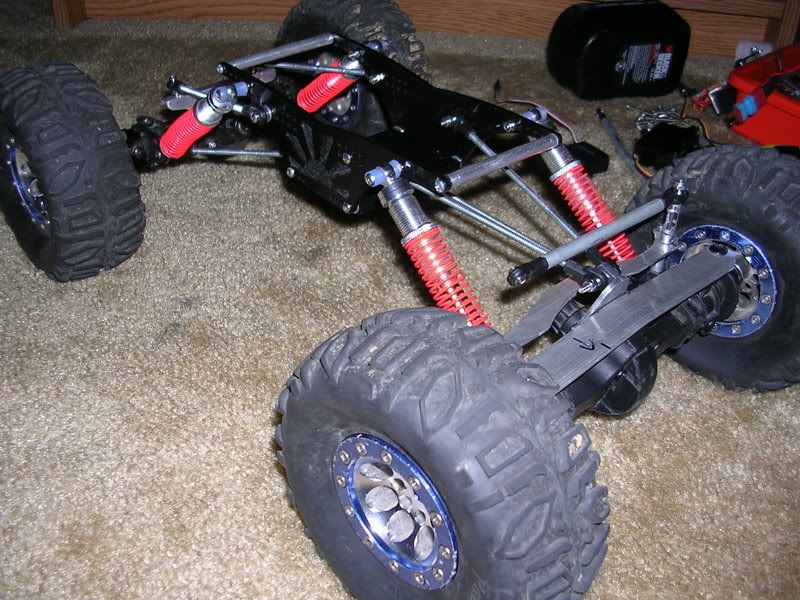
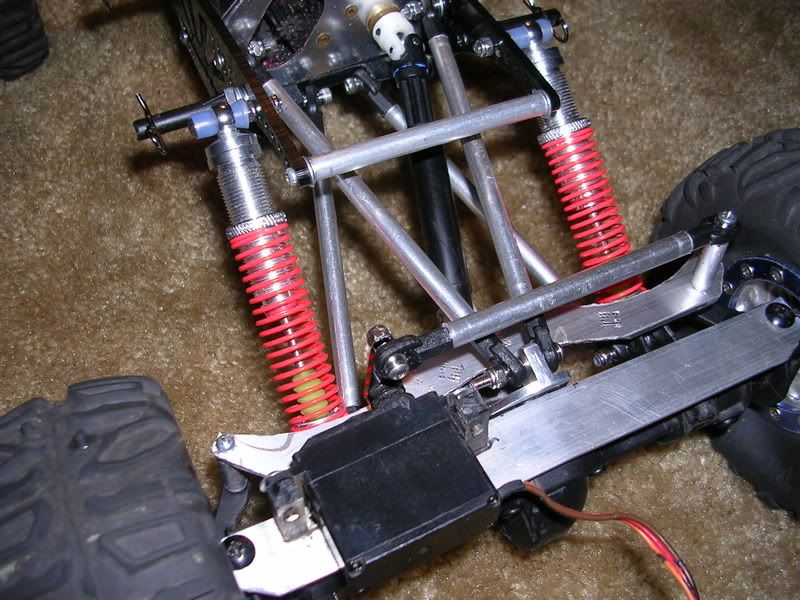
A Small mock up, I will be using 1/4 inch solid aluminum rod for the links, I'm using the Althread for mock up, because it is easy to cut, and adjust.
Image

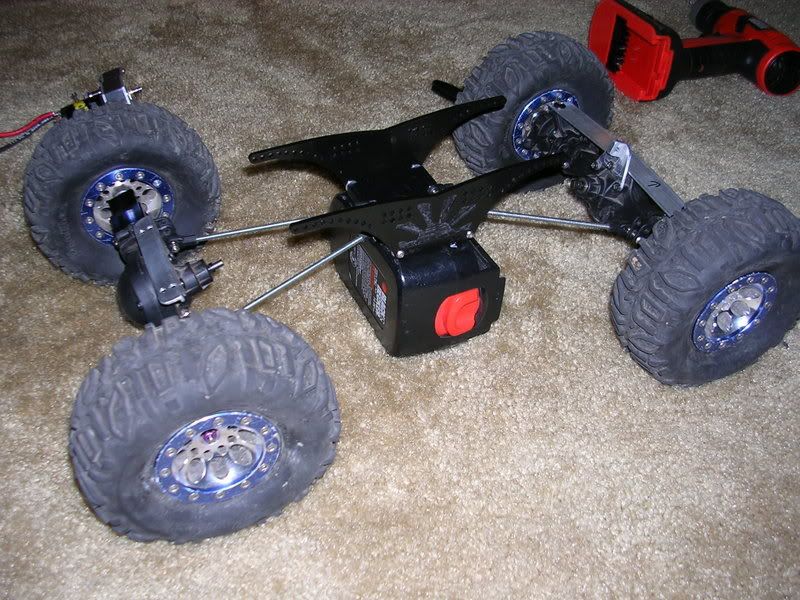
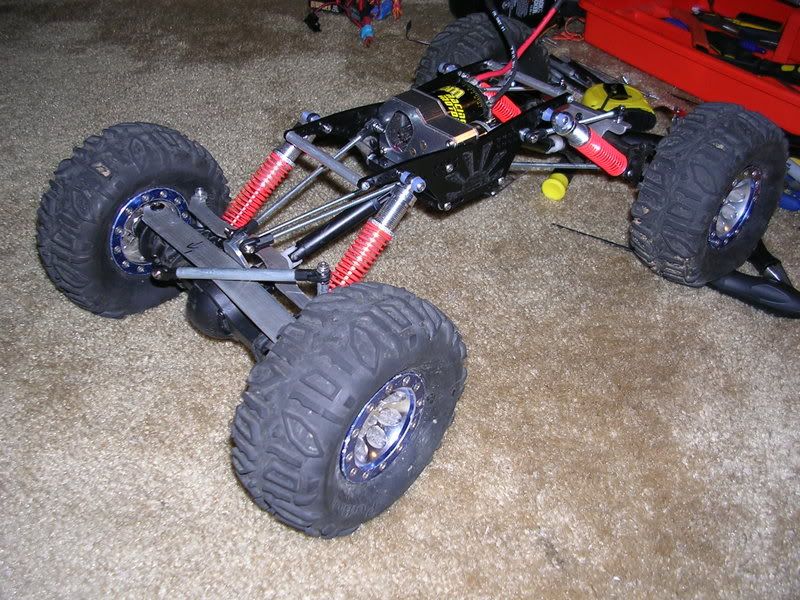
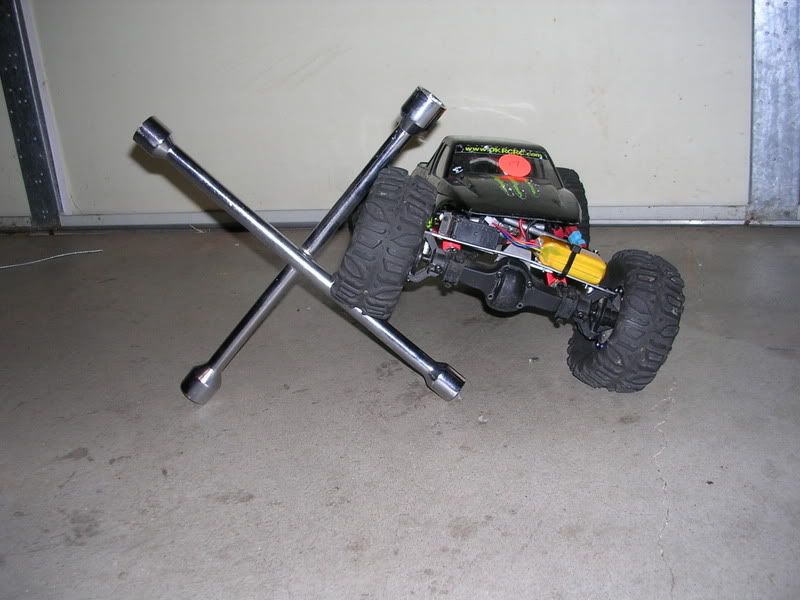
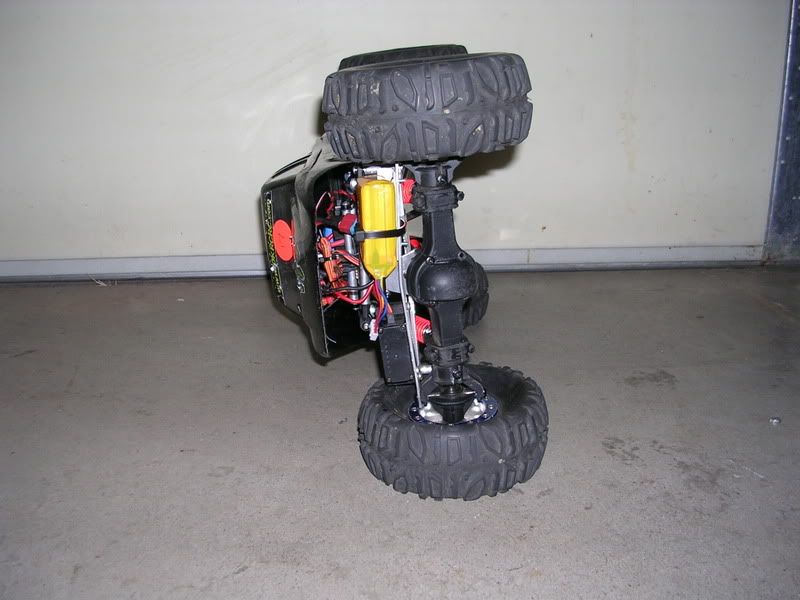
I will have more in the morning. I have to say, this chassis is awesome, I have 3 inches of ground clearance and the highest point of the chassis, is just over a 1/16th of an inch above the tires.

Posted: Tue Oct 14, 2008 11:42 pm
by crazydave
So why did you want another chassis? Was it just the ground clearance?

Posted: Wed Oct 15, 2008 9:57 am
by SHAUN
crazydave wrote:So why did you want another chassis? Was it just the ground clearance?
That, and I'm kinda going to a different set up.

Here is an Update, I got an idea of where I want the links to end up. I also got a little more work done to the tie rod, the final version of the tie rod, will be made from 1/8 inch aluminum.

Still not finished with the tie rod, but getting closer.
Image

What I'm planning on for the links.
Image

R2D, is nice and snug inside the chassis.
Image

Posted: Wed Oct 15, 2008 10:14 am
by crazydave
Interesting, so you've flipped the steering knuckle to put the tie rod behind the axle. Is that something people are doing now?

Is that 6/32 rod in the linkages?

Posted: Wed Oct 15, 2008 10:29 am
by SHAUN
Yes, I'm use 6-32 althread for mock up links, once I decide if this is how I want the links I'm going to make links from 1/4 solid aluminum rod.

I believe I may be the first person to do BTA(Behind the Axle) steering on wheely king axles, a few people have done it on AX-10 axles.

Posted: Wed Oct 15, 2008 11:54 am
by SHAUN
I need to pick up some harder springs, but this is what I got after a little work this morning. I found out that I can bump it up to 3 1/2" of ground clearance and still be able to stand it on its side with the r2, motor, and electronics sitting in it. I really need to get a hold of some shorter shocks.

Image

Posted: Wed Oct 15, 2008 6:42 pm
by SHAUN
Chassis braces, and transmission installed.

Image

Image

Posted: Wed Oct 15, 2008 8:45 pm
by BilboBaggins
So is that the chassis from the company that is now your sponsor?

So I'm guessing the Behind the Axle steering doesn't get caught on the rocks as easily as front steer.

Re:

Posted: Mon Jan 19, 2009 12:57 am
by SHAUN
BilboBaggins wrote:So is that the chassis from the company that is now your sponsor?

So I'm guessing the Behind the Axle steering doesn't get caught on the rocks as easily as front steer.
Yes, and yes. I haven't been around here for a while, but I'm back here now.

I got my dig servo mounted, and I got my 1/8th" tie-rod made, it only took me a hundred cut off wheels to get it cut out, and I still have alot of clean up to do.


All I have to do is cut the links, and a drag link. Then I'm either going to polish everything aluminum or have it anodized red, what do you guys think? I can't wait till I finish it and my dad heals and I can go kick some ass at some comps..... Naw I'll loose anyway.

Image

Image

The servo is straight, it just looks weird in the pics, I still have alot of clean up to do on the tie-rod.
Image

I got the front links done.
Image

I got the rear finished as well.
Image

Runs great, super stable, and will crawl over anything. The other OKRCRC guys better watch out for me this season"thumbsup"

Image

Image

Image

Its got a bit more flex, but I might limit it a little bit, I don't want it to have very much.
Image

New angle on the dig. I'm going to redo the link.
Image

Complete with battery and body, and electronics. If it had some hybrid foams it would be even more stable.
Image

How can you beat that? 3" of ground clearance and still stand it on its side, with a shafty! Now go buy your self a ZERO!

I have some stock Losi Rock Claw foams headed my way, I plan to cut them, and stick them on the sides on the stock memory foams, so it will be a Hybrid foam. Also if anyone is wondering I'm making the links from solid 1/8th inch aluminum rod. I cut the rod to length, trill it, and tap it with a 6-32 tap, I use 6-32 althread for studs. Then I drill the Traxxas link ends, to accept the 6-32 althead.

I still have a few things I need;
Axial AX-10 HD ring and pinion(x2)
RCP high clearance aluminum knuckles
RCP aluminum C-hubs
Stage 3 Racing chromoly lockers
HS-225MG(for dig)
5955 Steering servo


I'm also thinking of polishing all of the aluminum.

Re: Kamikaze Kustoms Zero D Build

Posted: Mon Jan 19, 2009 2:09 am
by sidewinder
Looking good...but yeah, you gotta polish the aluminum, or anodize it. :-o

Re: Kamikaze Kustoms Zero D Build

Posted: Sun Mar 22, 2009 9:31 pm
by SHAUN
Thanks.

I finally got it running, I have taken it out for a shake down run, and it did very good. It handles excellent, I was amazed at what it went through.

When I get paid on Friday, I have to order this list of parts.

Axial Harden Ring and Pinion(X2)
Integy Aluminum Axle C
Integy Aluminum Knuckle
HS-85MG dig servo

I also got the wiring cleaned up
Image

Re: Kamikaze Kustoms Zero D Build

Posted: Fri Sep 18, 2009 9:34 pm
by SHAUN
Getting the rig ready for crawlapalooza '09. I have only got to make one comp this year because I have been working so much 60+ hours a week.

I got a new lid, the Proline bug body, I like the paint I did actually, its the first body that I've done that I actually like.

Image

Image

Image

Image

I also just got my Hot Bodies Rovers in today, they are awesome, I haven't got to crawl with them yet and no pics yet, but they feel really nice.

Heres some other changes I've done to it.
Had to swap my front ring and pinion. Reverse+dig+sticky tires really kill these things, and I'm to cheap to buy the Hardened R&P, these are only $6 for a R&P and the out put shaft is 6mm instead of 5mm like on the hardened R&P.

Old
Image

New
Image

Old(left) New(right)
Image

My new foam set up, I'll also be running this in the Rovers too.
Image

Sorry for the bad lighting, but here is a pic of the truck assembled.
Image

Re: Kamikaze Kustoms Zero D Build

Posted: Sun Sep 20, 2009 5:42 pm
by redrustbucket
Bug body looks sweet!

Re: Kamikaze Kustoms Zero D Build

Posted: Mon Sep 21, 2009 9:56 pm
by PimpFloyd
Ditto on the nice looking Baja body :-o

Re: Kamikaze Kustoms Zero D Build

Posted: Tue Sep 22, 2009 1:55 am
by SHAUN
Thanks guys, I did skid plates too.

Next season my club is also going to run a 2.2 sportsman class. Basically its 2.2 Pro, but no dig. I've already got most of the parts laying around to build another rig, so it looks like there will be another build coming soon.

Image

Image