
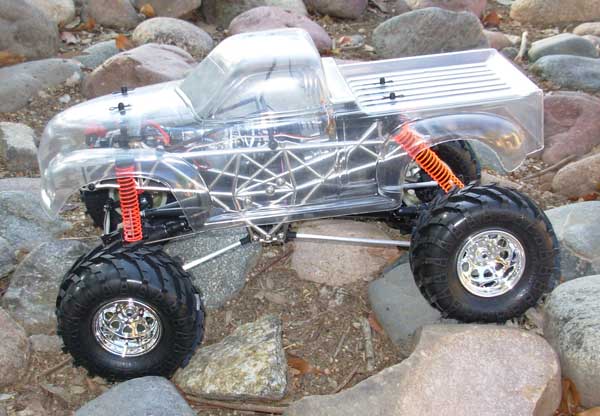
My Wheely King, soon to be "Mastodon"
-
crazydave

- bitPimp
- Posts: 6874
- Joined: Thu Apr 17, 2003 9:05 am
- Location: Koolsville
-
redrustbucket

- bitGangsta'
- Posts: 363
- Joined: Wed Mar 15, 2006 9:41 pm
- Location: sunny acres, fl
Most weights I've seen are run inside the tire to keep them from peeling off I guess. I run airsoft bb's in my Moabs. They're really grippy but have too much sidewall flex.
These are the best foams I've read about if you can get a hold of them...
http://www.rccrawler.com/forum/showthre ... 883&page=2
From what I read there's no need to cut them.
You may want to limit that flex some too. Lookin' good, glad you finally got a crawler together.
These are the best foams I've read about if you can get a hold of them...
http://www.rccrawler.com/forum/showthre ... 883&page=2
From what I read there's no need to cut them.
You may want to limit that flex some too. Lookin' good, glad you finally got a crawler together.
The devil made me do it the first time, the second time I done it on my own...
tlca # 14622
tlca # 14622
-
SHAUN
- bitDisciple
- Posts: 1462
- Joined: Wed Oct 05, 2005 10:35 am
- Location: On the trail
- Contact:
-
sg219
- bitPimp
- Posts: 4244
- Joined: Thu Jan 22, 2004 1:00 pm
- Location: Kennywood, PA
- Contact:
I personally like the star pattern. The thing I would change would be to make them with less points. Maybe two or three less and have less of an angle on the points. I used the star shape in the MOABS, and they performed awesomely!crazydave wrote:So which pattern is better for you, SG?
Weighting brings up another issue altogether. So should I wrap a strip around the inside before I mount the tires, or can just use sticky weights on the inside of the back of the wheels, so I can play with weights after the tires are mounted.
For weight, I do recommend the sticky weights, and install them on the inside of the tire, around the rim. Then the foam.
I listed in my Prometheus thread how much weight I used.
I got mine for free, I went down to a tire shop and asked if they had any that were unusable or that they removed from cars that they were going to throw away. They took me to a box of about 100 pounds of dead weights. Help yourself, and I did....
Since the sticky was gone or unusable, I used packing tape, the white stuff with the string in it, to secure them. I used that because the string don't strecth. Then a piece of duct tape one time around to hold it, because duct tape holds up to H2O better. Plus the foams help hold them too.
Otherwise, I would say to get a set of the Axial beadlocks and run without foams, but still with weight. The beadlocks keep just enough air inside to let the tire flex and still support the truck.
I would scrap the current wheels and just go straight for the beadlocks. I'm pretty sure you'll be happy that you did. This way you can change tires, weights, foams, without ruining your tires and rims with glue.
I don't like BB's. When you flip or get into an awkward position, so do the BB's position. Dead secure weight I feel is the best way to go.
I've edited this and added stuff about 100 times, so read it again later or something...

-
crazydave
- bitPimp
- Posts: 6874
- Joined: Thu Apr 17, 2003 9:05 am
- Location: Koolsville
Yeah, that's what I'm gathering from the guys at RCC, but that's not a big issue is it. I mean isn't it better I got the wheelbase where I want it, and kept the ride height so the tranny isn't dragging? Now I could just dial the extra flex out with some fuel tubing on the shock shaft, couldn't I?redrustbucket wrote:You may want to limit that flex some too. Lookin' good, glad you finally got a crawler together.
-
Bird

- bitPimp
- Posts: 1303
- Joined: Sat Jan 17, 2004 2:22 am
- Location: waste mifflin, pa
I actually responded out loud "An hour on that must mean you already got 5 into the masking job then!"... my old lady was on the other side of the room looking at me like I was retardedcrazydave wrote:That'll counteract what took me about an hour to figure out.
Good to see it's coming together for ya... lookin good so far. Now I'm the jealous one, since the Courier project has hit another one of those "lack of funds" lulls...
-
crazydave
- bitPimp
- Posts: 6874
- Joined: Thu Apr 17, 2003 9:05 am
- Location: Koolsville
Hmm, not sure what you mean, no masking done. I haven't even test fitted the body yet, I still gotta finish up my half finished Micro-T body that got interrupted when my WK showed up a lot earlier than I expected it.Bird wrote:I actually responded out loud "An hour on that must mean you already got 5 into the masking job then!"... my old lady was on the other side of the room looking at me like I was retardedcrazydave wrote:That'll counteract what took me about an hour to figure out.
Good to see it's coming together for ya... lookin good so far. Now I'm the jealous one, since the Courier project has hit another one of those "lack of funds" lulls...
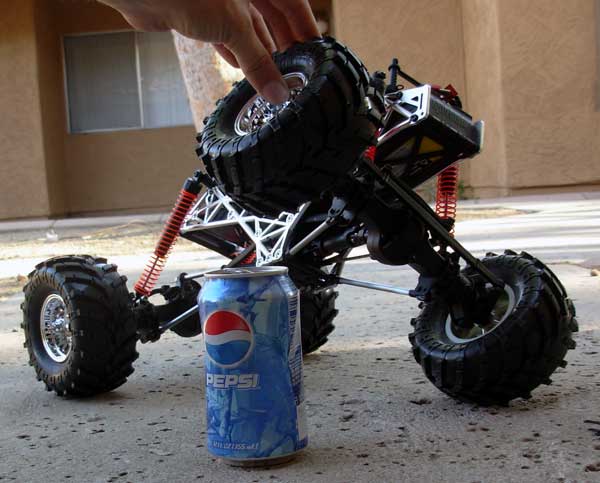
Ok, been thinking about it. The fuel tubing thing will work. Its been done for many many years, I did it myself on my Losi back in the day. I tested and did measurements. Doubling up to account for tube squishedge, I figure I need about a half inch inside the body, to bring my ride height down to level, and that'll look a lot better too. It'll also bring my articulation down over an inch. Then a little over an inch outside the shock, will get me right in that pop can height that was recommended to me at RCC.
-
redrustbucket
- bitGangsta'
- Posts: 363
- Joined: Wed Mar 15, 2006 9:41 pm
- Location: sunny acres, fl
-
crazydave
- bitPimp
- Posts: 6874
- Joined: Thu Apr 17, 2003 9:05 am
- Location: Koolsville
-
crazydave
- bitPimp
- Posts: 6874
- Joined: Thu Apr 17, 2003 9:05 am
- Location: Koolsville
Well, I guess I got a little excited when I got it together, and got a little ahead of myself, but I've been refining it over the week. In retrospect the travel on those Savage shocks was ridiculous. I solved my problem by simply putting the stock WK shafts in the Savage bodies. It seem to be sitting level now. I was being thrown off by the optical illusion of the top bar's angle, but if you go by the bottom of the chassis, and the tops of the shock tower its pretty much level now.
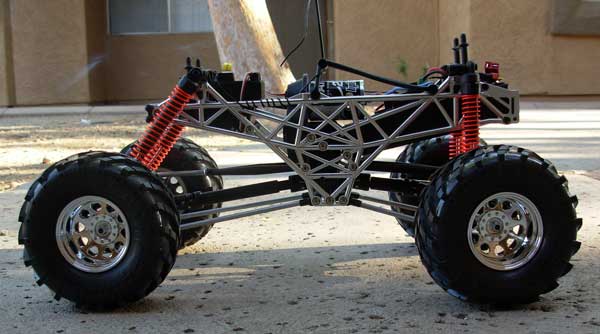
That helped my flex issue quite a bit, but I still need to dial out about an inch and a half with some fuel tubing on my shafts. I'm guesstimating about 1/4" on the front, and 1/2" in the back will get me right in the range.
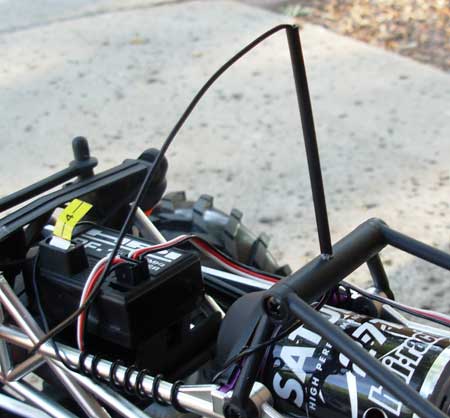
I made my under body antenna mount by drilling a 1/8" hole in the top bar of the motor's roll cage. I was pretty proud of it, but I needed just a drop of CA to secure it. A 7/16 hole might have been better to jam the tube in there.
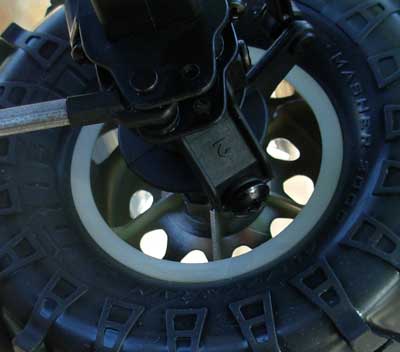
I had just snapped the Tmaxx shafts over the HPI drive pins, but I noticed the HPI one is smaller and was creating slop. So I reamed out the hole of the HPI drive cup with a 1/8" drill bit, to use the Tmaxx drive pins, and its perfect now.

I just got the wheels on for mock up. Still need to score some lead weights, and cut the foams before I glue them, but I did narrow up a set of stock WK wheels.
Then finally the part that gets my panties in an uproar, test fitting the body. This is just a rough trim, still need to go over my edges with the dremel, at that point I'll open up the wheel wells more.
Getting there, I'm gonna take it slower now that some of the excitement has worn off.
That helped my flex issue quite a bit, but I still need to dial out about an inch and a half with some fuel tubing on my shafts. I'm guesstimating about 1/4" on the front, and 1/2" in the back will get me right in the range.
I made my under body antenna mount by drilling a 1/8" hole in the top bar of the motor's roll cage. I was pretty proud of it, but I needed just a drop of CA to secure it. A 7/16 hole might have been better to jam the tube in there.
I had just snapped the Tmaxx shafts over the HPI drive pins, but I noticed the HPI one is smaller and was creating slop. So I reamed out the hole of the HPI drive cup with a 1/8" drill bit, to use the Tmaxx drive pins, and its perfect now.
I just got the wheels on for mock up. Still need to score some lead weights, and cut the foams before I glue them, but I did narrow up a set of stock WK wheels.
Then finally the part that gets my panties in an uproar, test fitting the body. This is just a rough trim, still need to go over my edges with the dremel, at that point I'll open up the wheel wells more.
Getting there, I'm gonna take it slower now that some of the excitement has worn off.
-
supergroup_crawler
- bitThug
- Posts: 56
- Joined: Mon Nov 27, 2006 3:40 pm
- Location: www.myspace.com/thelfucs
-
crazydave
- bitPimp
- Posts: 6874
- Joined: Thu Apr 17, 2003 9:05 am
- Location: Koolsville
-
Maxximum Attack
- bitDisciple
- Posts: 1798
- Joined: Thu Jul 31, 2003 7:15 pm
- Location: Barbados

-
crazydave
- bitPimp
- Posts: 6874
- Joined: Thu Apr 17, 2003 9:05 am
- Location: Koolsville
-
crazydave
- bitPimp
- Posts: 6874
- Joined: Thu Apr 17, 2003 9:05 am
- Location: Koolsville
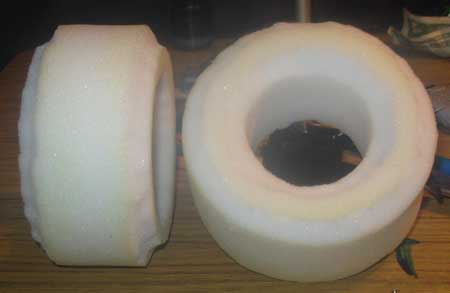
Alrighty, got it all buttoned up and ready to drive again. I tird to do the star cut on my foams, but got halfway through the first one, and realized I was wrecking it. Me and tire foams just do not get along. So I tacked it back together, and made mental note to get some softer foams I wont have to cut next time. I just did my usual cut I always did on my stadium truck tires to give them more sidewall bite, but in this case I think it just help them fit over the narrowed wheels better, since they suck in the tires sidewall.
SG hooked me up with this TowerPro MG945.
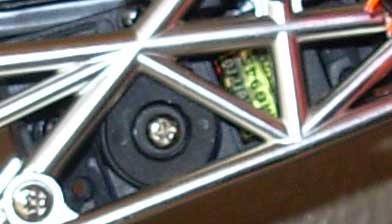
Its a little noisy, but its plenty torquey enough that when I tested it, it took about 10 minutes to yank the self tapping screw out of the steering bell crank. I just drilled it out and did the ol' 4-4o screw and locknut thing. It should be fine now.

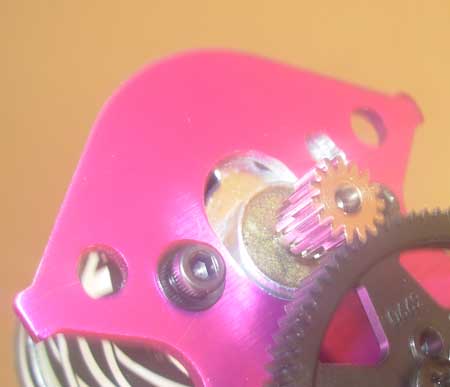
I took shaun's advice and just dremeled out the motor plate to let me use the 15 tooth pinion. he never mentioned having to take out the top of the tranny, but I got it. Just had to shave a little bit off. I like the extra power. It snaps when it takes off now.
... and now the part I've been waiting for. Introducing:
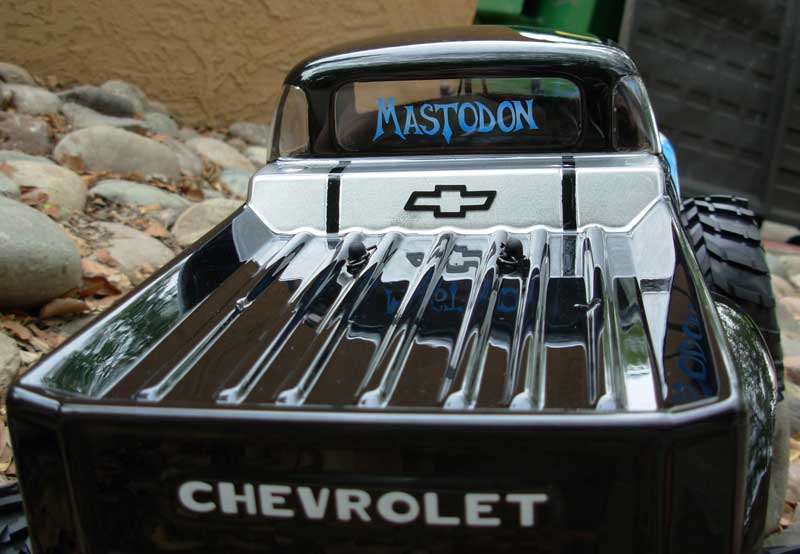
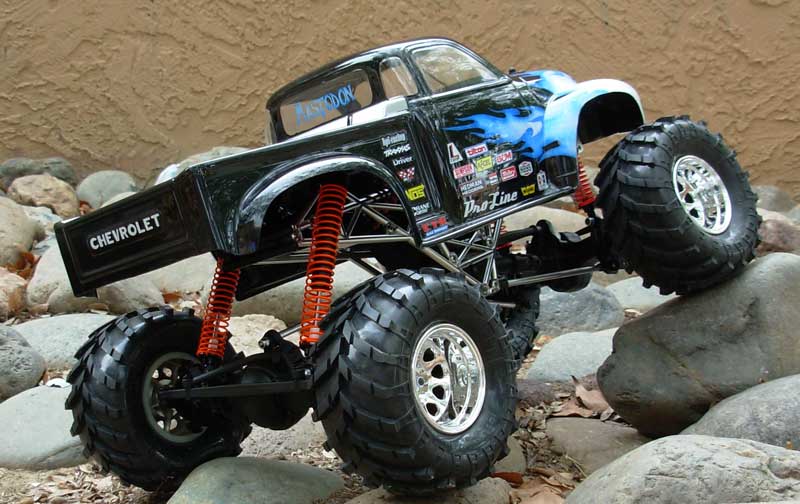
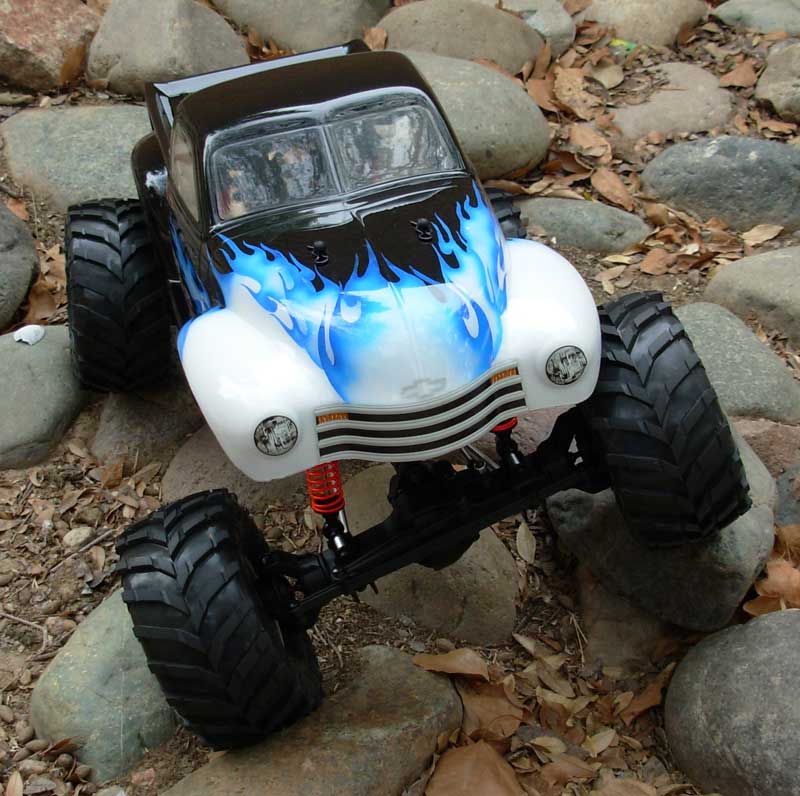
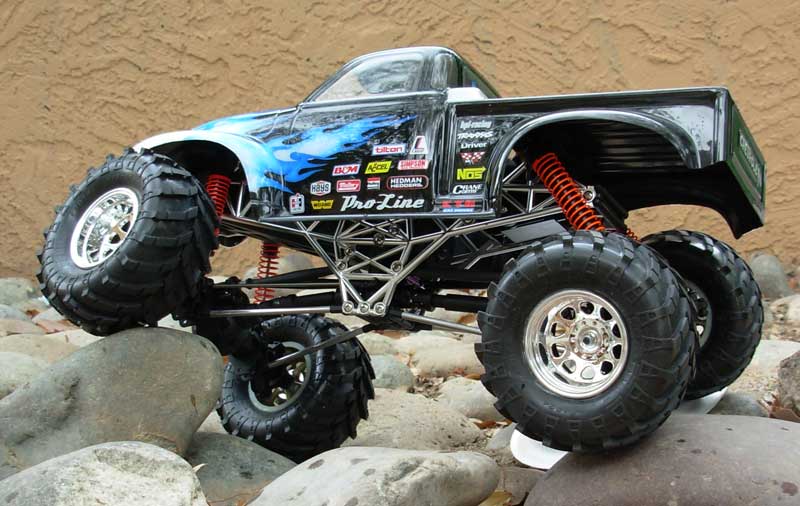
I had intended to do hot rod flames, but at the last minute decided to challenge myself and do something based off the decals that came with the body, and I don't know, I guess it came out pretty good, but I wish I just stuck with the hot rod flames.
SG hooked me up with this TowerPro MG945.
Its a little noisy, but its plenty torquey enough that when I tested it, it took about 10 minutes to yank the self tapping screw out of the steering bell crank. I just drilled it out and did the ol' 4-4o screw and locknut thing. It should be fine now.
I took shaun's advice and just dremeled out the motor plate to let me use the 15 tooth pinion. he never mentioned having to take out the top of the tranny, but I got it. Just had to shave a little bit off. I like the extra power. It snaps when it takes off now.
... and now the part I've been waiting for. Introducing:
I had intended to do hot rod flames, but at the last minute decided to challenge myself and do something based off the decals that came with the body, and I don't know, I guess it came out pretty good, but I wish I just stuck with the hot rod flames.