
Altezza Mini-Z (updated + shock system tutorial)
-
ynad

- bitNinja
- Posts: 776
- Joined: Fri Apr 30, 2004 12:22 am
- Location: NYC/NJ
Ok. here it is.
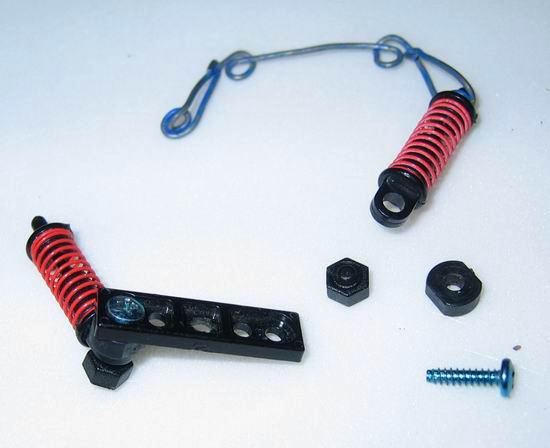
parts used: steel wire, plastic plate, xmod plastic lock nuts, xmod/mini-z plastic bushings, xmod shocks.
view of all parts used

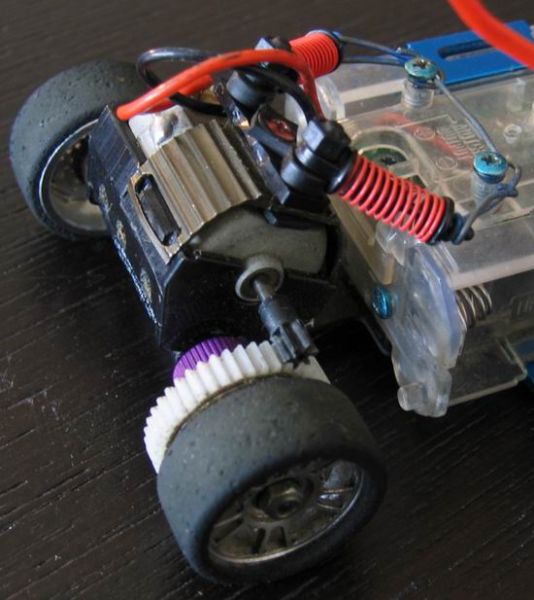
shock attached with use of the bushing for free movment
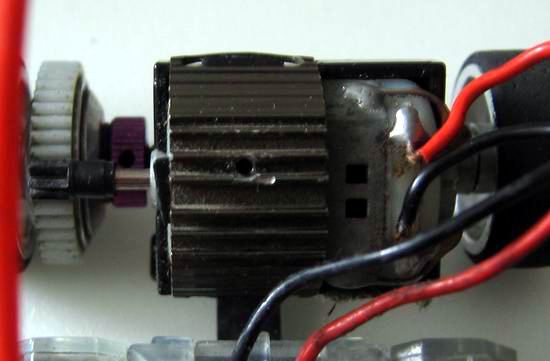
hole to mount plate (works with alloy heat sink easy, but other heat sink... )
)
and the way it's put together ...
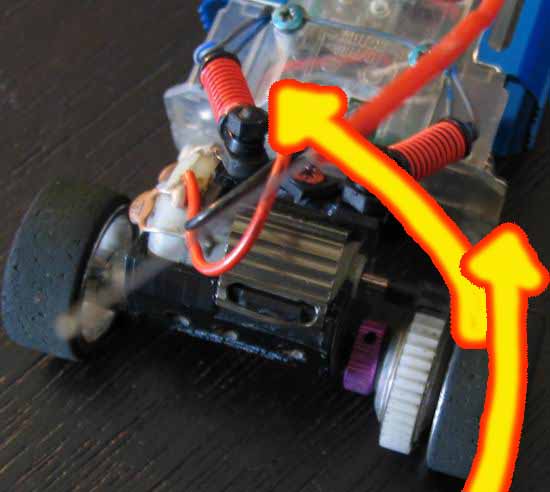
all based on triangular configuration. as wheel is moved up the force is transfered diagonally to the shock absorber.
that is all.
parts used: steel wire, plastic plate, xmod plastic lock nuts, xmod/mini-z plastic bushings, xmod shocks.
view of all parts used
shock attached with use of the bushing for free movment
hole to mount plate (works with alloy heat sink easy, but other heat sink...
and the way it's put together ...
all based on triangular configuration. as wheel is moved up the force is transfered diagonally to the shock absorber.
that is all.
-
betty.k

- bitPimp
- Posts: 4090
- Joined: Fri Dec 26, 2003 4:52 pm
- Location: la la land
- Contact:

-
ynad
- bitNinja
- Posts: 776
- Joined: Fri Apr 30, 2004 12:22 am
- Location: NYC/NJ
-
SuperFly

- bitPimp
- Posts: 2760
- Joined: Mon May 05, 2003 6:37 pm
- Location: nationwide


-
ynad
- bitNinja
- Posts: 776
- Joined: Fri Apr 30, 2004 12:22 am
- Location: NYC/NJ