1:1 Micro Bug
-
sessiz
- bitPimp
- Posts: 4663
- Joined: Wed Feb 19, 2003 5:16 pm
- Location: Upstate NY
- PimpIke
- bitGangsta'
- Posts: 351
- Joined: Mon Apr 21, 2003 10:37 pm
- Location: theBay, CA
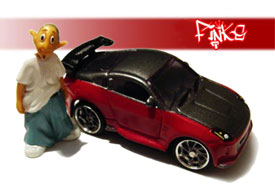
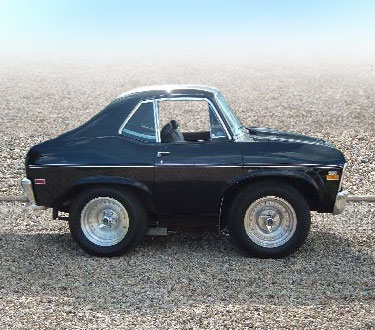
the pictures on that 99 page are photoshops. A guy on a BMW forum did them. his name is jackpot, and here is the thread that has all of the chops he did
http://forum.e46fanatics.com/showthread ... +photoshop
before that page, there is really none of his work because he didn't make the thread, he kind of joined in.
you can see that that work is his if you look through the thread because he even chops some of the members rides which are just as good as the ones he makes with random cars.
here is some of his work



- Finks
- bitPimp
- Posts: 2174
- Joined: Tue Jan 06, 2004 10:31 am
- Location: Red Sox and Pats Nation BITCHES!
Here is the walkthrough
:edit:
Further info
Got to try this tonightALright .. heres how you do it ... go into photoshop (obviously) open the image of the car // go to "image" -"image size" and make sure the top box on the bottom ISNT checked - this makes it so if u adjust one proportion the other doesnt automatically do it .. then resize the image to what u think looks good // then save the shrunk image UNDER A DIFFERENT name // then open the original pic of the car... go back to image size .. this time make it bigger // next take the high light thingy (marque tool?) and choose the eliptical shape and then outline JUST the wheels on the bigger image .. .. then just click and drag them over to the smaller one .. flatten and save and thats IT
:edit:
Further info
here's a short description:
1. Find a good pic (good side view)
2. open this pic in photoshop (= layer 1)
3. duplicate the layer and shrink it (= layer 2)
4. duplicate the wheels from the basic layer (layer 1) and give them on the top (= layer 3)
5. find the right position for the wheels on the shrunk pic
6. use the rubber to delete the mess around the wheels
7. finish
And finallyWith lasso and circle selection tool you can select areas on the original pic, you need for the new pic, duplicate this small part of the car, put this layer on top and use the rubber brush to create a smooth fading. Sometimes you have to repeat this several times!!!!! Even then you achieve good result and a smooth fading. Always use original parts - and if necessary transform them, move them - to cover parts of your shrunk car, which you what to hide.
1. For duplicating the wheels of the original pic,
choose a bigger field - not only the wheel itself:
2. Use the rubber tool and cut the edges of the duplicated
frontwheel/ frontfender smootly and arrange it perfectly with
the rest of the car.
3. This is the cut frontwheel/fender:
4. If you need original parts - maybe the front reflector - go to the original pic - use the lasso tool - and duplicate this part. Put this layer on the top of the layers, adjust it on the shrunk pic, cut the edges and arrange it once again with the rest.
-
CaboWabo
- Site Admin
- Posts: 10259
- Joined: Tue Dec 10, 2002 4:05 pm
- Location: The Adult Table
- Contact:
Nice homework guys, that's good info to know.
Dear Life Cereal, Where do you get off? Part of a balanced breakfast and delicious? Who do you think you are? By now you may have guessed I'm speaking ironically and have nothing but good things to say about what you do. Life cereal do not change a thing.
- crazydave
- bitPimp
- Posts: 6874
- Joined: Thu Apr 17, 2003 9:05 am
- Location: Koolsville
That seems almost too easy. Its more fun and challenging to make them look like actual bits.

I did a bunch a of these a few years a ago. Some guy on TRC was doing it, and I thought it was pretty fun. I couldn't stop, I did all these in one night.
http://bitpimps.lixlink.com/pages/phpGa ... p?album=19
That Pinto was the hardest, because I had to close the open hood, with a guy burying his head in there to look at the engine.
- hue35
- bitPimp
- Posts: 2244
- Joined: Tue May 20, 2003 3:03 pm
- Location: all up in ya fuckin' mind, yo.
Those are cool, Dave. I think some of the stubbies are harder than others... the trick is making them look right.
This is one I did from that E46 site... one that someone asked for, but no one obliged... I think because the background made it harder than some. I wouldn't say this one was all that easy, actually.
the shot I started with
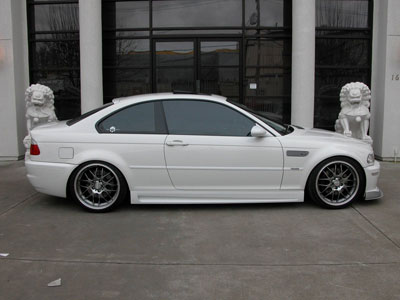
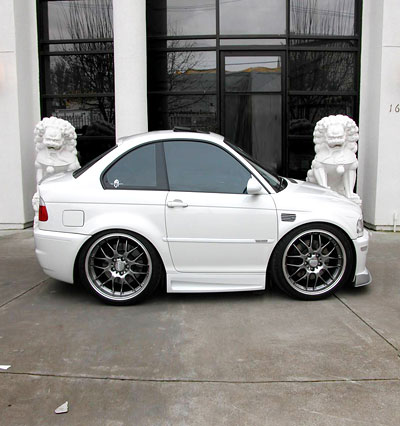
This is one I did from that E46 site... one that someone asked for, but no one obliged... I think because the background made it harder than some. I wouldn't say this one was all that easy, actually.
the shot I started with


- crazydave
- bitPimp
- Posts: 6874
- Joined: Thu Apr 17, 2003 9:05 am
- Location: Koolsville
- hue35
- bitPimp
- Posts: 2244
- Joined: Tue May 20, 2003 3:03 pm
- Location: all up in ya fuckin' mind, yo.
crazydave wrote:...I still think bits are more fun. I'm kinda feeling inspired to make another batch of bits.
Yeah, man... those real-car-to-bit pictures are cool as hell. I'd like to try a version in between... I can see this getting addicting.
Did you take the photos of the cars and the bits and bring them together? Or, did you find pics of cars, then take a photograph of the bit at the right angle and lighting, etc. to pull off the effect? Or was it some other method altogether?
-
blindrider3
- bitPlaya'
- Posts: 148
- Joined: Sat Sep 27, 2003 11:40 pm
- Location: Mandan ND
- crazydave
- bitPimp
- Posts: 6874
- Joined: Thu Apr 17, 2003 9:05 am
- Location: Koolsville
I used slightly different methods for each car, whatever works, you know? But basically, I took the car pics from around the internet. The chrome bit wheels I took from pictures off the TE website. Then later I took pictures of a naked chassis, and I used the black wheels from those, tried to make it so you could see the PCB through the windows, and also used the background.hue35 wrote: Did you take the photos of the cars and the bits and bring them together? Or, did you find pics of cars, then take a photograph of the bit at the right angle and lighting, etc. to pull off the effect? Or was it some other method altogether?
Same basic technique as the stubbies, resize the car in a new layer. Make a feathered selection of the wheels, including the wheel wells and resize them appropriately, the fronts being a little smaller. Then I paste the bit wheel on top of the stock tire, putting a shadow around the wheel, so it blends with the stock tire.
I don't even remember how I was tinting the windows, and doing the interiors. I guess I'll have to get in that "zone" again. I'm gonna try to get in the Photoshop mode when I get home tonight.


