- ZZMT Crawler Hydro Style Steering - How to w/ crappy pics
Posted: Sun Dec 31, 2006 2:19 pm
I added 2 gears to my crawler's steering box the other day. Big improvement! Previously I was using a yellow mt motor as my steering motor. I now have more torque and control using only the stock mt steering motor. The steering obviously reacts slower now due to the reduction so I wouldn't recommend it for any high speed applications.
My old box on the left with stock gear set up and modded box on the right.

Exploded boxes.

Basically this mod is an exercise in trimming and slimming to allow the 2 extra gears to fit. Once your stock box is removed and disassembled take the top cover and trim the sleeve where the steering motor would slide through flush to the bottom of the cover. Then trim the two nubs where the gearshafts fit about halfway down. You want to remove enough material for the gears to fit but not too much or they will not hold the gearshafts securely. Old cover is on left for reference.

Repeat the procedure to the nubs on the bottom of the box.

Now on to the gears. Take the 1/3rd gear with the steering arm on it and trim the nubs on top and bottom where the gearshaft goes flush on both sides of the gear. The shaft itself will also need to be cut down about halfway but you may want to wait till later and fit the finished box into the chassis first to check fit and make sure you don't trim too much.
Old gear on left for reference if you can make anything out in this doo doo
pic.

Here's where it gets a little tedious and tricky. You need to slim the other three gears down. Take the gears and stack them like the picture. Mark the thickness of the top gear on the teeth in the center of the two other gears. Now trim or sand down the teeth till you can barely see the last bit of the marks you put on them. You want to to trim the center teeth so they are just thicker than the outer teeth. This will give you enough room in the packup for the extra gears but still keep them from binding up. Be careful not to take off too much and to keep the surface you trim level. I lay a piece of 200 grit sand paper down on my workbench and hand sand my gears down to the correct thickness checking them often against another gear as I go. I also use this same method to add transfer gears in the rear.

Now you can put the box back together with the gears in a slightly different order to check for binding or excessive friction.
Start with the gear shafts inserted in the bottom of the box. Place the 1/3 gear on the aft pin with the steering shaft facing down. Then place a gear on the forward pin with the center teeth facing down to mesh with the 1/3 gear. Now place another gear on the aft pin then the last on the forward pin. Reinstall the cover and check for excessive binding. You can see in the pic how the stackup should look when assembled.
You will also need to trim your tierod to clear the 1/3 gear as it is now located lower. I'll guestimate it at about halfway again for the slot where the steering pin fits and the pin on the bottom of the tierod that helps it stay level but your best bet is to dry fit the box into the chassis with the tierod and see how much needs to come off.
Stock tierod on left. Trimmed tierod on right.

If everything is trimmed installed and moving fairly freely it's time to reassemble the front end. Once everything is back together you can reinstall your steering motor in the sleeve. Do not slide it all the way down in the sleeve. It will not fit and will cause binding. It engages with the gears much higher now due to the thicker packup. The best way to install it is to first put a good charge in your mt then slide the motor into the sleeve and turn the wheels left and right while moving the motor slightly up and down. Once you hit the sweet spot where the steering works smoothly use a small dab of superglue to hold the motor at the correct height.
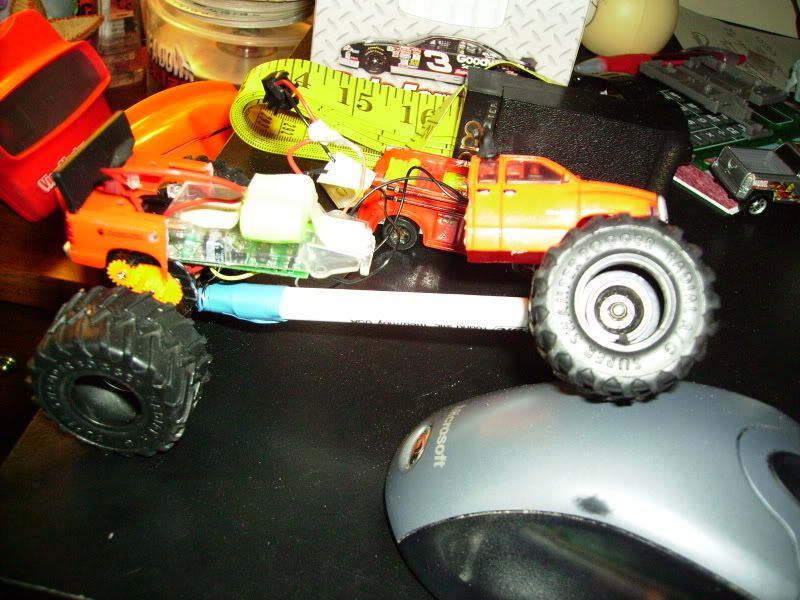
It should look something like this.


Basically you're done. By the way while you are initially disassembling your front end remove your steering centering spring and adjuster and throw them away! They're useless now. I initially was going to install a se red motor as well but I don't think it's necessary. The longer can on the se motor would cause my body to ride too high.

My old box on the left with stock gear set up and modded box on the right.
Exploded boxes.
Basically this mod is an exercise in trimming and slimming to allow the 2 extra gears to fit. Once your stock box is removed and disassembled take the top cover and trim the sleeve where the steering motor would slide through flush to the bottom of the cover. Then trim the two nubs where the gearshafts fit about halfway down. You want to remove enough material for the gears to fit but not too much or they will not hold the gearshafts securely. Old cover is on left for reference.
Repeat the procedure to the nubs on the bottom of the box.
Now on to the gears. Take the 1/3rd gear with the steering arm on it and trim the nubs on top and bottom where the gearshaft goes flush on both sides of the gear. The shaft itself will also need to be cut down about halfway but you may want to wait till later and fit the finished box into the chassis first to check fit and make sure you don't trim too much.
Old gear on left for reference if you can make anything out in this doo doo
pic.
Here's where it gets a little tedious and tricky. You need to slim the other three gears down. Take the gears and stack them like the picture. Mark the thickness of the top gear on the teeth in the center of the two other gears. Now trim or sand down the teeth till you can barely see the last bit of the marks you put on them. You want to to trim the center teeth so they are just thicker than the outer teeth. This will give you enough room in the packup for the extra gears but still keep them from binding up. Be careful not to take off too much and to keep the surface you trim level. I lay a piece of 200 grit sand paper down on my workbench and hand sand my gears down to the correct thickness checking them often against another gear as I go. I also use this same method to add transfer gears in the rear.
Now you can put the box back together with the gears in a slightly different order to check for binding or excessive friction.
Start with the gear shafts inserted in the bottom of the box. Place the 1/3 gear on the aft pin with the steering shaft facing down. Then place a gear on the forward pin with the center teeth facing down to mesh with the 1/3 gear. Now place another gear on the aft pin then the last on the forward pin. Reinstall the cover and check for excessive binding. You can see in the pic how the stackup should look when assembled.
You will also need to trim your tierod to clear the 1/3 gear as it is now located lower. I'll guestimate it at about halfway again for the slot where the steering pin fits and the pin on the bottom of the tierod that helps it stay level but your best bet is to dry fit the box into the chassis with the tierod and see how much needs to come off.
Stock tierod on left. Trimmed tierod on right.
If everything is trimmed installed and moving fairly freely it's time to reassemble the front end. Once everything is back together you can reinstall your steering motor in the sleeve. Do not slide it all the way down in the sleeve. It will not fit and will cause binding. It engages with the gears much higher now due to the thicker packup. The best way to install it is to first put a good charge in your mt then slide the motor into the sleeve and turn the wheels left and right while moving the motor slightly up and down. Once you hit the sweet spot where the steering works smoothly use a small dab of superglue to hold the motor at the correct height.
It should look something like this.
Basically you're done. By the way while you are initially disassembling your front end remove your steering centering spring and adjuster and throw them away! They're useless now. I initially was going to install a se red motor as well but I don't think it's necessary. The longer can on the se motor would cause my body to ride too high.