April 20th, 2008 by Smoke&Mirrors
After some suggestions from other forum members, I decided to add some weight to my front wheels to help it climb better and decrease it’s flipability (how often it flips, which is frequent). As usual, here is my particular process. I wanted to be sure that this method added enough weight to make a difference but not kill the steering, I also wanted it to be ultra secure so it wouldn’t rattle around. Here we go:
Start out by gathering some:
- Soldering Wire
- 2 front Wheels And Tires from ZZMT
- Aluminum Tape
- Super Glue
- Flat-Head Screw Driver (like the one found in your zzmt controller, convenient huh?)
Read the rest of this entry »
Posted in Fabrication, Micro | No Comments »
April 17th, 2008 by Smoke&Mirrors
I know, you saw a video on YouTube and have the urge now. I went through it and I’m sure a lot of other people have too. For me, I loved 1:1 crawling so much that I wanted more and on a smaller scale so I could do it in backyard without tearing up the grass so much. :-o
So I started looking around the net and here and bookmarking pages that had killer mods that I planned to do (note: I did not find ALL of these, some sites already had lists which I am linking to). Before long I had a good 10 mods, at least. So, to make it easy on all you crawlin’ pimps in the making, and without further adu, here it is:
The End-All, Be-All
Read the rest of this entry »
Posted in Fabrication, Micro | No Comments »
January 8th, 2008 by steelwoolghandi
I have put together what I like to think as a simple and quick tutorial for casting a body using Clear Casting Epoxy. I use Liquid Latex Rubber to build the molds of the item I wish to cast.
1. I use Mold Builder by Casting Craft to build my molds there are other Liquid Latex Rubber products out there and can be purchased at any LHS. I apply coats of the Latex to the outside of the item I am going to make a mold of. Make sure they are thin coats as the thicker they are the longer it takes to dry.
Read the rest of this entry »
Posted in Fabrication, Micro | No Comments »
April 2nd, 2006 by ExtremePaint
Fire, mans eternal quest to capture and control the raging energy that confines its self within. To first paint fire you have to understand exactly what it is, although I find it a little hard to define its merely a very hot gas rising rapidly so the shapes should be fluid, organic and random. Using a good reference is the key to getting the fire right, take some snapshots of your barbeque after you poured in a bottle of lighter fluid, check around on the internet for reference photos and pick the kind of fire you like, whether it be hot and raging, a cooler tumbling fire or maybe a big explosive like fire they can all be rendered using these basic principles. this process is neither long nor painful! infact its a rather easy technique that is fun to do and dosnt take alot of thought, although it does take a lil bit of gray matter to figure out all the steps when theres no one around to tell you how. 
Read the rest of this entry »
Posted in Micro, Mini, Painting | No Comments »
November 9th, 2005 by Clint
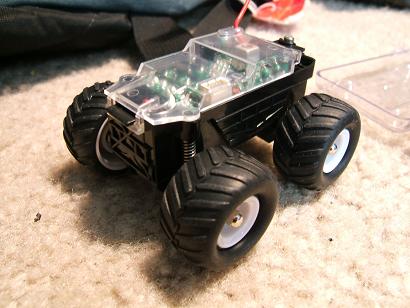
Start with a new ZZ Monster Truck.
Read the rest of this entry »
Posted in Micro | 2 Comments »

