
Painting “Real” Flames
by ExtremePaint
Fire, mans eternal quest to capture and control the raging energy that confines its self within. To first paint fire you have to understand exactly what it is, although I find it a little hard to define its merely a very hot gas rising rapidly so the shapes should be fluid, organic and random. Using a good reference is the key to getting the fire right, take some snapshots of your barbeque after you poured in a bottle of lighter fluid, check around on the internet for reference photos and pick the kind of fire you like, whether it be hot and raging, a cooler tumbling fire or maybe a big explosive like fire they can all be rendered using these basic principles. this process is neither long nor painful! infact its a rather easy technique that is fun to do and dosnt take alot of thought, although it does take a lil bit of gray matter to figure out all the steps when theres no one around to tell you how. ![]()
Step 1. At this stage we’ll figure out our colors and materials.

To achieve this pattern and effect two kinds of paints are used from the same manufacturer. For this demo I’m going to use House of Kolor, but this effect can be achieved with Spazsticks line of paints, when using Faskolor (auto air) the candy’s that they sell are semi transparent and do not give you the see through qualities of a good candy. When using faskolor or auto air try doing only the pattern, the semi transparent nature of the paint will muddy the effect. (Always take caution when using urethane paints. That means a good respirator and very good ventilation) it is these opaque and transparent (candy) paints that will achieve the effect of dimension and depth.
The other material used is the free hand shield and the gray scuff it pad (600 grit). The free hand shield can either be bought from your local art supply store or it can be hand made. To make the shield cut out the wheel well of the body and use that scrap piece of lexan as material, draw some flowing random shapes around the wheel well (what ever shapes your in the mood for!). Then with an x-acto knife score around the edges of your markings and snap off the excess, both sides can be used, and the more free hand shields you have the more random your flames will be.
Another small thing that I’ve noticed when doing this technique, is the over spray from the paint, you’ll notice the paint will group together from the static electricity and these will leave odd blotches in your black portions of the paint job, to remedy this I use a tack rag or in a pinch just a paper towel to wipe it all off, just make sure your paint is nice and dry before you wipe it! lol
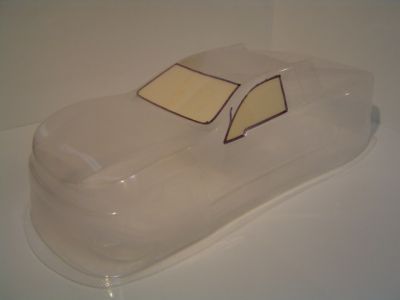
Step 2. To begin I mask of the windows and scuff the body with the gray scuff pad leaving a dull shine behind me, then I clean it off with a wax and grease remover and its prepped to go. There’s not to much to this first step but remember to scuff, especially with HOK.
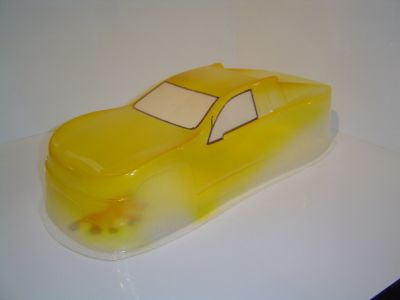
Step 3. This is wear we come in with the pagan gold (candy yellow basically) and use this to mark out wear and how far your flames and flame tips will reach, I usually put on a 2 coats of the yellow and try to cover as much as possible in the defined areas.
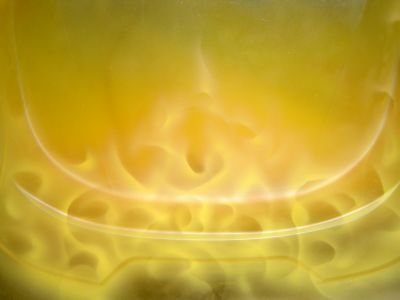
Step 4. Here is the fun part and the most important as well, the first yellow licks come in. I’ve tried to demonstrate the different kinds of techniques you can use in this picture, I try to use my head a little for filling in things that don’t look right but try not to think about placement or what part of the shield that I’m using. When doing the first fire licks its important to realize that these determine how fare your fire will travel up the sides, I try to keep it to a minimum and go slightly heavy in the front of the fire and try to lighten up as I go back so there’s only a few licks spaced out evenly trailing back. At this point I’ll throw in some free handing to get the licks just right and to give them more of a random flowing look, (see how the free handing works in the pictures below.)
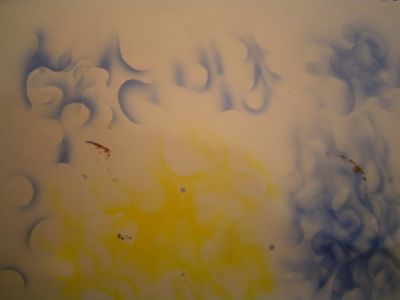
I just come in and take some of the licks back or bring some together and add some streak spots as well. Remember at this stage less is more so be careful, practice really helps this step. Another good tip for this stage is to back the yellow licks with black construction paper to see how they will look. And then you can work from there.
The next pic is of the freehanding i do.
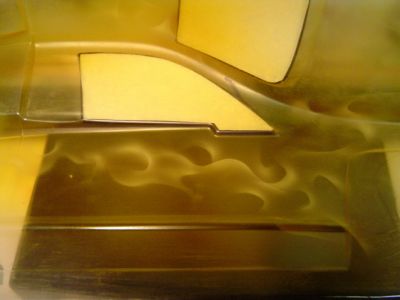
Step 5. After your happy with the small spots of yellow highlights you will come back in with the candy orange, I come in and cover this about an inch or two farther than with the yellow to give myself a good coverage area so the licks that trail off by them selves wont be to bright (just incase.)
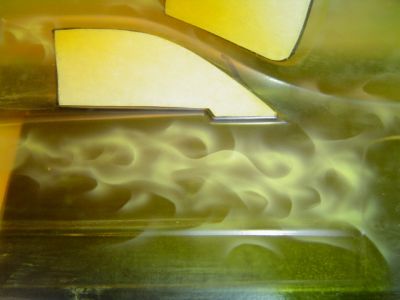
Step 6. Here is wear the fire in the background is supposed to come in, to make the effect seamless and blend together you need to either go back in and use your free hand shield or even just free hand in with the light opaque orange (I’m using HOK sunrise pearl in this step, gives the background a little bit of a ghostly shine from the pearl) I’ll free hand in around the edges of the yellow highlights and exaggerate all the curves and licks with the orange, when you go back over the licks it will create the transition from yellow to orange. If you don’t your yellow licks will look like a set of yellow flames over a set of orange flames and they wont blend together. Then after I’ve free handed around the previous licks I’ll take my freehand shield, and start to create more hard edges past the previous yellow/orange licks, then this creates the illusion that the licks cool off as they get farther away from the source. Your just about done so at this stage you can check with a piece of black construction paper how they will look and you can adjust to your taste, b/c this is the last step before you finalize it.


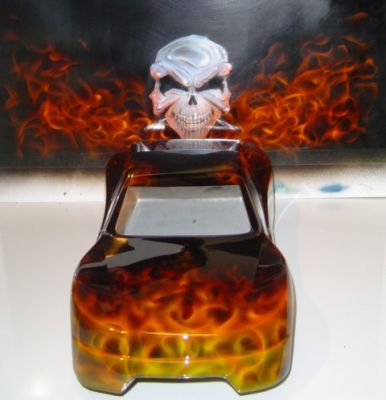
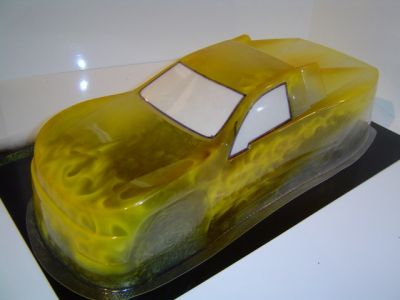
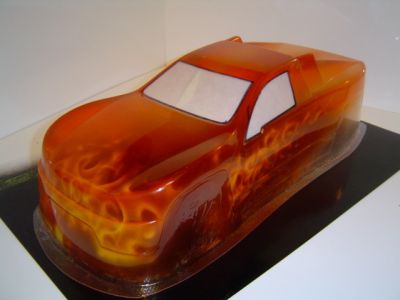
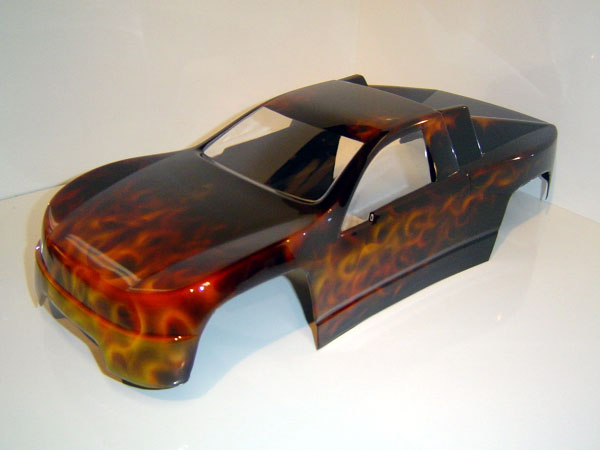
Step 7. Spray in your black basecoat to seal it off from the world. If you want another color as a base you can use red and darker colors that can blend with the candies you used earlier but changing the background color is hard b/c the candies will tint the backer, these flames look best over black its gives them more vibrancy and makes them pop. After you’ve backed it with the black, you can hit it with a sealer for your nitro cars or just something if you’re going to run it. Remove the plastic cover and admire your results. This technique takes practice to be able to get right so try using scrap pieces of lexan or even a sheet of plexi-glass to see how the color react to one another and how the patterns work out. And as always feel more than free to experiment with your own variation of colors and effects, combine this with other effects to get that next new trick!
If you wanted to change it up a little you can use different colors for your flames as well if you do it green try a candy green base coat as your first layer, then back that with an opaque yellow then back that with a candy blue/teal and use green opaque as the final backer. For blue fire use a candy blue as your base, then use a blue tinted white then come back in with a candy purple and back that with the opaque blue. Again you’ll have to experiment with your paint to get a feel for how much of what needs to be put wear.

So thats about it, the secrets out! lol if you need bigger pics or you have more questions my e-mail is extremepaint@hotmail.com
also bigger pics are in my gallery at http://www.cfxpaintworks.com/modules.php?name=coppermine&file=thumbnails&album=4&page=1
Thanks for waiting guys I hope this little how to can get some decent fire jobs out!
For you guys on this board specifically:
If you wonder why i would do this, and I still paint for a living and I know i can make a buck off of ebay, but why you ask? b/c the more people that will push them selfs to paint a body the better it is for airbrushing, and the more people actually trying it the more they will find out its not “that” easy, then they will in turn have a new respect for anyone that airbrushes, if they talk about it (and they will if they tried it!) they will pass that respect and attitude on to the next, their by bolstering the hobby upping the quality complexity and creativity of paint jobs in general. and that just means basically i then force myself to get even better! as well as everyone else and maybe one day it will get to the point of fine art! it takes one step at a time…. the top pro’s in the nation (not “ebay” painters) the guys that have there own shop and advertise nation wide feel the exact same way, well at least the ones that teach. I payed good money to learn how to paint like this (airbrush getaways, dvds, a whole lot of time practicing…. more practice…. and more practicing, talking to people and getting tips from them) and I share it with the rest of you for nothing but to help you guys out…. b/c through that whole jumble of drug induced thought that I just wrote up im helping myself.
Hope those guys that get 100 bucks per dont mind me posting this…. guess the secrets out, gonna have to come up with some new ideas huh!? ![]()
