Archive for the 'Painting' Category

Painting “Real” Flames

by ExtremePaint

Fire, mans eternal quest to capture and control the raging energy that confines its self within. To first paint fire you have to understand exactly what it is, although I find it a little hard to define its merely a very hot gas rising rapidly so the shapes should be fluid, organic and random. Using a good reference is the key to getting the fire right, take some snapshots of your barbeque after you poured in a bottle of lighter fluid, check around on the internet for reference photos and pick the kind of fire you like, whether it be hot and raging, a cooler tumbling fire or maybe a big explosive like fire they can all be rendered using these basic principles. this process is neither long nor painful! infact its a rather easy technique that is fun to do and dosnt take alot of thought, although it does take a lil bit of gray matter to figure out all the steps when theres no one around to tell you how.

Read the rest of this entry »

Painting Flames and Graphics 101 – Lesson 1: Basic Flames

by crazydave

Ok, so I wasn’t sure how to cover everything at once, and not get too complicated, so I decided to break it down into a series.

In this first lesson we’ll cover preparation, basic painting technique, and laying flames in a single base color, and adding body color last.

Read the rest of this entry »

CaboWabo’s S-2000 White Rag-Top (v. 1.0)

by CaboWabo

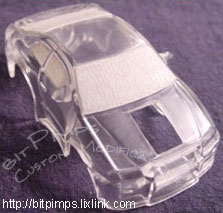
Clear body maskedTo start, you need to make any cuts or trimmings on the body that you’ll want in the finished project. For instance, if you’re going to use the body on a “dual-celled” chassis, you’ll need to cut out the part of the body that will allow it to fit on the chassis while having the extra battery. Or another instance could be fixing the molding imperfections on the body, sometimes the molds don’t quite match-up and cause a crease, get rid of those. Continue this process until you have all your cuts made and smoothed out. The cuts and trimmings should be completed with the idea in mind that those cuts and trimmings are final, you will not be able to do any “touch-up” work after you begin so make sure you’ve got it like you want it before moving on.

Read the rest of this entry »

Painting Your Body: Part 2 – Laying Paint

by payaso

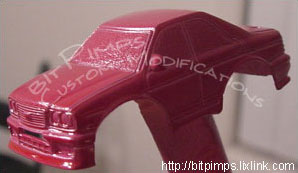
Base PaintAfter reading the first article and getting our masking and primer done, let’s remove the masking, and clean up any bleeding. After the primer paint dries we’ll mask for design, effects, and parts then lay down our base coat paint (the main color of your body).

Once your first coat of paint has dried, if desired – you can keep painting an overcoat to fix any imperfections. You should however, try to reduce the number of overcoats, after all, we’re dealing with micro sizes and weights, and thick – heavy paint jobs add weight, plus there’s a tendency for the paint to run more.

Read the rest of this entry »

Painting Your Body: Part 1 – Masking & Primer

by payaso

There’s no introduction needed really, it’s pretty self-explanitory ? we’re talking about painting a Bit body here. The only thing to note here is that we’re talking about painting right on top of the body. This allows you to paint fine details like side-view mirrors, headlights, grills, and have them blend in naturally with the paint on the rest of the body. With that said, let’s just dive right in shall we?

MaskingFirst, make sure you body is clean with no dust specs, hairs, etc. It must be clean, if there’s any debris, it’ll ruin your paint job. Cans of compressed air come in handy for blowing away debris, while keeping the body itself free of finger prints, scratches, fuzz, etc.

Now, it’s time to do some basic masking, unless you plan to have your windows painted, you better mask them. You can just use regular manilla colored masking tape, cheap, easy to find and easy to manipulate. Take pieces of tape off the role, relatively the size you’re going to need, you want to work with only what a piece the size neccessary to cover the area to be masked.

Read the rest of this entry »