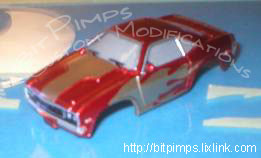
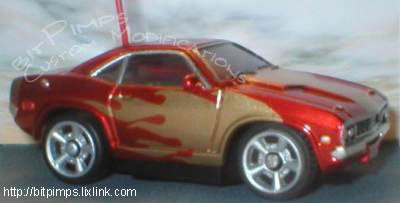
Painting Flames and Graphics 101 – Lesson 1: Basic Flames
by crazydave
Ok, so I wasn’t sure how to cover everything at once, and not get too complicated, so I decided to break it down into a series.
In this first lesson we’ll cover preparation, basic painting technique, and laying flames in a single base color, and adding body color last.
I’m going to try to make this as easy as possible for you, but it is going to take some patience, and practice, to develop the skills. So the key is to relax. Don’t do this right after work or school when your all stressed out. Throw on some tunes, get in a groove, mellow out, and take your time. You going to need about 4-5 hours, so make sure you have the time before you start.
Step 1 – Preparation
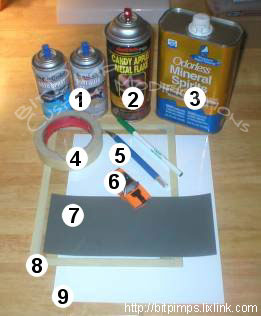
Items you’ll need:
1. One or two colors of paint.
I really recommend acrylic laquer. You get it in the automotive section as touch up paint. I recommend it because it dries thinner and glossier than enamel. Some cons that I’d like to de-bunk are; It’s harder to work with. What we’re talking about here is a longer drying and cureing time. Enamel, 5 minutes and it’s safe to recoat, 20-30, ands it’s safe to handle. Acrylic Laquer, 10-15 to recoat, and 45-60 minutes to safely handle. See, you just have to wait a little longer, and the automotive touch up paints have fan tips that lay really thin even coats, so you really get much more professional results. The other thing I believed until recently, is that it is more expensive. Usually this is true, but I bought these little cans at Walmart for less than $3 a piece in the auto section. That’s the same as they charge for the model paint.
If you want to use you current body color for the flames you only need one color, and can skip Step 2 – Base coat. If you using your current color, careful not to sand through in Step 1 – Preperation.
You’ll want to pick a top coat color that works well with the base coat, especially if it’s semi-transparent. If say you wanted to use a blue over a red, and not have it come out purple, then you would have to lay a coat of silver or white first, and this will build up the edges more, and may cause a light ring around the edge. Something I just don’t recommend.
2. Clear coat
You’ll notice that I’m using a different brand of clear coat than color coat. That is something you want to avoid, but I just love the gloss of that candy clear, so I’m bending the rules, but I have had some issues with paint running into crevices, and getting bubbles, so I’m extra careful about using this stuff with the other brand.
3. A solvent of some sort
I used Mineral Spirits, you could also use denatured alcohol, or Naptha (lighter fluid). I don’t reccomend using dish detergent, in this case, because I’m going be having you use this stuff between coats, and after masking.
4. Masking tape
I used some 1″ 3M stuff. Anything will do, the thinner the better, and if you have a sheet of masking film, that will work even better.
5. Exacto blade
Obviously, this is important. You’ll need fresh blades too.
6. A Body
I chose the Zip zap Challenger for this one, because the Zip Zap has a larger door than bits, making this much easier on first timers, and also because flames really are more at home on American Muscle, than import tuners. ;)
7. Sandpaper
320 – 400 grit, to rough up the surface. I used 320.
8. A piece of glass
I just bought a 8×10 picture frame from the dollar store, and got the glass out of that. Wrap the edges with masking tape so you don’t cut yourself, and I stuck little pieces of felt on the corners of the back, so it will be esier to turn the glass on the table when I’m cutting curves.
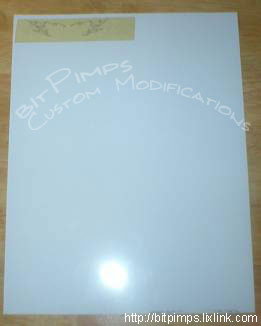
9. A piece of photo paper
More on this later. Skip this if you have masking film.
Also needed but not shown:
Lint free cloth
You’ll need this to wipe the solvents with. Paper towels leave little fuzzies behind, so find something that does not leave lint. I use the disposable pink cleaning cloths.
Newspaper
So you don’t make a mess out of your painting area.
Time to start
Now by this point you should have all your materials gathered, have an area prepared, be calm, relaxed, and ready to get your groove on.
Before you do anything, go to the kitchen, and wash your hands with dishwashing soap. Get your hands good and clean to minimize oils from your hands.
Now wipe your body down with your solvent. Since I went with Mineral Spirits, that what I’ll refer to them as from now on.
Now your going to mask off you windows, and any details that you don’t want to redo later. I’m having you do this first so they don’t get scratched when we sand. Press the tape into the crevices with your fingernail, use that as a guideline for your Exacto blade. After you cut it out, rub the tape down really good with the back of your fingernaill, and use the tip of your fingernail to get it into the crevices…
Now your going to give it quick scuffing with the sandpaper. You don’t have to be too thorough, just rough it up a bit. This helps the paint stick, and level out better. If you happen to be painting a clone body, I’ve noticed they don’t like taking paint, and you’ll need to give it a thorough sanding.
Wipe it down with mineral spirits again, to remove any oils you might have just got on it.
You should now be ready to paint, and looking about like this:
Step 2 – Laying the base coat
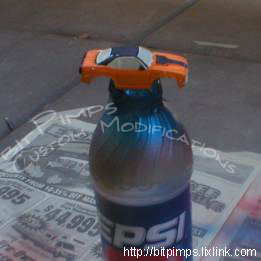
Now your going to need to get ready to paint. Have an area cleared off on your porch. Tape your newspaper down, so a sudden breeze doesn’t blow it into your fresh paint. A little trick that I learned at TRC is to stick your bit bodies on top of pop bottle half full of water. That way it’s off the ground, and the weight of the water keeps it from blowing away.
I like to soak my cans of paint in warm, but not too hot , water for about 10-15 minutes. It causes the paint to lay thinner,and more even.
Shake your can thoroughly, for about 2 minutes.
Now you start laying coats. Try not to cover it on your first coat, it should still be semi transparent. Wait about 10-15 minutes between coats, and lay 2 or 3 coats, untill it looks even. Like this:
Now give it about an hour to dry.
Step 3 – Making your flame mask
Now while your body is drying, you’ll want to make your flame mask.
To make this as easy as possible for you, I’m providing you with the flame graphic. You can get the flame graphic HERE. This was designed for the Dodge body, but should work on most Zip zaps, if you wanted to use it for a bit, you should be able to resize and proportion it in your favorite paint program.
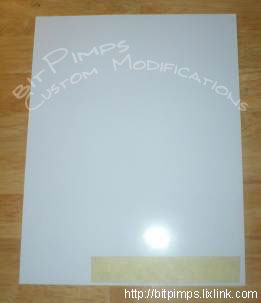
If you have masking film, just print that graphic straight to the film, if you using masking tape like me, then print the graphic to the photo paper, to get an idea exactly where the flames going to be. Then stick a piece of masking tape over the flame, like this:
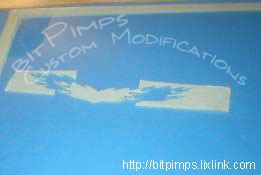
Now print it again on the masking tape, and it should look this:
Give it a minute or two for the ink to dry, then carefully peel the tape off and stick it to your glass.
You’re going to now start cutting the flames, so go ahead and put a a fresh blade on your exacto knife. It is very important to relax at this point. If you jam your blade into the glass, the fine tip is going snap, and you’ll have a hell of a time cutting then.
The knife is going to try to guide you in a straight line, you are going have to force it to cut curves. Try to cut in one motion, turning the glass and your hand at the same time to make tight curves. That’s the reason for the felt. Try your best to start and stop on the tips of the flames. You’ll want to cut just outside of the black line, because the knife cut is thinner than your pen line, and that gives you a better guide. Cut past the tips of the flames, also because the knife line is thinner than the pen tip so you get nice sharp tips, and not blunt ones on your flames. Also so you know it’s cut thoroughly, and doesn’t rip when you take it apart.
When you get done it be lookin something about like this:
Notice now you have a inner, and outer flame. We’ll be using the inner flame for this project, but feel free to use the outer flame to mask another project. We’ll be getting more into what we can do with that later.
Now very very carefully peel the flames away from the glass. You going to end up with a curled up mess, and I find this part to be the most difficult, and frustrating.
You going to have to try to get it lined up on the body. The best suggestion I can give you is stick one end about where you think it should be, and then hold it down with one thumb, while you get the other end lined up, then hold that end down while you get the first end lined up. Repeat as neccesary. Pick a key spot, like some where on the wheel well to help you identify where the flame goes, and line up the second side faster.
When you get the flames alll lined up on the car rub it down really good, and use the tip of your finger nail to rub it into door lines, and crevices, and wipe with mineral spirits.
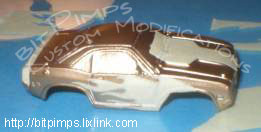
Now your ready to lay your top coat and you should be looking about like this:
I also masked off the old Dodge graphic, so it’ll be in gold too. To help balance out the flames, and lend some product identity.
Step 4 – Top Coat
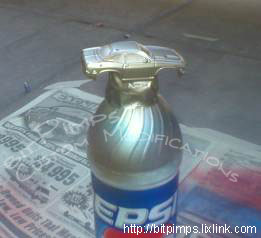
Lay your top coat the same as the base, but be extra careful to lay the first couple coats really thin, so they seal the edges, and your flames don’t bleed. Lay 2 or 3 coats until you have even coverage.
You should be lookin about like this:
Let it dry for about an hour, and you’ll be ready to clear coat.
Step 5 – Clear Coat
After you’ve let the body dry, it’s time to remove the masking tape. This is where you a want to pray to your god, rub a lucky penny, use telepathy, or do whatever you have to do to swing luck your way, and not get bleeds.
Peel the tape away slowly and carefully or you might take chunks of paint with it. When you get it all off, it should be looking about done like this:
Now you just need to clear coat it. Wipe it down with mineral spirits. Like the other coats lay thin coats first, then after 2 or 3 thin coats lay a heavy coat to even it out.
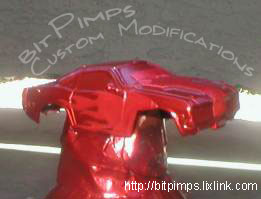
Let it dry for a few hours, throw in some last minute details, and your done!
You should be pimpin’ like this now:

