
CJ’s ElCamino Gloria
by cj
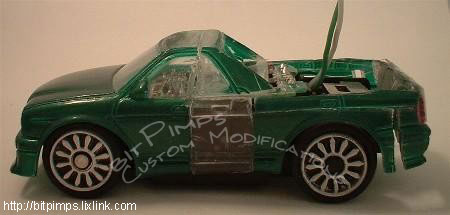
 This body mod will turn 1 1/2 Nissan Gloria bodies into a Elcamino style truck to fit a ZipZap Chassis. This project can take a week to do and not recomended to do on a weekend for best quality.
With that said let’s get all the supplies needed for this project.
You will need CA Glue (Super Glue), Two Gloria Bodies (Or any two like car bodies), #11 X-acto Blade, a set of needle files, various sanding films (Sandpaper on plastic film for wet sanding), some type of putty, sheets of plastic, and compatiable paints of your choice (1 as a primer).
You can also use a micro saw inplace of the X-acto.

Time to start cutting SLOWLY. We will be cutting the back half of the body off.
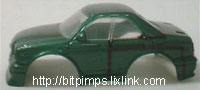 To cut using an Xacto blade turn the blade over and use the back side of the tip of the blade. Scrapping slowly in a pulling motion with the sharp edge of the blade facing out. Slowly scratch the body along the door seam, the body line, and a straight line from the body line to the bottom of the body. As marked the the picture.
Note: Take your time and go slow with this part.
Next score between the bottom of the back side window toward the back of the body till you get to the trunk. Repeat this process on both sides. Now remove the back window using the same scoring method starting at the top of the window working our way down each side. As you get close to cutting through the sides go real slow as at this point the back window should now be to only thing holding the body together. With the back half off use the trunk seam and the two holes from the removed spoiler as you guide and remove the rear deck. Your parts should look like this:
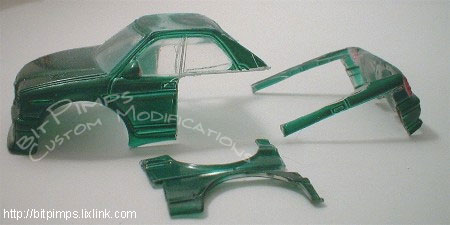
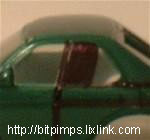 Now we are going to shorten the roof. A Traditional Elcamino is only a two door and we have a four door roof line. Cut the roof in half along the window/door seam and accross. Make sure as you are cutting the body top from side to side you go as straight as possable. Shorten the section we just removed by about a 1/4 of an inch keeping the angle the same as to was attached.
With all cutting on this body done we can start glueing. Reattach the roof that we sectioned off. Test fit it first before attaching with the CA. The two parts may need minor sanding or fileing to each other untill you get a perfect match. While that part is hardening attach the rear quarter panels shifting them about 1/32 of an inch forward.
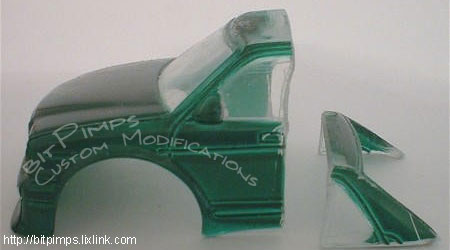
Note: to make sure of the placement set the rear section on a ZipZap chassis and see where the panel needs to to attached.
When all glue has hardened place the two halves on a ZZ Chassis.
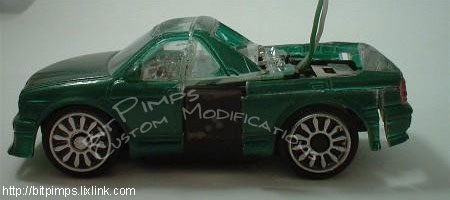
Note: You may need to remove the clear cover from the pc board on the chassis to make the body fit.
Now for the 1/2 Gloria body part. From the donor body we will need the whole side panel with the door seams. Measure the gap between the front half and back half. Remove the amount we need from another gloria body the same way we dismantaled the frist body. Attach the side panels the same way we did the roof sanding each edge to get as perfect a fit as possiable. Rounding the outside edge at the door seam just before you attach to create the door seam. You may have to gently widen the rear roof section as you are glueing it up to make sure it attaches properly.
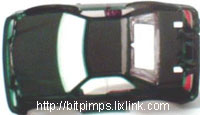 We need to build up the back end so the body will sit properly on a ZZ chassis and clear the PC board. We will add a 1/16″ strip of plastic aroud the side and back top edge. It was .040″ thick Styrene found at a hobby shop. Also cut a rectangle (back window) wider than the old back window about 3/8″ tall. Glue that rectangle under the body straight up just at the point of the body before it bends. Test fit again to make sure the new rear window does not touch the chassis. If it does gently file or sand the window till it sits properly.
Gray mark inside body
Make two triangle shaped peices to fill the gap inside the old rear window frame. Test fit again and make sure no plastic is touching a tire or the chassis and sand or file till all parts are clear of the chasses. Take the thinest plastic you have and cut a rectangle larger than the rear window to cover the old plate and half of each tail light to make the tailgate. Glue it on at the very top edge of the bumper up. Don’t worry if it is taller than the bed.
Note: You may need to file or sand the rear end to properly seat the tailgate.
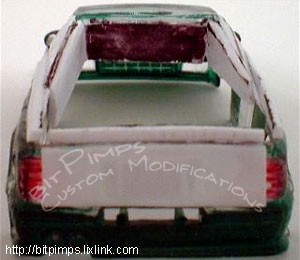 Take a thin peice of plastic and cut it larger than the bed but small enough to fit inside the body. Hold it inside the body and using a fine tiped marker mark the plastic where the window and the sides are from the out side. Cut on the outside of those marks and test fit. Gently remove plastic untill you get as close to perfect fit as you like it and glue in place. With one of those scraps glue a peice of plastic inside the body spaning the gap of the rear quarter panel. Smooth out all your rough edges with your needle files and your course sanding film. Use a slightly damp cloth to remove all excess dust. Fill in all gaps with putty of your choice. Leave the body sit for at least 1 whole day. Sand all putty points till roughly smooth. Sand with a progressively finer grain under water to get an even smoother finish to the body. Examine the body again after sanding and add putty to any low spots or gaps that you find. Wait again another day to sand with and even finer grain of sanding film. Take a damp cloth again and clean the body off and let it dry. Spray on a VERRY THIN layer of your primer on the body and let dry. After drying examine the body again for any inperfections and either sand them down or add putty and wait for it to dry. Once the body is at the level of smoothness you like spray it again with a thin even coat to cover all parts of the body. Paint with your choice of color paint in super light thin coats.
NOTE: When masking the windows mask both the inside and outside before painting. Keep the donor body parts never know what you can make out of it.
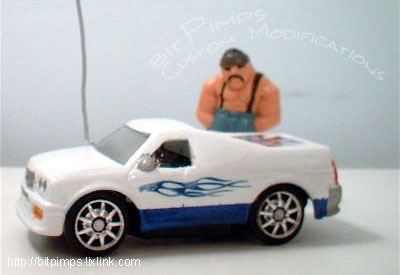
I painted mine white and blue and used the white as my primer. There are atleast 8+ super thin coats of white on this body and only 3 of the blue.


